Add an End-User Report Designer to an ASP.NET Core 2.1 Application
- 8 minutes to read
This tutorial describes how to add the Report Designer control to an ASP.NET Core 2.1 web application.
Tip
For ASP.NET Core 3.1, review the following topic: Add an End-User Report Designer to an ASP.NET Core 3.1 Application.
Note
The complete sample project is available in the following DevExpress Examples repository on GitHub: How to Add an End-User Report Designer to an ASP.NET Core Application.
Prerequisites
- .Net Core 2.1 framework
- Visual Studio 2017 v15.3 or later
Create an ASP.NET Core MVC Web Application
- Create a new project in Visual Studio and select ASP.NET Core Web Application on the start page as a project template.
- Specify the ASP.NET Core 2.1 framework, select Web Application (Model-View-Controller), and click OK.
Review the following article for more information: Get started with ASP.NET Core MVC.
Manage Packages and Libraries
Follow the steps below to install the NuGet packages:
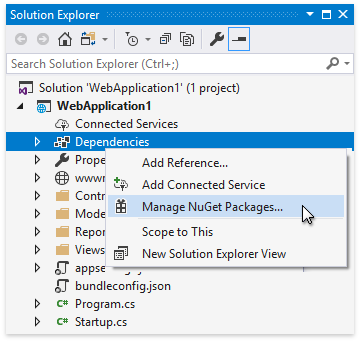
Right-click the Dependencies node in Solution Explorer and select Manage NuGet Packages in the invoked context menu.
Select All in the Package source drop-down list, go to the Browse page, and install the following packages:
- DevExpress.AspNetCore.Reporting
- BuildBundlerMinifier
- Microsoft.Web.LibraryManager.Build
Open the Add New Item dialog (
Ctrl+Shift+A) and add the npm Configuration File (package.json) to the project. Open the newly created file, overwrite its content with the following code, and save the file:{ "version": "1.0.0", "name": "asp.net", "private": true, "dependencies": { "devextreme": "20.1.*", "@devexpress/analytics-core": "20.1.*", "devexpress-reporting": "20.1.*", "globalize": "^1.3.0", "jquery-ui-dist": "^1.12.1" } }Add a new empty text file (
bundleconfig.json) to the root directory. Open the newly created file, copy and paste the following content, and save the file:[ { "outputFileName": "wwwroot/css/thirdparty.bundle.css", "inputFiles": [ "node_modules/jquery-ui-dist/jquery-ui.min.css", "node_modules/bootstrap/dist/css/bootstrap.min.css", "node_modules/devextreme/dist/css/dx.common.css", "node_modules/devextreme/dist/css/dx.light.css" ], "minify": { "enabled": false, "adjustRelativePaths": false } }, { "outputFileName": "wwwroot/css/viewer.part.bundle.css", "inputFiles": [ "node_modules/@devexpress/analytics-core/dist/css/dx-analytics.common.css", "node_modules/@devexpress/analytics-core/dist/css/dx-analytics.light.css", "node_modules/devexpress-reporting/dist/css/dx-webdocumentviewer.css" ], "minify": { "enabled": false, "adjustRelativePaths": false } }, { "outputFileName": "wwwroot/css/designer.part.bundle.css", "inputFiles": [ "node_modules/@devexpress/analytics-core/dist/css/dx-querybuilder.css", "node_modules/devexpress-reporting/dist/css/dx-reportdesigner.css" ], "minify": { "enabled": false, "adjustRelativePaths": false } }, { "outputFileName": "wwwroot/js/thirdparty.bundle.js", "inputFiles": [ "node_modules/jquery/dist/jquery.min.js", "node_modules/jquery-ui-dist/jquery-ui.min.js", "node_modules/knockout/build/output/knockout-latest.js", "node_modules/bootstrap/dist/js/bootstrap.min.js", "node_modules/cldrjs/dist/cldr.js", "node_modules/cldrjs/dist/cldr/event.js", "node_modules/cldrjs/dist/cldr/supplemental.js", "node_modules/cldrjs/dist/cldr/unresolved.js", "node_modules/globalize/dist/globalize.js", "node_modules/globalize/dist/globalize/message.js", "node_modules/globalize/dist/globalize/number.js", "node_modules/globalize/dist/globalize/currency.js", "node_modules/globalize/dist/globalize/date.js", "node_modules/devextreme/dist/js/dx.all.js", "node_modules/ace-builds/src-min-noconflict/ace.js", "node_modules/ace-builds/src-min-noconflict/ext-language_tools.js", "node_modules/ace-builds/src-min-noconflict/theme-dreamweaver.js", "node_modules/ace-builds/src-min-noconflict/theme-ambiance.js", "node_modules/ace-builds/src-min-noconflict/snippets/text.js" ], "minify": { "enabled": false }, "sourceMap": false }, { "outputFileName": "wwwroot/js/viewer.part.bundle.js", "inputFiles": [ "node_modules/@devexpress/analytics-core/dist/js/dx-analytics-core.min.js", "node_modules/devexpress-reporting/dist/js/dx-webdocumentviewer.min.js" ], "minify": { "enabled": false }, "sourceMap": false }, { "outputFileName": "wwwroot/js/designer.part.bundle.js", "inputFiles": [ "node_modules/@devexpress/analytics-core/dist/js/dx-querybuilder.min.js", "node_modules/devexpress-reporting/dist/js/dx-reportdesigner.min.js" ], "minify": { "enabled": false }, "sourceMap": false } ]Right-click the project in Solution Explorer and select Manage Client-Side Libraries to open the
libman.jsonfile. Copy and paste the following content to the file and save it:{ "version": "1.0", "defaultProvider": "filesystem", "libraries": [ { "library": "node_modules/devextreme/dist/css/icons/", "destination": "wwwroot/css/icons", "files": [ "dxicons.ttf", "dxicons.woff2", "dxicons.woff" ] } ] }For more information on LibMan, review the following article: Use LibMan with ASP.NET Core in Visual Studio.
- Right-click package.json in Solution Explorer and select Restore Packages.
Add a Sample Report
Right-click the project in the Solution Explorer and select Add | New Folder from the context menu. Rename the newly created folder to Data.
Right-click the project in the Solution Explorer and select Add | Existing Item… in the context menu. Open the following path and copy the nwind.xml file to the project’s Data folder:
C:\Users\Public\Documents\DevExpress Demos 20.1\Components\Data\nwind.xmlRight-click the project in the Solution Explorer and select Add | New Folder from the context menu. Rename the newly created folder to Reports.
Right-click the Reports folder and select Add | New Item… in the context menu. In the invoked Add New Item dialog, click the Reporting section in the tree on the left and select the DevExpress v20.1 Report item.
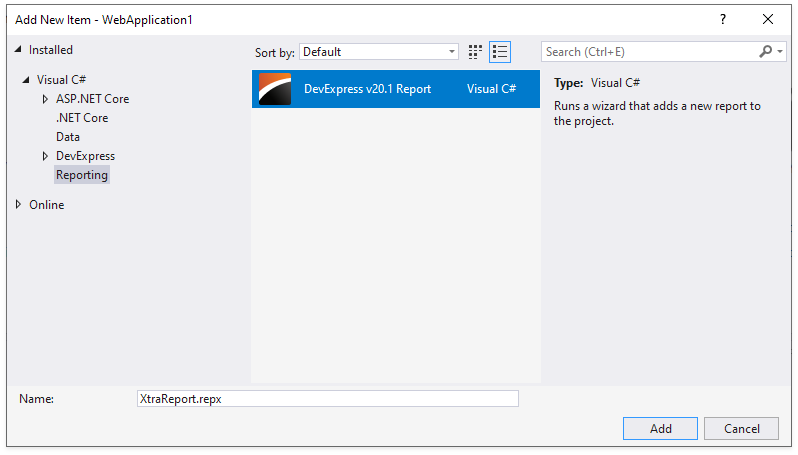
Rename the new report as TestReport and click Add.
Select the Table report type in the invoked Report Wizard. Select the Database data source, create a new connection and select the XML data provider for the nwind.xml file in the Data folder.
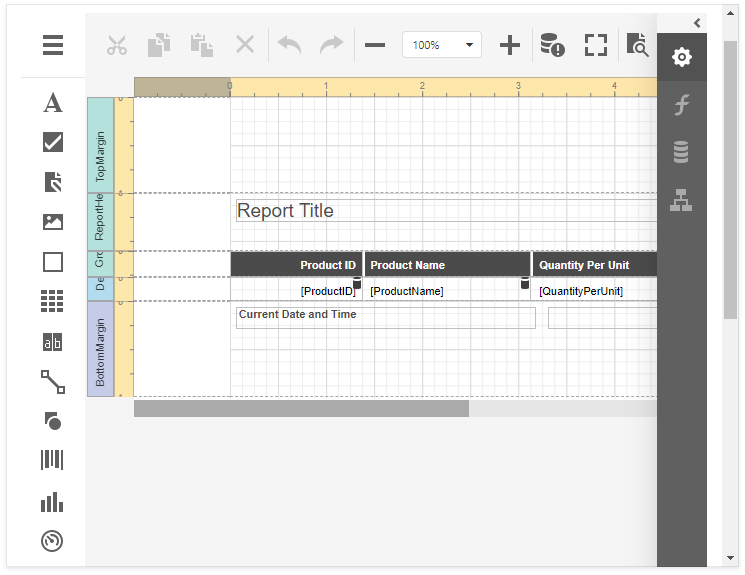
Create a new report in the Report Designer, save the report (
Ctrl+S) and close the designer.
Review the following article for more information on report creation: Add a New Report in Visual Studio.
Implement Report Storage
You can implement server-side report storage for the Report Designer as follows:
Right-click the Reports folder and select Add | Class… from the context menu - to create the ReportsFactory class. Copy and paste the following code to the ReportsFactory.cs file:
public class ReportsFactory
    {
        public static Dictionary<string, Func<XtraReport>> Reports = new Dictionary<string, Func<XtraReport>>()
        {
            ["TestReport"] = () => new TestReport()
        };
    }
Right-click the project in the Solution Explorer and select Add | New Folder. Name the folder Services.
Right-click the Services folder and select Add | Class… to add a new CustomReportStorageWebExtension class. Copy and paste the following code to overwrite the CustomReportStorageWebExtension.cs content:
Note
This code is for demonstration purposes only. It should not be used in production.
using DevExpress.XtraReports.UI;
using Microsoft.AspNetCore.Hosting;
using System;
using System.Collections.Generic;
using System.IO;
using System.Linq;

public class CustomReportStorageWebExtension : DevExpress.XtraReports.Web.Extensions.ReportStorageWebExtension
{
    readonly string ReportDirectory;
    const string FileExtension = ".repx";
    public CustomReportStorageWebExtension(IHostingEnvironment env)
    {
        ReportDirectory = Path.Combine(env.ContentRootPath, "Reports");
        if (!Directory.Exists(ReportDirectory))
        {
            Directory.CreateDirectory(ReportDirectory);
        }
    }

    private bool IsWithinReportsFolder(string url, string folder)
    {
        var rootDirectory = new DirectoryInfo(folder);
        var fileInfo = new FileInfo(Path.Combine(folder, url));
        return fileInfo.Directory.FullName.ToLower().StartsWith(rootDirectory.FullName.ToLower());
    }

    public override bool CanSetData(string url)
    {
        // Determines whether or not it is possible to store a report by a given URL.
        // For instance, make the CanSetData method return false for reports that should be read-only in your storage.
        // This method is called only for valid URLs (i.e., if the IsValidUrl method returns true) before the SetData method is called.

        return true;
    }

    public override bool IsValidUrl(string url)
    {
        // Determines whether or not the URL passed to the current Report Storage is valid.
        // For instance, implement your own logic to prohibit URLs that contain white spaces or other special characters.
        // This method is called before the CanSetData and GetData methods.

        return Path.GetFileName(url) == url;
    }

    public override byte[] GetData(string url)
    {
        // Returns report layout data stored in a Report Storage using the specified URL.
        // This method is called only for valid URLs after the IsValidUrl method is called.
        try
        {
            if (Directory.EnumerateFiles(ReportDirectory).Select(Path.GetFileNameWithoutExtension).Contains(url))
            {
                return File.ReadAllBytes(Path.Combine(ReportDirectory, url + FileExtension));
            }
            if (Reports.ReportsFactory.Reports.ContainsKey(url))
            {
                using (MemoryStream ms = new MemoryStream())
                {
                    Reports.ReportsFactory.Reports[url]().SaveLayoutToXml(ms);
                    return ms.ToArray();
                }
            }
        }
        catch (Exception ex)
        {
            throw new DevExpress.XtraReports.Web.ClientControls.FaultException("Could not get report data.", ex);
        }
        throw new DevExpress.XtraReports.Web.ClientControls.FaultException(string.Format("Could not find report '{0}'.", url));
    }

    public override Dictionary<string, string> GetUrls()
    {
        // Returns a dictionary of the existing report URLs and display names.
        // This method is called when running the Report Designer,
        // before the Open Report and Save Report dialogs are shown and after a new report is saved to a storage.

        return Directory.GetFiles(ReportDirectory, "*" + FileExtension)
                                .Select(Path.GetFileNameWithoutExtension)
                                .Union(Reports.ReportsFactory.Reports.Select(x => x.Key))
                                .ToDictionary<string, string>(x => x);
    }

    public override void SetData(XtraReport report, string url)
    {
        // Stores the specified report to a Report Storage using the specified URL.
        // This method is called only after the IsValidUrl and CanSetData methods are called.
        if (!IsWithinReportsFolder(url, ReportDirectory))
            throw new DevExpress.XtraReports.Web.ClientControls.FaultException("Invalid report name.");
        report.SaveLayoutToXml(Path.Combine(ReportDirectory, url + FileExtension));
    }

    public override string SetNewData(XtraReport report, string defaultUrl)
    {
        // Stores the specified report using a new URL.
        // The IsValidUrl and CanSetData methods are never called before this method.
        // You can validate and correct the specified URL directly in the SetNewData method implementation
        // and return the resulting URL used to save a report in your storage.
        SetData(report, defaultUrl);
        return defaultUrl;
    }
}
The class descends from the abstract ReportStorageWebExtension class. Refer to the following topic for more information: Add a Report Storage.
Register a custom report storage at application start up. Open the Startup.cs file and add the following code to the ConfigureServices method of the Startup class:
using DevExpress.AspNetCore;
using DevExpress.AspNetCore.Reporting;
//...

public class Startup {
    //...
    public void ConfigureServices(IServiceCollection services) {
    // ...
        services.AddScoped<ReportStorageWebExtension, CustomReportStorageWebExtension>();
    // ...
}
//...
}
Configure Application and Services
Open the Startup.cs file and modify the ConfigureServices method of the Startup class as shown in the following code snippet:
using DevExpress.AspNetCore;
using DevExpress.AspNetCore.Reporting;
using DevExpress.XtraReports.Web.Extensions;
using Microsoft.AspNetCore.Builder;
using Microsoft.AspNetCore.Hosting;
using Microsoft.Extensions.Configuration;
using Microsoft.Extensions.DependencyInjection;
//...

public class Startup {
//...
    public void ConfigureServices(IServiceCollection services)
    {
        services.AddDevExpressControls();
        services.AddScoped<ReportStorageWebExtension, Services.CustomReportStorageWebExtension>();
        services
            .AddMvc()
            .SetCompatibilityVersion(Microsoft.AspNetCore.Mvc.CompatibilityVersion.Version_2_1);
        services.ConfigureReportingServices(configurator => {
            configurator.ConfigureReportDesigner(designerConfigurator => {
                designerConfigurator.RegisterDataSourceWizardConfigFileConnectionStringsProvider();
            });
            configurator.ConfigureWebDocumentViewer(viewerConfigurator => {
                viewerConfigurator.UseCachedReportSourceBuilder();
            });
        });
    }
// ...
Modify the Configure method of the Startup class as shown in the following code snippet:
using DevExpress.AspNetCore;
using DevExpress.AspNetCore.Reporting;
using Microsoft.AspNetCore.Builder;
using Microsoft.AspNetCore.Hosting;
using Microsoft.Extensions.Configuration;
using Microsoft.Extensions.DependencyInjection;
//...

public class Startup {
//...
    public void Configure(IApplicationBuilder app, IHostingEnvironment env)
    {
        DevExpress.XtraReports.Configuration.Settings.Default.UserDesignerOptions.DataBindingMode = DevExpress.XtraReports.UI.DataBindingMode.Expressions;
        app.UseDevExpressControls();
        System.Net.ServicePointManager.SecurityProtocol |= System.Net.SecurityProtocolType.Tls12;
        if (env.IsDevelopment())
        {
            app.UseDeveloperExceptionPage();
        }
        app.UseStaticFiles();
        app.UseMvc(routes =>
        {
            routes.MapRoute(
                name: "default",
                template: "{controller=Home}/{action=Index}/{id?}");
        });
    }
// ...
Add the End-User Report Designer Control
You can add the Report Designer to the web page as follows:
Add the DevExpress.AspNetCore namespace directive to the _ViewImports.cshtml file. You can also add this namespace to the view that contains the Report Designer control.
@using DevExpress.AspNetCoreOpen the Layout.cshtml file (Views|Shared folder) and replace its content with the following code:
<!DOCTYPE html>
<html>
<head>
    <meta charset="utf-8" />
    <meta name="viewport" content="width=device-width, initial-scale=1.0" />
    <title>SimpleAspNetCoreReportingDesigner</title>
    <link rel="stylesheet" href="~/css/thirdparty.bundle.css" />
    <link rel="stylesheet" href="~/css/site.css" />
    <script src="~/js/thirdparty.bundle.js"></script>
    <script src="~/js/site.js" asp-append-version="true"></script>
</head>
<body>
    <div class="container body-content">
        @RenderBody()
    </div>
</body>
</html>
Replace the contents of the Index.cshtml file with the following code which displays the Report Designer and loads the TestReport:
<link rel="stylesheet" href="~/css/viewer.part.bundle.css" />
<link rel="stylesheet" href="~/css/designer.part.bundle.css" />

<script src="~/js/viewer.part.bundle.js"></script>
<script src="~/js/designer.part.bundle.js"></script>

@(Html.DevExpress().ReportDesigner("reportDesigner")
    .Height("1000px")
        .Bind("TestReport"))
Run the Application
The page displays the Report Designer control with the TestReport report.
For troubleshooting assistance, review the “Limitations” section of the following help topic: ASP.NET Core Reporting.