Display Documents from the Report and Dashboard Server
- 7 minutes to read
You can use the Web Document Viewer to display documents that are created remotely with the DevExpress Report and Dashboard Server.
The Server provides the protected API for getting its documents, which you can access using a Bearer token. This topic demonstrates how to obtain this token in an ASP.NET MVC application using the resource owner password credentials grant.
Tip
Online Example: How to display documents from the Report and Dashboard Server in the Web Document Viewer.
Configure the Report and Dashboard Server
Create a Server account (with Server authentication) that the Web Document Viewer uses in your application.
Give this account at least read permissions to all the required documents.
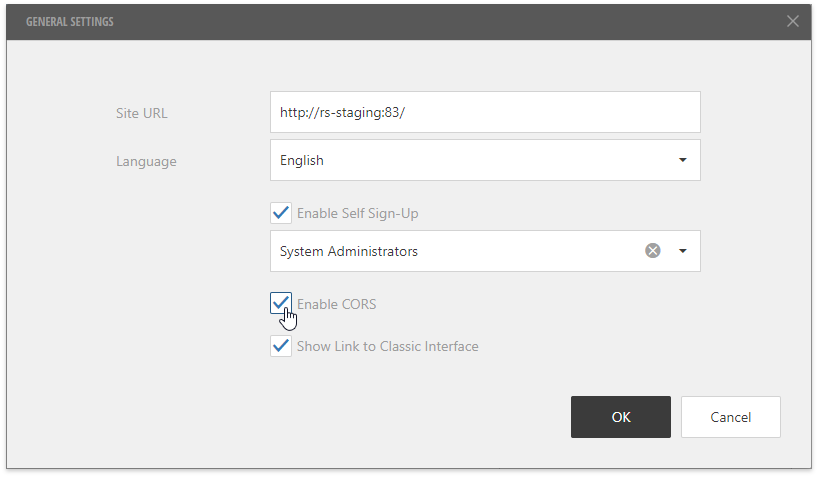
Enable Cross-Origin Resource Sharing (CORS) on the screen with the General Settings and restart the Report and Dashboard Server to apply the changes.
Configure SSL on IIS to access the Report and Dashboard Server web site using SSL.
Obtain Documents from the Server
Open an existing ASP.NET MVC application or create a new one from scratch.
Declare a new public HttpClient object in the Global.asax file to send HTTP requests to the Report and Dashboard Server.
Implement a way to get an access token to the Report and Dashboard Server. For this tutorial, add a new file to the Models folder and write the necessary code there.
- Declare a dedicated class storing token settings and mark it with the DataContract attribute.
- Define a HTTP request’s content that includes the following required parameters: grant_type (with the password value) and your username and password to exchange for an access token. Use the FormUrlEncodedContent class to encode these parameters in the “application/x-www-form-urlencoded” format.
- Send the POST request to the Report and Dashboard Server using the previously declared HttpClient object.
using System; using System.Collections.Generic; using System.Net.Http; using System.Runtime.Serialization; [DataContract] public class Token { [DataMember(Name = "access_token")] public string AuthToken { get; set; } } public class ReportServerHelper { public const string REPORT_SERVER_URI = "https://example.com"; // Your Report and Dashboard Server URI private const string DOCUMENT_VIEWER_ACCOUNT_LOGIN = "DocumentViewer"; private const string REPORT_SERVER_PASSWORD = "MyPassword"; public static string GetToken() { HttpContent httpContent = new FormUrlEncodedContent(new Dictionary<string, string>() { { "grant_type", "password"}, { "username", DOCUMENT_VIEWER_ACCOUNT_LOGIN }, { "password", REPORT_SERVER_PASSWORD } }); HttpResponseMessage result = MyApplication.httpClient.PostAsync(new Uri(REPORT_SERVER_URI + "/oauth/token"), httpContent).Result; return (result.Content.ReadAsAsync<Token>().Result).AuthToken; } }Note
You should obtain a Bearer token directly before using it in the Web Document Viewer since this token has a limited lifetime and can expire.
Create a class to represent an individual document in the document list from the Report and Dashboard Server.
Write a method that gets all the available reports by sending the GET request to the Report and Dashboard Server using the obtained Bearer token.
using System.Net; //... public class ReportServerHelper { // ... public static List<DocumentItem> GetReports() { var message = new HttpRequestMessage { Method = HttpMethod.Get, RequestUri = new Uri(REPORT_SERVER_URI + "/api/documents") }; var client = MyApplication.httpClient; client.DefaultRequestHeaders.Add(HttpRequestHeader.Authorization.ToString(), "Bearer " + GetToken()); HttpResponseMessage result = client.SendAsync(message).Result; List<DocumentItem> documents = JsonConvert.DeserializeObject<List<DocumentItem>>(result.Content.ReadAsStringAsync().Result); return documents.Where(document => document.documentType == "Report").ToList(); } }Add a Web Document Viewer’s data model class (for example, name it DocumentViewerModel) to the Models folder and declare all the necessary properties as shown below:
public class DocumentViewerModel { // An access token used to obtain documents from the Report and Dashboard Server. public string AuthToken { get; set; } // The Report and Dashboard Server URI. public string ServerUri { get; set; } // The URL of a report to open in the Web Document Viewer. public string ReportUrl { get; set; } }Create a new View file (for instance, Viewer.cshtml) and use the ExtensionsFactory.WebDocumentViewer method that returns a WebDocumentViewerExtension object to render the HTML5 Document Viewer. Bind this extension to a report by its URL using the Bind method. Specify the AuthToken and ServerUri properties for an object that the SettingsRemoteSource property returns.
@model MyApplication.Models.DocumentViewerModel @Html.DevExpress().WebDocumentViewer(settings => { settings.Name = "WebDocumentViewer"; settings.SettingsRemoteSource.ServerUri = Model.ServerUri; settings.SettingsRemoteSource.AuthToken = Model.AuthToken; }).Bind(Model.ReportUrl).GetHtml()Open the main Index.cshtml View file and insert code for displaying all the reports from the Report and Dashboard Server.
@model List<MyApplication.Models.DocumentItem>

@if (Model.Count > 0) {
    <h3>Available reports:</h3>
    <ul>
        @foreach (var item in Model) {
            <li>
                <a href="@Url.Action("Viewer", "Home", item, null)" target="_blank">@item.name</a>
            </li>
        }
    </ul>
    }
else {
    <h3>No reports to display.</h3>
}
In the HomeController file, implement action methods that pass the required data to the corresponding Views.
using System.Web.Mvc;
using MyApplication.Models;

public class HomeController : Controller {
    public ActionResult Index() {
        ViewBag.Title = "Remotely Generated Documents";
        var documents = ReportServerHelper.GetReports();
        return View(documents);
    }

    public ActionResult Viewer(DocumentItem item) {
        ViewBag.Title = "Preview: " + item.Name;

        var model = new DocumentViewerModel() {
            ReportUrl = "report/" + item.id.ToString(),
            AuthToken = ReportServerHelper.GetToken(),
            ServerUri = ReportServerHelper.REPORT_SERVER_URI
        };
        return View(model);
    }
}
View the Result
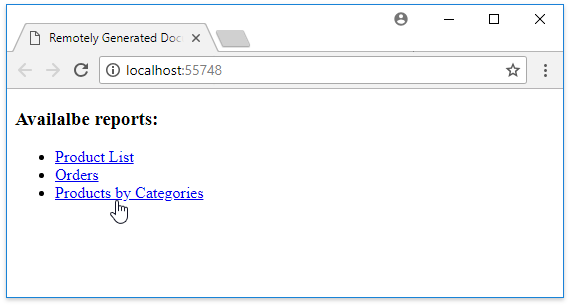
Run the application to see the available report list.
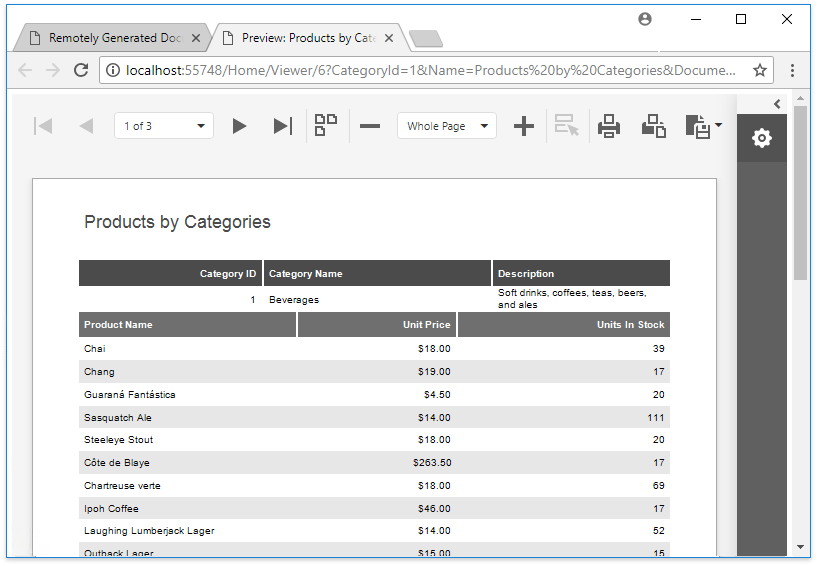
Click a report to open it in the Web Document Viewer.