How to: Bind GridControl to Database and Implement Master-Detail Mode at Design Time
- 6 minutes to read
This example demonstrates how to bind a data-aware control (XtraGrid, XtraPivotGrid, XtraVerticalGrid, etc.) to a database at design time within Microsoft Visual Studio. Note that specific controls may need additional customization after the control is bound to a data source. For more information, refer to the documentation of the corresponding control.
In this example, a GridControl is bound to a database to represent master-detail relationships.
Microsoft Visual Studio introduces a BindingSource component, which simplifies the binding of data-aware controls to data. For information on this component, please refer to the BindingSource component topic in MSDN.
This topic shows how to use a BindingSource component to bind a Grid Control to the “Orders” and “Order Details” tables in the NorthWind database (the nwind.mdb file that ships with the installation of DevExpress controls). These tables are linked by a one-to-many relationship (a single row in the first table can be related to one or more rows in the second table, but a row in the second table can only be related to one row in the first table). In the example below, the grid will represent these tables as master and detail levels (Views).
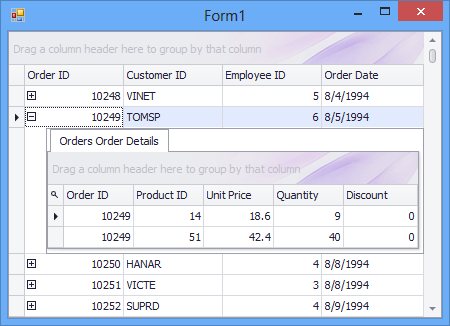
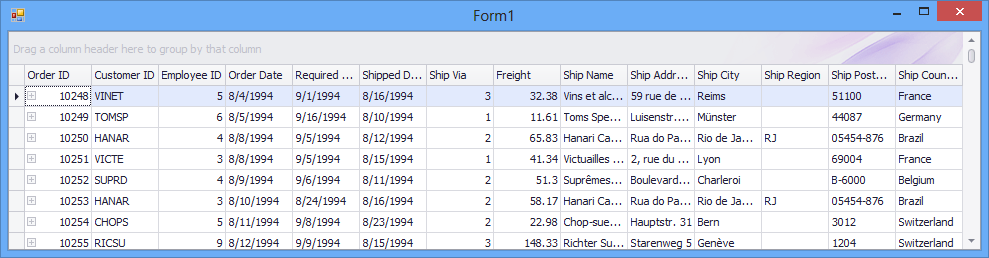
After you perform the steps in this example, the result will be similar to the following.
Steps 1-8. Binding Grid to Data
- Start Visual Studio and create a new Windows Forms Application. Drop a Grid Control on the form.
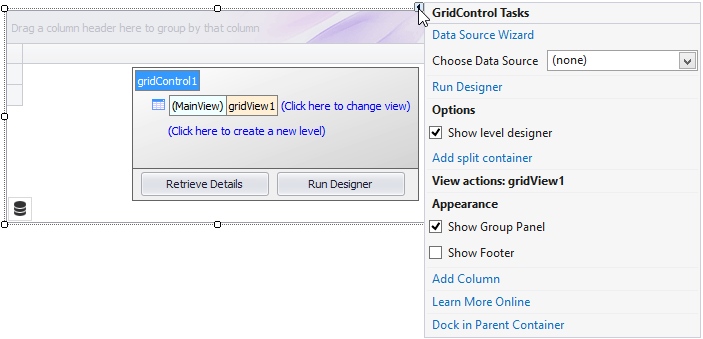
Open the Grid Control Tasks pane by clicking the Grid’s smart tag button.
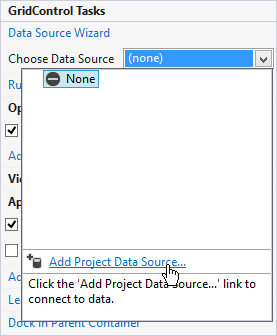
Expand the Choose Data Source popup panel and click the Add Project Data Source… link.
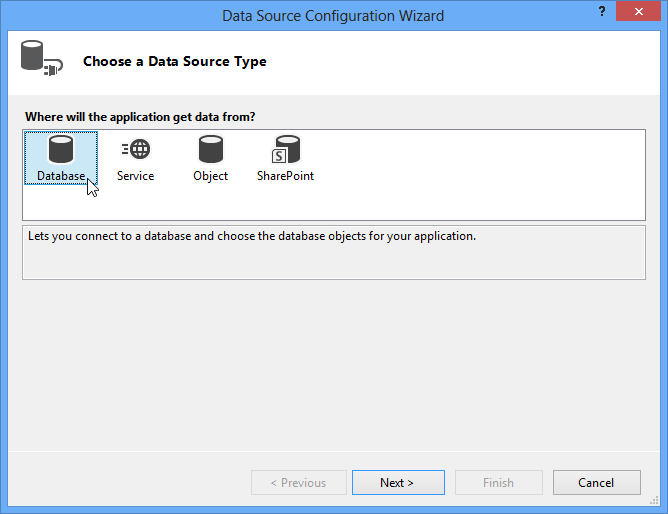
Select Database and click Next.
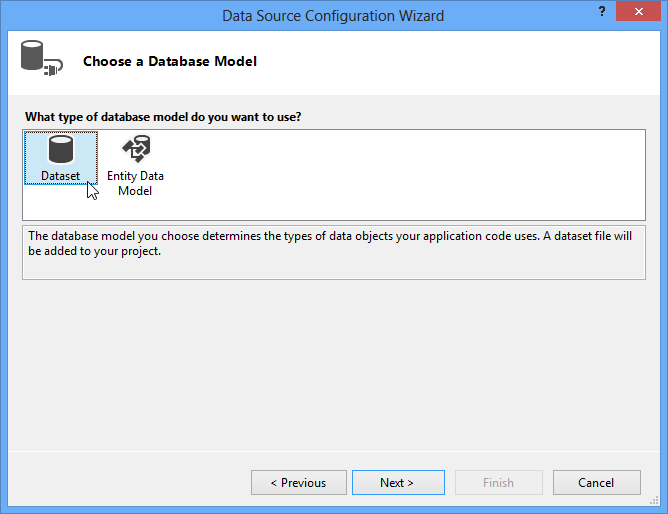
Select Dataset and click Next.
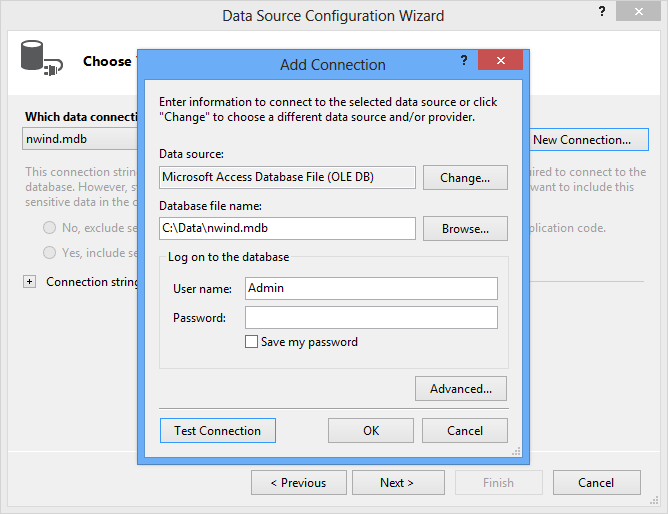
Specify the path and connection settings to the NorthWind database (the nwind.mdb file) using subsequent dialogs.
The next page allows you to choose which tables need to be obtained from the database. Select the ‘Orders’ and ‘Order Details’ tables, and then click Finish.
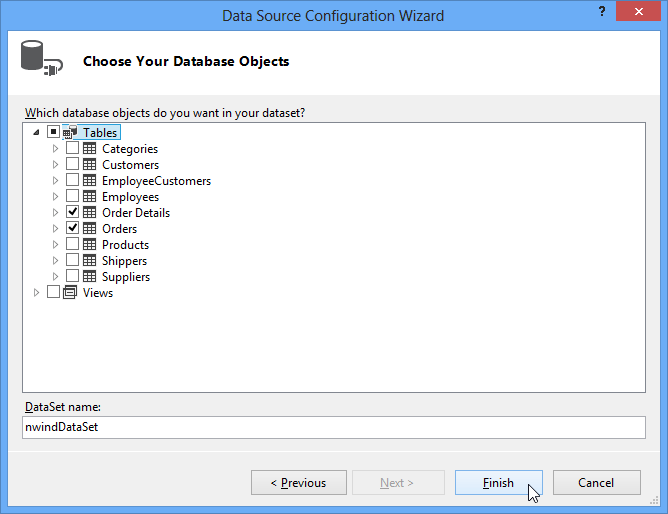
This creates a DataSet with two DataTables encapsulating the ‘Orders’ and ‘Order Details’ tables.
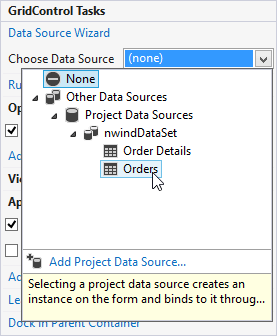
The Grid Control should display the ‘Order’ table as the master data table. To bind to this table, click ‘Orders’ in the Choose Data Source popup panel.
If you run your application now, you will notice inactive row expansion buttons, since the ‘Order Details’ table is empty.
The next section will show you how to populate the ‘Order Details’ table data.
Steps 9-11. Populating the Grid with Detail Data.
As you can see, Visual Studio has generated a set of classes that support the ADO.NET architecture.
- nwindDataSet - a DataSet object (a collection of tables that can be related to each other). This generated DataSet contains the OrdersDataTable and Order_DetailsDataTable tables, and specifies a one-to-many relationship between them.
- ordersBindingSource - a BindingSource object that binds the ‘Orders’ table stored in the nwindDataSet to the Grid. This data is displayed as a master View.
- ordersTableAdapter - a TableAdapter object that can communicate with the ‘Orders’ table in the NorthWind database. A TableAdapter object contains methods for getting data from and posting data to a corresponding table in the database.
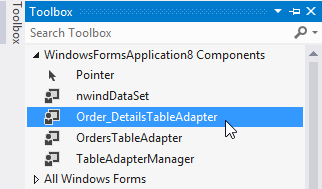
To populate ‘Order Details’ table data, create another TableAdapter that will communicate with this table.
Open the Visual Studio Toolbox window and add the Order_DetailTableAdapter object onto your application form (the solution needs to be built beforehand).
Shift to application code view by pressing the F7 key. Notice that the following code already exists.
private void Form1_Load(object sender, EventArgs e) { this.ordersTableAdapter.Fill(this.nwindDataSet.Orders); }This code calls the ordersTableAdapter object’s Fill method, which populates the nwindDataSet.Orders table with data. To populate the ‘Order Details’ table, add the following code.
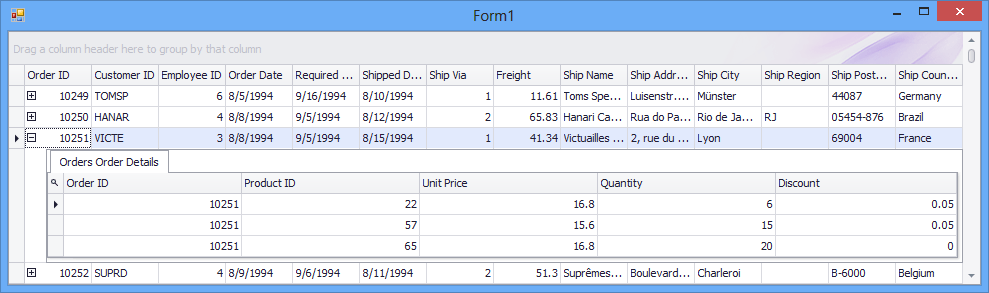
Run the solution. Master rows can now be expanded to view detail rows.
Steps 12-13. Customizing the Grid
Hiding Columns
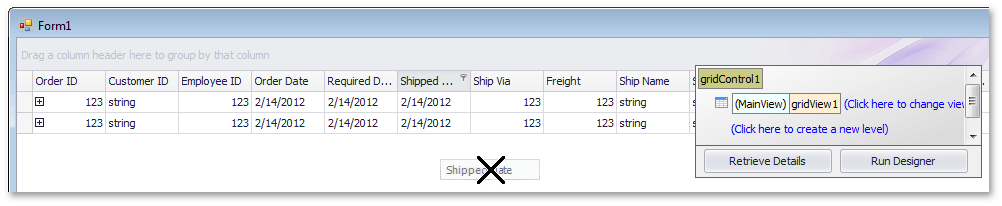
The grid’s main View (gridView1) contains too many columns. Although it is possible to use an AdvBandedGridView to arrange columns in multiple rows, you will simply hide specific columns. To hide the ‘ShippedDate’ column, drag and drop its header outside the header panel (the mouse cursor will change its shape to a cross).
Creating a Detail View
A detail View to represent the detail table (‘Order Details’) is not created at design time. Only the master View (gridView1) is created. If a detail View is not created at design time, the Grid Control automatically creates detail Views at runtime (based on the master View’s settings) when master rows are expanded. To provide the ability to customize detail Views at design time, create a pattern detail View using the grid’s Level Designer.
Click the Retrieve Details button in the Level Designer. Click Yes in the invoked dialog. As a result, the Grid Control returns all master-detail relationships in the underlying data source and represents them as levels. In this example, a single detail level is created. Its name (‘OrdersOrder Details’) matches the relationship name, which is an explicit requirement. It is now possible to assign a specific View to the created detail level. Click the ‘Click here to change view‘ link and select Create new view | GridView.
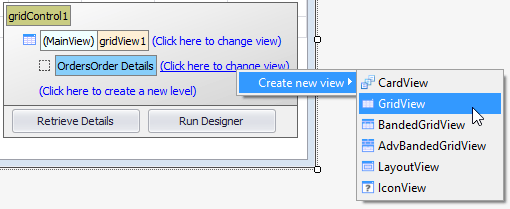
The grid will create a new view (of the GridView type) and associate it with the “OrdersOrder Details” level.
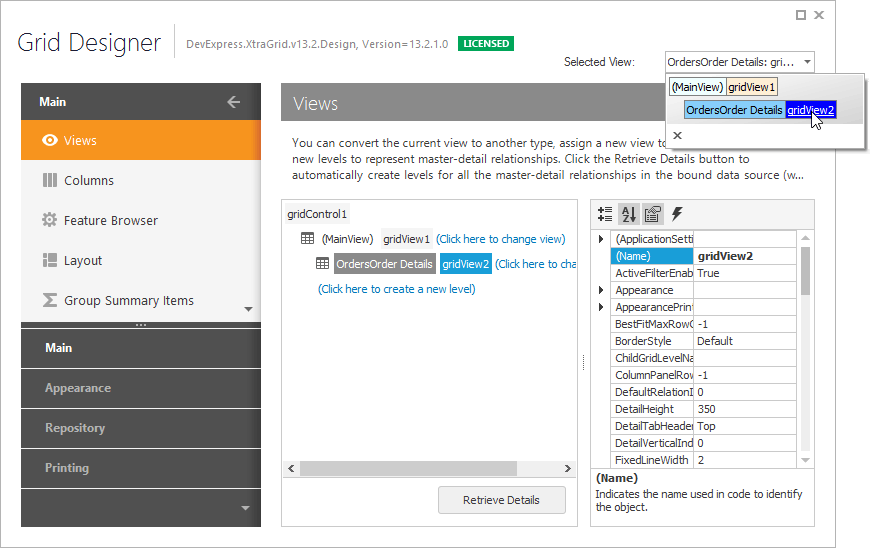
Click the Run Designer button and select gridView2 from the list box in the top right corner of the Designer window.
Switch to the ‘Columns’ page and click the Retrieve Fields button to create columns for all fields in the underlying detail table.
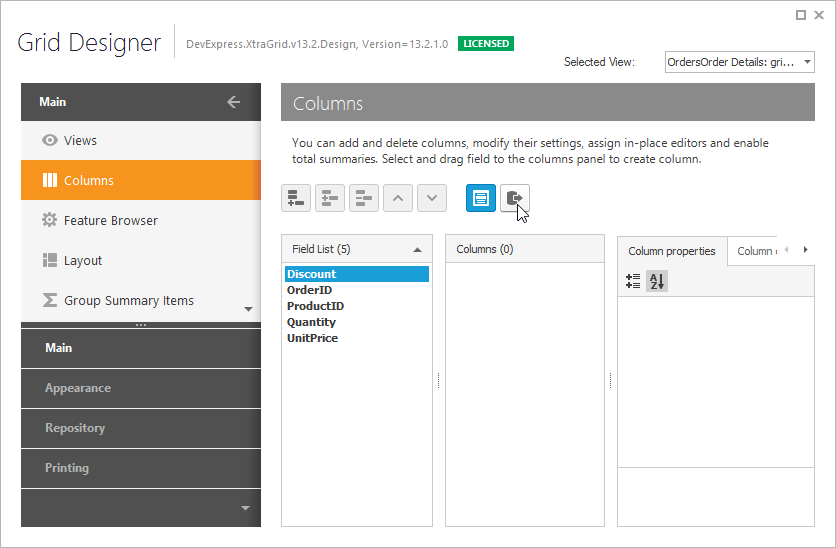
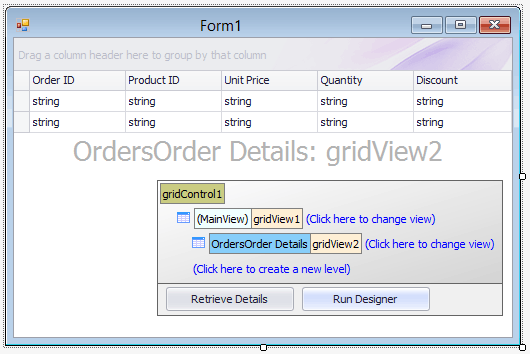
When the Designer is closed, the gridView2 will display all columns from the ‘Order Details’ table.
Other Tasks
The grid control serves many purposes. To help you find out which options relate to which features, use the Feature Browser. It is accessible using the grid’s Designer.
Step 16. Posting Data Back to the Database
You can run the project and begin editing data. The changes will be saved in the underlying DataTable objects, but they will not be saved in the database. To complete the example, write the code that posts the changes in the OrdersDataTable and Order_DetailsDataTable tables back to the database. The FormClosing event is handled for this purpose.
private void Form1_FormClosing(object sender, FormClosingEventArgs e) {
   DevExpress.XtraGrid.Views.Base.BaseView view = gridControl1.FocusedView;
   if (!(view.PostEditor() && view.UpdateCurrentRow())) {
      e.Cancel = true;
      return;
   }
   ordersTableAdapter.Update(nwindDataSet.Orders);
   order_DetailsTableAdapter.Update(nwindDataSet.Order_Details);
}
Result
The following image illustrates the resulting grid at runtime.