Data Source Wizard
- 3 minutes to read
The Data Source Wizard allows the user to create a new data source, configure it, and if there is more than one data source available, to select the one that is required for a particular task. Once created, the data source configuration will be stored in the XLS/XLSX spreadsheet file, so the user does not have to re-configure the data source again.
To invoke the wizard, click Add Data Source in the External Data Sources group of the Mail Merge tab.

The Data Source Wizard is invoked. Proceed with the following steps in the wizard.
On the first page of the invoked Data Source wizard, specify a name for the new data source and click Next.

On the next page, select a data source type (Database) and click Next.

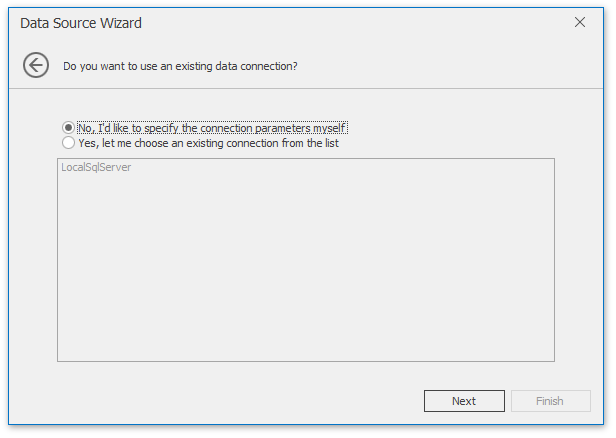
If a data connection has already been specified in the application, the next wizard page allows you to select whether to use one of the existing connections, or create a new one.
On the next page, select a data provider, specify the required connection settings and click Next.

On this page, you can define a custom connection string, or select from the following supported data source types.
- Microsoft SQL Server
- Microsoft Access 97
- Microsoft Access 2007
- Microsoft SQL Server CE
- Oracle
- Amazon Redshift
- Google BigQuery
- Teradata
- Firebird
- IBM DB2
- MySQL
- Pervasive PSQL
- PostgreSQL
- SAP Sybase Advantage
- SAP Sybase ASE
- SQLite
- VistaDB
- VistaDB5
- XML File
Depending on the selected data provider, it may be necessary to specify additional connection options (such as authentication type and database name) on this page.
To proceed to the next wizard page, click Next.
- On the next page you are prompted to save the connection string including or excluding the user name and a password. Choose any option and click Next.
This page allows you to select a query or a stored procedure.
Click Run Query Builder… to invoke the Query Builder window.

Important
Manual SQL editing is not allowed by default. Enabling custom SQL queries may lead to inadvertent or unauthorized modifications to your data/database structure. Before you decide to allow manual SQL editing, we recommend you to follow best practices and implement the appropriate end-user read/write permissions at the database level.
If for some reason you need to enable custom SQL editing, set the SpreadsheetControl.Options.DataSourceWizard.EnableCustomSql option to true.
Note that only SELECT statements are allowed in the text. To override this restriction, handle the SpreadsheetControl.ValidateCustomSqlQuery event.
In the invoked Query Builder window, double-click the Categories item in the list of available tables on the left to add it to the tables included into the query.
Enable the check box for the Categories table, to include all of its fields in the view.

Click OK to close the Query Builder and return to the Data Source Wizard.
When the query is ready, click Finish to save it.

The Field List Panel displays the structure of the created data source.
To modify the query used in the data source, click Manage Relations -> Manage Queries in the External Data Sources group.
Tip
The data source configuration is stored in .xls or .xlsx file. The end-user can save the workbook after creating the data source. Next time, the user can start performing a mail merge immediately after the XLSX/XLS file is loaded into the Spreadsheet control.