Dashboard Items Layout
- 5 minutes to read
The Dashboard Designer allows users to arrange and resize dashboard items and groups using drag-and-drop operations.
Layout Concepts
The dashboard arranges dashboard items, groups and tabs using layout items, layout groups and layout tab pages arranged in layout tab container. They are containers that display a dashboard layout as a hierarchical structure.
Refer to the following topic for more information about concepts related to a dashboard layout: Dashboard Layout.
Item Resizing
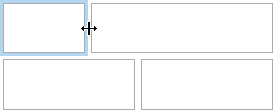
You can resize individual items/groups by dragging their edges. The area that allows resizing items displays the resizing indicator (the  icon).
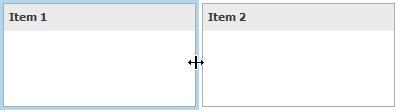
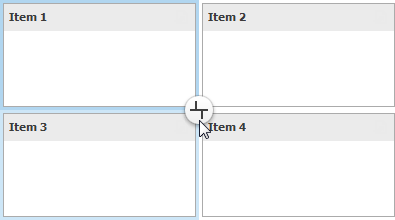
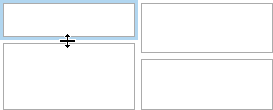
A 2x2 dashboard items layout group is horizontally oriented and contains two child layout groups by default. This arranges dashboard items in two ‘columns’ and allows you to set a different height for items in different columns. You can switch the group’s orientation to DashboardLayoutGroupOrientation.Vertical using the indicator at the group’s intersection.
This allows you to specify different widths for dashboard items in different ‘rows’. The table below lists and describes different modes.
| Indicator | Result | Description |
|---|---|---|
 |
 |
Orients the layout group horizontally and allows you to change individual items’ height and the width of ‘columns’. |
 |
 |
Orients the layout group vertically and allows you to change the width of individual items and the height of ‘rows’. |
To set the size of the layout item/group in code, use the DashboardLayoutNode.Weight property. It specifies the size of the layout item/group relative to the total weight of the parent’s layout items/groups.
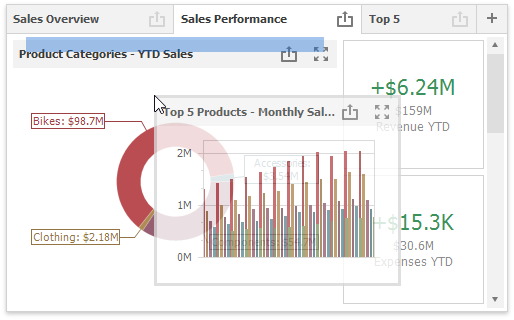
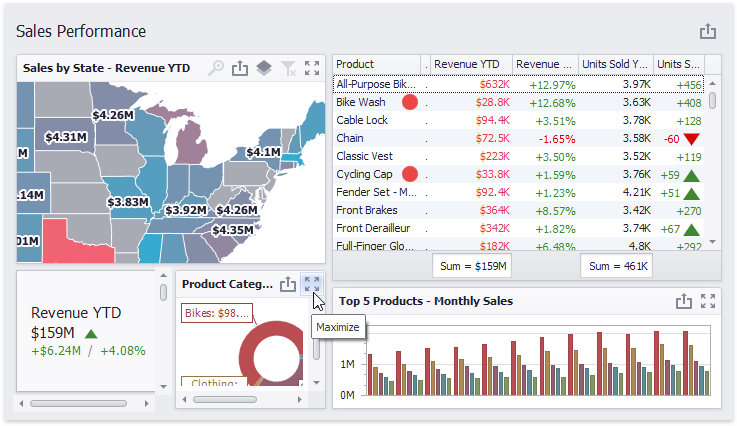
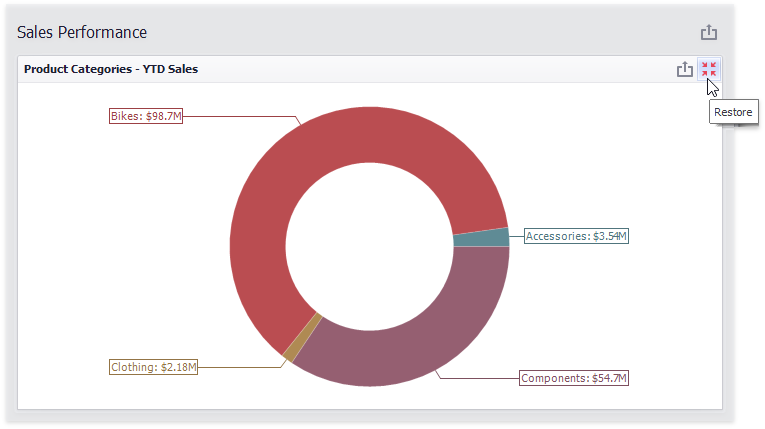
Maximize and Restore Item
You can expand any dashboard item into the whole dashboard size to examine data in greater detail. The expanded dashboard item size in this case is the same as the root layout group.
To maximize a dashboard item, click the Maximize button in the dashboard item caption.
To restore the item size, click Restore.
In code, call the following methods:
- DashboardDesigner.MaximizeDashboardItem
- Expands the specified dashboard item to the entire dashboard size to examine data in greater detail.
- DashboardDesigner.RestoreDashboardItem
- Restores the item size if an item is expanded to the entire dashboard size (maximized).
Note
The dashboard item is re-created when you maximize / restore the item. All events connected with a dashboard item life cycle (such as DashboardItemControlCreated, DashboardItemControlUpdated, etc.) are fired again.
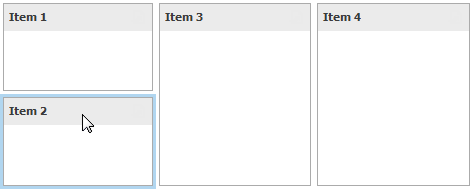
Item Positioning
You can change the position of a dashboard item using drag-and-drop and one of the following approaches:
- If the dashboard item’s caption is visible, click it and hold down the left mouse button while dragging the item.
- If the dashboard item’s caption is not visible, click the
 icon in the top left corner, and hold down the left mouse button while dragging the item.
Depending on the required position, a new layout group is created (if required) to maintain the item’s arrangement. Thus, the dashboard item can be inserted into a new or existing dashboard layout group.
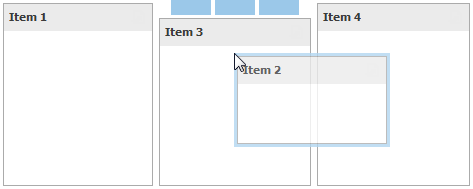
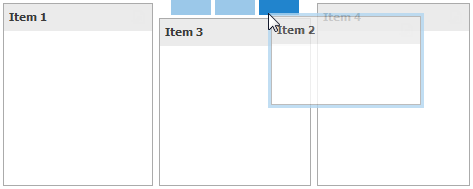
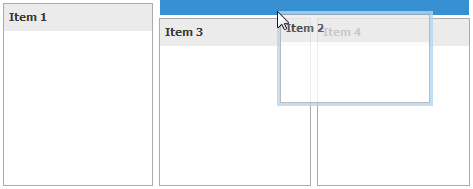
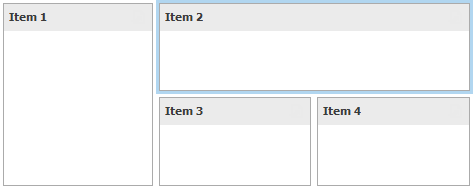
The following table illustrates how a dashboard item is dragged:
Action | Description |
|---|---|
| Select the required dashboard item. |
| Drag the dashboard item to the expected area. The drag indicator…
…shows the dashboard item’s possible positions. |
| Move the mouse pointer to the required position. The drop indicator…
…highlights the hovered position. |
| Then, the drop indicator sequentially displays areas that the dashboard item can occupy. Release the left mouse button when the drop indicator displays the required area. |
| The dashboard item is moved to a new position. |


Note
You can specify various settings related to changing the dashboard’s layout in the Dashboard Designer. See Dashboard Surface for more details.
Manage Layout in Code
The Dashboard class exposes the Dashboard.LayoutRoot property, which provides access to the root dashboard layout group.
Use the DashboardLayoutGroup.ChildNodes property to add child layout groups and items to the parent group (in particular, to the root group). The DashboardLayoutGroup.Orientation property allows you to specify whether the orientation of layout items/groups within the group is vertical or horizontal.
You can determine the immediate parent of the current layout item/group using the DashboardLayoutNode.Parent property. To determine the root (or topmost) group for a layout item/group, use the DashboardLayoutNode.Root property.
The items in a dashboard are automatically arranged. However, you can specify their size and locations in the Dashboard Designer or in code. See the following example for details:
You can use the following methods to change the position of layout items/groups in code:
| Method | Description |
|---|---|
| DashboardLayoutNode.MoveAbove | Moves the current layout item/group above the specified layout item/group. |
| DashboardLayoutNode.MoveBelow | Moves the current layout item/group below the specified layout item/group. |
| DashboardLayoutNode.MoveLeft | Moves the current layout item/group to the left of the specified layout item/group. |
| DashboardLayoutNode.MoveRight | Moves the current layout item/group to the right of the specified layout item/group. |
Note
You cannot move the layout group to a position within its own subtree.
The following methods allow you to insert the layout item/group next to the current layout item/group and display them side by side:
| Method | Description |
|---|---|
| DashboardLayoutNode.InsertAbove | Inserts the layout item displaying the specified dashboard item above the current layout item/group. |
| DashboardLayoutNode.InsertBelow | Inserts the layout item displaying the specified dashboard item below the current layout item/group. |
| DashboardLayoutNode.InsertLeft | Inserts the layout item displaying the specified dashboard item to the left of the current layout item/group. |
| DashboardLayoutNode.InsertRight | Inserts the layout item displaying the specified dashboard item to the right of the current layout item/group. |