Create an ASP.NET Core 2.0+ Dashboard Application
- 4 minutes to read
This tutorial describes how to integrate the Web Dashboard control into an ASP.NET Core 2.0+ web application.
Note
Download the completed project: Create an ASP.NET Core 2.0 Dashboard Application
See demo: C:\Documents and Settings\Public\Documents\DevExpress Demos 19.1\Components\Dashboard\CS\AspNetCoreDashboard
- Prerequisites
- Steps 1-7. Create an ASP.NET Core Web Application
- Step 8. Add and Configure the Web Dashboard
- Steps 9-10. Create a Dashboard
- Steps 11-13. Switch to the Viewer Mode
- Restrictions and Limitations
- Next Steps
Prerequisites
- .Net Core 2.0.0 framework or later
- Visual Studio 2017 v15.3 or later
Steps 1-7. Create an ASP.NET Core Web Application
- In Visual Studio, create a new ASP.NET Core Web Application project.
- Specify the ASP.NET Core 2.0 platform, select Web Application (Model-View-Controller), and click OK.
- Open the NuGet Package Manager and set the package source to All. Install the
DevExpress.AspNetCore.Dashboardpackage. - Right-click the project in the Solution Explorer and select Add | New Folder from the context menu. Rename the created folder to App_Data and create the Dashboards folder inside it.
Replace the Startup.cs file’s content:
using Microsoft.AspNetCore.Builder;
using Microsoft.AspNetCore.Hosting;
using Microsoft.Extensions.Configuration;
using Microsoft.Extensions.DependencyInjection;
using DevExpress.DashboardAspNetCore;
using DevExpress.DashboardWeb;
using DevExpress.AspNetCore;
using Microsoft.Extensions.FileProviders;

namespace AspNetCoreDashboardWebApplication {
    public class Startup {
        public Startup(IConfiguration configuration, IHostingEnvironment hostingEnvironment) {
        Configuration = configuration;
        FileProvider = hostingEnvironment.ContentRootFileProvider;
        }

        public IConfiguration Configuration { get; }
        public IFileProvider FileProvider { get; }

        public void ConfigureServices(IServiceCollection services) {
            // Add a DashboardController class descendant with a specified dashboard storage
            // and a connection string provider.
            services
                .AddMvc()
                .AddDefaultDashboardController(configurator => {
                    configurator.SetDashboardStorage(new DashboardFileStorage(FileProvider.GetFileInfo("App_Data/Dashboards").PhysicalPath));
                    configurator.SetConnectionStringsProvider(new DashboardConnectionStringsProvider(Configuration));
                });
            // Add the third-party (JQuery, Knockout, etc.) and DevExtreme libraries.
            services.AddDevExpressControls(settings => settings.Resources = ResourcesType.ThirdParty | ResourcesType.DevExtreme);
        }

        public void Configure(IApplicationBuilder app, IHostingEnvironment env) {
            if (env.IsDevelopment()) {
                app.UseDeveloperExceptionPage();
            } else {
                app.UseExceptionHandler("/Home/Error");
            }

            app.UseStaticFiles();
            // Register the DevExpress middleware.
            app.UseDevExpressControls();
            app.UseMvc(routes => {
                // Map dashboard routes.
                routes.MapDashboardRoute("api/dashboard");
                routes.MapRoute(
                    name: "default",
                    template: "{controller=Home}/{action=Index}/{id?}");
            });
        }
    }
}
Note
The basic cldr content needed for the Web Dashboard is included in the third-party Globalize library. However, you should also load additional cldr content for locales other than “en” (or currencies other than “USD”)(more information is available in the Globalize documentation).
Open the path below and copy the nwind.xml database to the project’s App_Data folder.
C:\Users\Public\Documents\DevExpress Demos 19.1\Components\Data\nwind.xml
Open the appsettings.json file, create the ConnectionStrings object, and add the nwind connection string to register the data connection:
{
  "Logging": {
    "IncludeScopes": false,
    "LogLevel": {
      "Default": "Warning"
    }
  },
  "ConnectionStrings": {
    "nwind": "XpoProvider=InMemoryDataStore;Read Only=true;Data Source=App_Data\\nwind.xml;"
  }
}
Step 8. Add and Configure the Web Dashboard
Open the Index.cshtml file and replace its content with the code below:
@{
    Layout = null;
}
<!-- Add the following namespace usages: -->
@using DevExpress.AspNetCore
@using DevExpress.DashboardWeb
@using DevExpress.DashboardAspNetCore

<!DOCTYPE html>
<html lang="en">
<head>
<!-- Attach the Dashboard's stylesheets. -->
    @Html.DevExpress().StyleSheets(config => config.AddDashboard(cssSettings => cssSettings.ColorScheme("light")))
</head>
<body>
    <!-- Add the Web Dashboard with the "clientDashboardControl1" name to a View, specify its size, and set the Working Mode to Designer. -->
    <div style="position: absolute; left:0;top:0;right:0;bottom:0;">
        @(Html.DevExpress().Dashboard("clientDashboardControl1")
        .WorkingMode(WorkingMode.Designer)
        .Width("100%")
        .Height("100%")
        )
    </div>
    <!-- Attach the Dashboard's scripts. -->
    @Html.DevExpress().Scripts()
</body>
</html>
Note
To use the dark theme, change the ColorShema value to “dark”.
Steps 9-10. Create a Dashboard
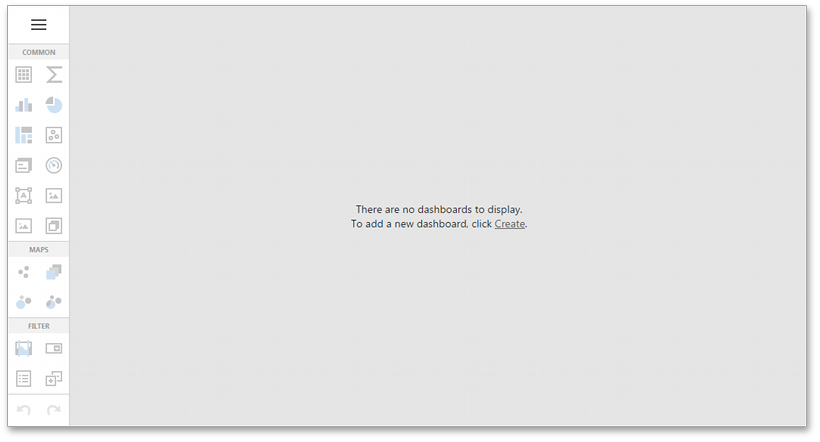
The designer application is now ready. Build and run the project.
Your application should look as follows:
Steps 11-13. Switch to the Viewer Mode
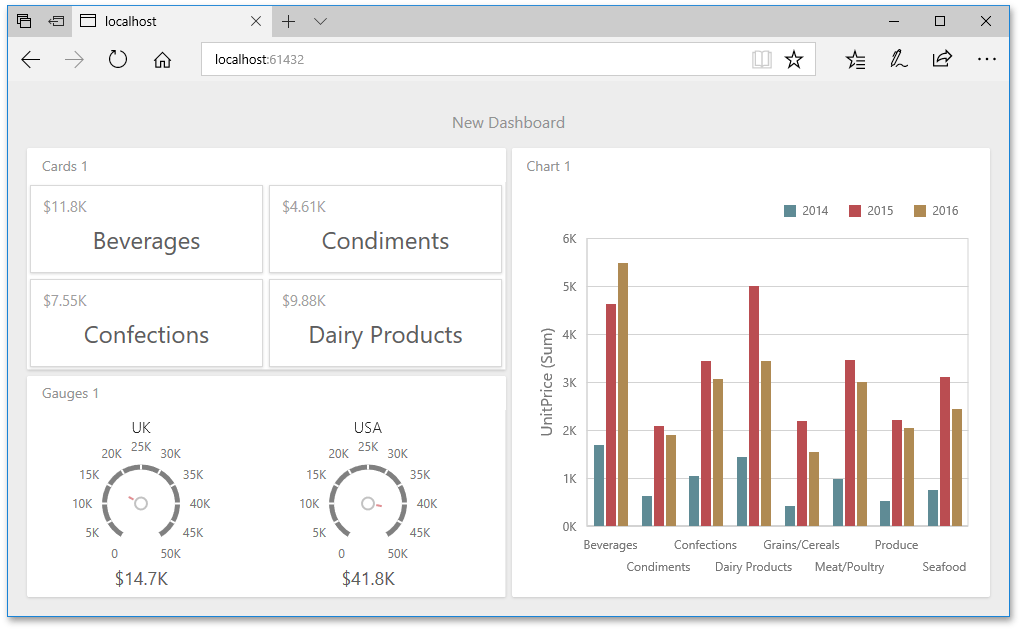
Once you create and save a dashboard, you can switch your Dashboard Designer application to the Viewer mode.
- In a project, open the Views | Home | Index.cshtml file.
Update the BuilderFactory.Dashboard helper method’s code as follows:
@(Html.DevExpress().Dashboard("clientDashboardDesigner1")
.WorkingMode(WorkingMode.ViewerOnly)
.Width("100%")
.Height("100%")
)
Run the application. The ASP.NET Core Dashboard control displays the dashboard from ~/App_Data/Dashboards.
Restrictions and Limitations
- OLAP mode supports only XML for Analysis (XMLA) with MSMDPUMP.
- The content of a dashboard or specific dashboard items is saved in Windows Metafile format when they exported to PDF or image formats. .NET Core does not support Windows Metafile format. Refer to the Manage Exporting Capabilities topic for more information on how to circumvent this limitation.
- Export to image is disabled for .NET Core because of a problem in the Libgdiplus library that is used to export data in ASP.NET Core Dashboard. See T685212 and T685811 for more information.
Next Steps
-
Describes how to create and configure dashboards in the Web Dashboard.
ASP.NET Core Dashboard Control
Provides instructions on how to integrate the Dashboard control into an ASP.NET Core application.