Create an ASP.NET Core 3.0 Dashboard Application
- 5 minutes to read
This tutorial describes how to integrate the Web Dashboard control into an ASP.NET Core 3.0 web application.
Note
Download the completed project: Create an ASP.NET Core 3.0 Dashboard Application
- Prerequisites
- Steps 1-7. Create an ASP.NET Core Web Application
- Step 11. Add and Configure the Web Dashboard
- Steps 12-13. Create a Dashboard
- Steps 14-16. Switch to the Viewer Mode
- Restrictions and Limitations
- Next Steps
Prerequisites
- .Net Core 3.0 framework.
- Visual Studio 2019 v16.3 or later
Steps 1-7. Create an ASP.NET Core Web Application
- In Visual Studio, create a new ASP.NET Core Web Application project.
- Specify the ASP.NET Core 3.0 platform, select Web Application (Model-View-Controller), and click OK.
- Open the NuGet Package Manager and set the package source to All. Install the following packages:
DevExpress.AspNetCore.Dashboardv19.1.7 and later- BuildBundlerMinifier
- Right-click the project in the Solution Explorer and select Add | New Folder from the context menu. Rename the created folder to Data and create the Dashboards folder inside it.
Open the Add New Item dialog (
Ctrl+Shift+A), add the npm Configuration File (package.json) to the project, and add the following npm packages:{ "version": "1.0.0", "name": "asp.net", "private": true, "license": "MIT", "devDependencies": { "devextreme": "19.1-next", "@devexpress/analytics-core": "19.1-next", "devexpress-dashboard": "19.1-next", "jquery-ui-dist": "^1.12.1", "globalize": "1.4.2", "devextreme-cldr-data": "1.0.2" } }Right-click package.json and select Restore Packages.
Create the bundleconfig.json file in the root directory and add the following configuration:
[
    {
        "outputFileName": "wwwroot/css/site.min.css",
        "inputFiles": [
            "node_modules/devextreme/dist/css/dx.common.css",
            "node_modules/devextreme/dist/css/dx.light.css",
            "node_modules/@devexpress/analytics-core/dist/css/dx-analytics.common.css",
            "node_modules/@devexpress/analytics-core/dist/css/dx-analytics.light.css",
            "node_modules/@devexpress/analytics-core/dist/css/dx-querybuilder.css",
            "node_modules/devexpress-dashboard/dist/css/dx-dashboard.light.min.css"
        ]
    },
    {
        "outputFileName": "wwwroot/js/site.min.js",
        "inputFiles": [
            "node_modules/jquery/dist/jquery.js",
            "node_modules/jquery-ui-dist/jquery-ui.js",
            "node_modules/knockout/build/output/knockout-latest.js",
            "node_modules/ace-builds/src-min-noconflict/ace.js",
            "node_modules/ace-builds/src-min-noconflict/ext-language_tools.js",
            "node_modules/ace-builds/src-min-noconflict/theme-dreamweaver.js",
            "node_modules/ace-builds/src-min-noconflict/theme-ambiance.js",
            "node_modules/cldrjs/dist/cldr.js",
            "node_modules/cldrjs/dist/cldr/event.js",
            "node_modules/cldrjs/dist/cldr/supplemental.js",
            "node_modules/cldrjs/dist/cldr/unresolved.js",
            "node_modules/globalize/dist/globalize.js",
            "node_modules/globalize/dist/globalize/message.js",
            "node_modules/globalize/dist/globalize/number.js",
            "node_modules/globalize/dist/globalize/currency.js",
            "node_modules/globalize/dist/globalize/date.js",
            "node_modules/devextreme-cldr-data/supplemental.js",
            "node_modules/devextreme-cldr-data/en.js",
            "node_modules/devextreme/dist/js/dx.all.js",
            "node_modules/@devexpress/analytics-core/dist/js/dx-analytics-core.min.js",
            "node_modules/@devexpress/analytics-core/dist/js/dx-querybuilder.min.js",
            "node_modules/devexpress-dashboard/dist/js/dx-dashboard.min.js"
        ],
        "minify": {
            "enabled": false
        },
        "sourceMap": false
    }
]
Replace the Startup.cs file’s content:
using DevExpress.AspNetCore;
using DevExpress.DashboardAspNetCore;
using DevExpress.DashboardWeb;
using Microsoft.AspNetCore.Builder;
using Microsoft.AspNetCore.Hosting;
using Microsoft.Extensions.Configuration;
using Microsoft.Extensions.DependencyInjection;
using Microsoft.Extensions.FileProviders;
using Microsoft.Extensions.Hosting;

namespace WebDashboardAspNetCore3 {
    public class Startup {
        public Startup(IConfiguration configuration, IWebHostEnvironment hostingEnvironment) {
            Configuration = configuration;
            FileProvider = hostingEnvironment.ContentRootFileProvider;
        }

        public IConfiguration Configuration { get; }
        public IFileProvider FileProvider { get; }

        // This method gets called by the runtime. Use this method to add services to the container.
        public void ConfigureServices(IServiceCollection services) {
            // Configures services to use the Web Dashboard Control.
            services
                .AddDevExpressControls()
                .AddControllersWithViews()
                .AddDefaultDashboardController(configurator => {
                    configurator.SetDashboardStorage(new DashboardFileStorage(FileProvider.GetFileInfo("Data/Dashboards").PhysicalPath));
                    configurator.SetConnectionStringsProvider(new DashboardConnectionStringsProvider(Configuration));
                });
        }

        // This method gets called by the runtime. Use this method to configure the HTTP request pipeline.
        public void Configure(IApplicationBuilder app, IWebHostEnvironment env) {
            if(env.IsDevelopment()) {
                app.UseDeveloperExceptionPage();
            } else {
                app.UseExceptionHandler("/Home/Error");
                app.UseHsts();
            }
            app.UseHttpsRedirection();
            app.UseStaticFiles();
            // Registers the DevExpress middleware.
            app.UseDevExpressControls();
            app.UseRouting();
            app.UseAuthorization();
            app.UseEndpoints(endpoints => {
                // Maps the dashboard route.
                EndpointRouteBuilderExtension.MapDashboardRoute(endpoints, "api/dashboards");
                endpoints.MapControllerRoute(
                    name: "default",
                    pattern: "{controller=Home}/{action=Index}/{id?}");
            });
        }
    }
}
Open the path below and copy the nwind.xml database to the project’s Data folder.
C:\Users\Public\Documents\DevExpress Demos 19.1\Components\Data\nwind.xml
Open the appsettings.json file, create the ConnectionStrings object, and add the nwind connection string to register the data connection:
{
  "Logging": {
    "IncludeScopes": false,
    "LogLevel": {
      "Default": "Warning"
    }
  },
  "ConnectionStrings": {
    "nwind": "XpoProvider=InMemoryDataStore;Read Only=true;Data Source=Data\\nwind.xml;"
  }
}
Step 11. Add and Configure the Web Dashboard
Open the Index.cshtml file and replace its content with the code below:
@{
    Layout = null;
}
<!-- Add the namespace usages. -->
@using DevExpress.AspNetCore
@using DevExpress.DashboardWeb
@using DevExpress.DashboardAspNetCore

<!DOCTYPE html>
<html lang="en">
<head>
    <!-- Add bundled resources. -->
    <link href="~/css/site.min.css" rel="stylesheet" />
    <script src="~/js/site.min.js"></script>
</head>
<body>
    <!-- Add the Web Dashboard with the "clientDashboardControl1" name to a View, specify its size, and set the Working Mode to Designer. -->
    <div style="position: absolute; left:0;top:0;right:0;bottom:0;">
        @(Html.DevExpress().Dashboard("clientDashboardControl1")
        .WorkingMode(WorkingMode.Designer)
        .Width("100%")
        .Height("100%")
        )
    </div>
</body>
</html>
Steps 12-13. Create a Dashboard
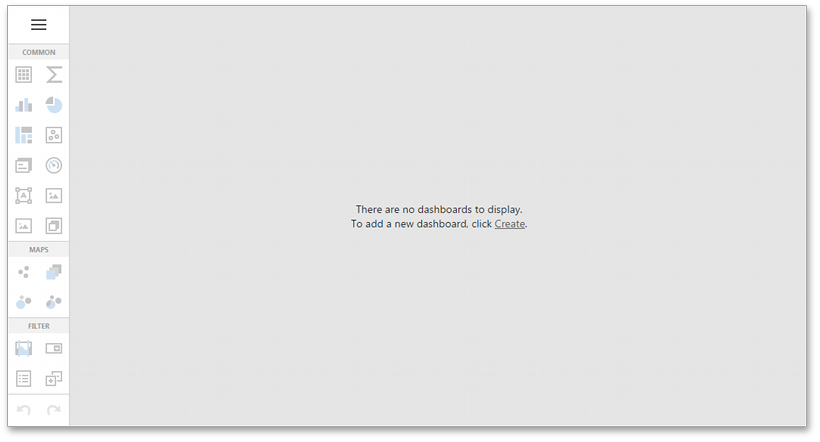
The designer application is now ready. Build and run the project.

Your application should look as follows:

Steps 14-16. Switch to the Viewer Mode
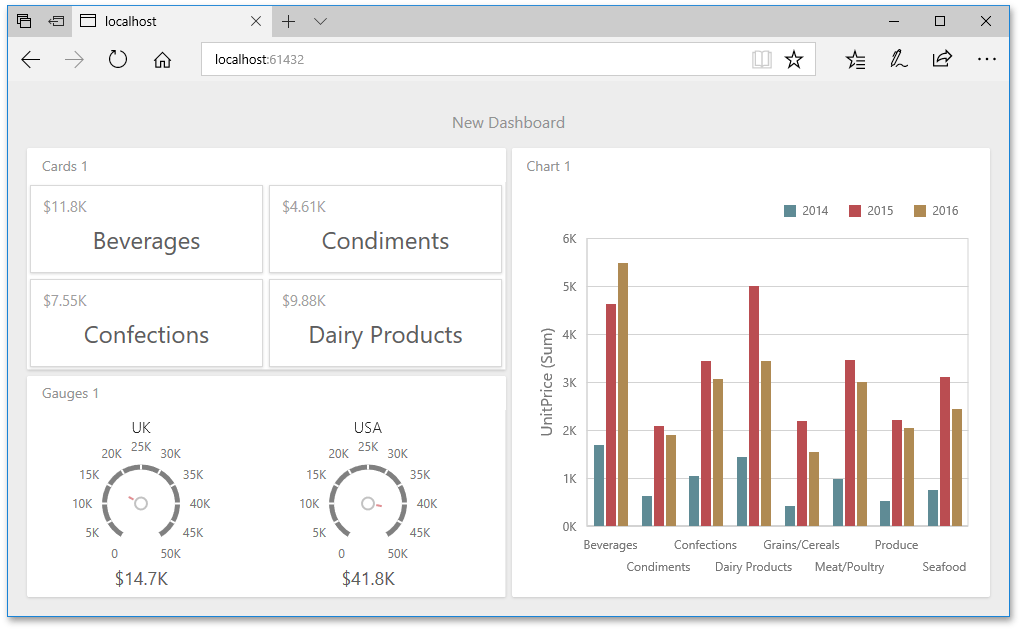
Once you create and save a dashboard, you can switch your Dashboard Designer application to the Viewer mode.
- In a project, open the Views | Home | Index.cshtml file.
Update the BuilderFactory.Dashboard helper method’s code as follows:
@(Html.DevExpress().Dashboard("clientDashboardDesigner1")
    .WorkingMode(WorkingMode.ViewerOnly)
    .Width("100%")
    .Height("100%")
)
Run the application. The ASP.NET Core Dashboard control displays the dashboard from ~/Data/Dashboards.

Restrictions and Limitations
- OLAP mode supports only XML for Analysis (XMLA) with MSMDPUMP.
- The content of a dashboard or specific dashboard items is saved in Windows Metafile format when they exported to PDF or image formats. .NET Core does not support Windows Metafile format. Refer to the Manage Exporting Capabilities topic for more information on how to circumvent this limitation.
- Export to image is disabled for .NET Core because of a problem in the Libgdiplus library that is used to export data in ASP.NET Core Dashboard. See T685212 and T685811 for more information.
Next Steps
-
Describes how to create and configure dashboards in the Web Dashboard.
ASP.NET Core Dashboard Control
Provides instructions on how to integrate the Dashboard control into an ASP.NET Core application.