Display a Nested Property Editor in a Detail View
- 2 minutes to read
This lesson explains how to make the editor of a property visible in a Detail View.
The instructions below show how to locate the Department.Office nested property and make it visible in the Employee Detail View.
Note
Before you proceed, take a moment to review the previous lesson:
Step-by-Step Instructions
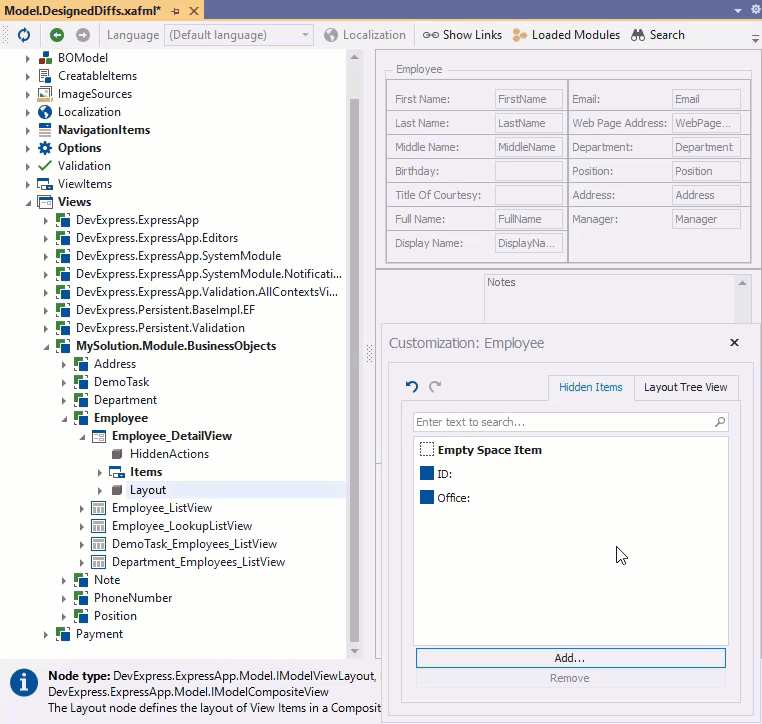
Open the Model.DesignedDiffs.xafml file in the Model Editor.
Navigate to the Views | MySolution.Module.BusinessObjects | Employee node. Expand the Employee_DetailView child node and click the Layout node.
The Model Editor displays a design surface that imitates the Employee Detail View. Right-click the View’s empty space and choose Customize Layout from the context menu:

In the invoked Customization window, click the Add button:

In the Object Model dialog, expand the Department node, check the Office checkbox, and click OK.

The Office: item appears on the Hidden Items tab of the Customization window:

Drag the Office: item to the required position of the Employee Detail View.
Run the application, open the Employee Detail View, and find the Office editor:
- ASP.NET Core Blazor

- Windows Forms:

Runtime Customization in ASP.NET Core Blazor
In an XAF ASP.NET Core Blazor application, you can also customize the Detail View layout at runtime. For more information, refer to the following topic: Runtime Layout Customization in ASP.NET Core Blazor Applications.
- Navigate to the Employee Detail View. Right-click the layout and select the Customize Layout option in the context menu.
In the invoked Customization form, click the Customize button under the Hidden Items list.

In the invoked Object Model dialog window, expand the Department node, check the Office checkbox, and click OK.

Note
If you have an extensive and complicated data model, the structure in the Object Model dialog window may be confusing. To see the path to a reference property, hover your mouse over the property in the Object Model dialog window. This may help you distinguish between similar properties.
The Office item now appears in the Hidden Items list of the Customization window.

Drag the Office item to the required position in the Employee Detail View.
Note
To remove unnecessary hidden items, uncheck them in the Object Model dialog window.