Set a Many-to-Many Relationship (XPO)
- 3 minutes to read
This lesson explains how to create a many-to-many relationship between business objects and how XAF generates the UI for such relationships.
Note
Before you proceed, take a moment to review the previous lesson: Inherit from the Business Class Library Class (XPO).
Step-by-Step Instructions
Right-click the Business Objects folder in the MySolution.Module project, and choose Add | Class…. Change the file name to Task.cs and click Add. Replace the new file’s content with the following code:
using DevExpress.ExpressApp.Model;
using DevExpress.Persistent.Base;
using DevExpress.Persistent.BaseImpl;
using DevExpress.Xpo;

namespace MySolution.Module.BusinessObjects {
    [DefaultClassOptions]
    [ModelDefault("Caption", "Task")]
    public class DemoTask : Task {
        public DemoTask(Session session) : base(session) { }
        [Association("Contact-DemoTask")]
        public XPCollection<Contact> Contacts {
            get {
                return GetCollection<Contact>(nameof(Contacts));
            }
        }
    }
}
Add the Tasks property in the Contact class implementation.
[DefaultClassOptions]
public class Contact : Person {
    //...
    [Association("Contact-DemoTask")]
    public XPCollection<DemoTask> Tasks {
        get {
            return GetCollection<DemoTask>(nameof(Tasks));
        }
    }
}
Run the application.
In the Contact detail view, the application displays the following elements:
- A list of assigned tasks;
- The New button - allows users to add a new assigned task;
- The Link button - allows users to assign the current contact an existing task.
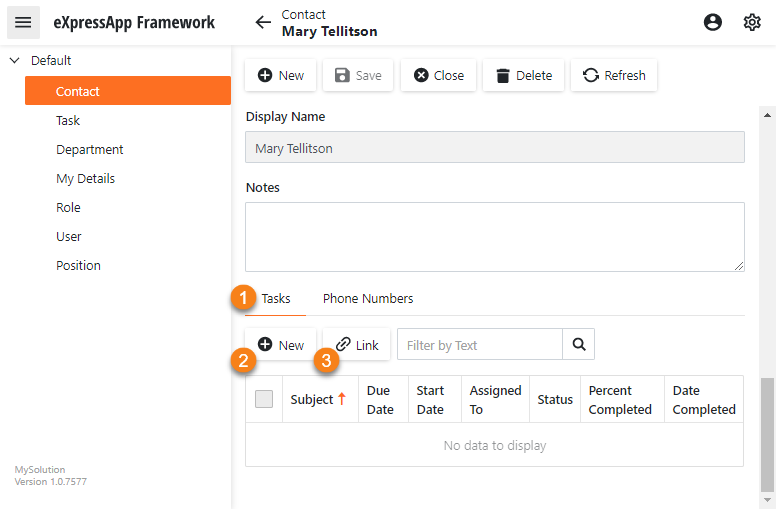
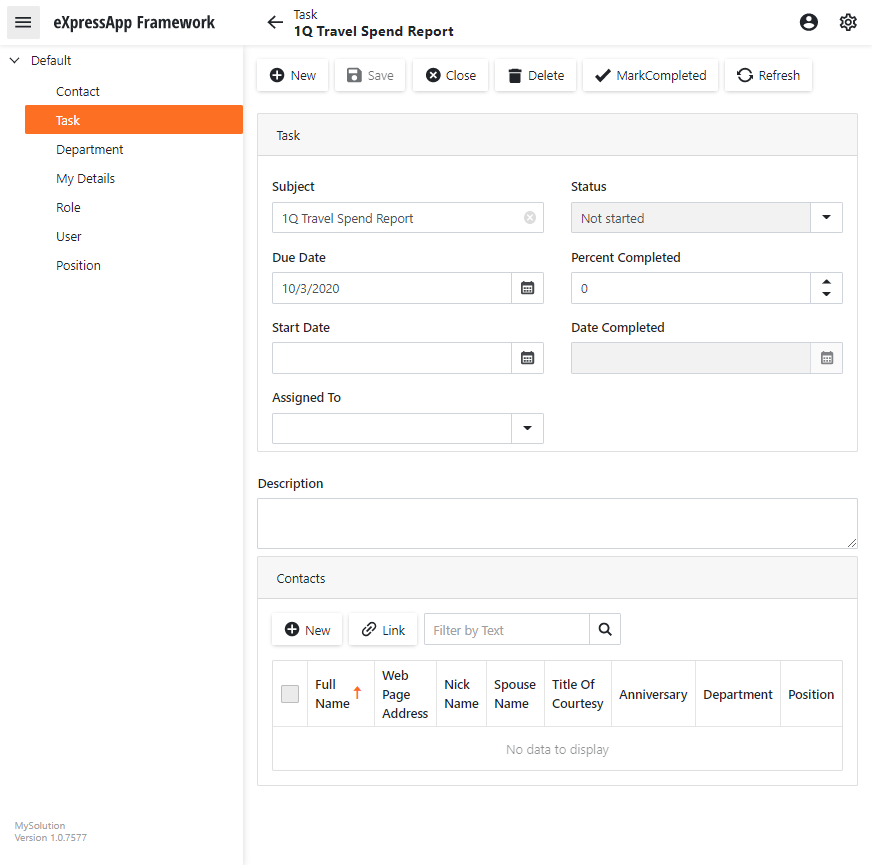
You can find the same UI in the Tasks detail view.
Detailed Explanation
Add an Association
In the DemoTask class, AssociationAttribute is applied to the Contacts property of the XPCollection type. This property represents a collection of associated Contacts. XPO uses the Association attribute to set a relationship between objects. The Contacts property getter implementation - the GetCollection method - is used to return a collection.
[Association("Contact-DemoTask")]
public XPCollection<Contact> Contacts {
    get {
        return GetCollection<Contact>(nameof(Contacts));
    }
}
In the Contact class, the Tasks property is the second part of the Contact-DemoTask relationship. Note that the Association attribute must be applied to this property as well.
[DefaultClassOptions]
public class Contact : Person {
    //...
    [Association("Contact-DemoTask")]
    public XPCollection<DemoTask> Tasks {
        get {
            return GetCollection<DemoTask>(nameof(Tasks));
        }
    }
}
Note
Do not modify the XPCollection property declaration demonstrated above. If you manipulate the collection or introduce any additional settings within the declaration, it may cause unpredictable behavior.
After you run the application, XPO will generate the intermediate tables and relationships.
Change Application Model in Code
The DemoTask class is decorated with the ModelDefaultAttribute attribute. The attribute parameters specify that the Caption property of the Application Model’s BOModel | DemoTask node is set to “Task”.
You can apply the ModelDefault attribute to a business class or its member to change any property of the Application Model’s BOModel | <Class> or BOModel | <Class> | OwnMembers | <Member> node.
Next Lesson
Set a One-to-Many Relationship (XPO)