Implement Custom Business Classes and Reference Properties (XPO)
- 3 minutes to read
This lesson explains the following concepts:
- How to implement business classes from scratch
- How to implement object references to existing classes
- How XAF generates UI for referenced objects
Note
Before you proceed, take a moment to review the previous lesson: Inherit from the Business Class Library Class (XPO).
Step-by-Step Instructions
Add the following Department and Position persistent classes to the Contact.cs file.
[DefaultClassOptions]
[System.ComponentModel.DefaultProperty(nameof(Title))]
public class Department : BaseObject {
    public Department(Session session) : base(session) { }
    private string title;
    public string Title {
        get { return title; }
        set { SetPropertyValue(nameof(Title), ref title, value); }
    }
    private string office;
    public string Office {
        get { return office; }
        set { SetPropertyValue(nameof(Office), ref office, value); }
    }
}
[DefaultClassOptions]
[System.ComponentModel.DefaultProperty(nameof(Title))]
public class Position : BaseObject {
    public Position(Session session) : base(session) { }
    private string title;
    public string Title {
        get { return title; }
        set { SetPropertyValue(nameof(Title), ref title, value); }
    }
}
Add the Department and Position properties to the Contact class:
[DefaultClassOptions]
public class Contact : Person {
    //...
    private Department department;
    public Department Department {
        get {return department;}
        set {SetPropertyValue(nameof(Department), ref department, value);}
    }
    private Position position;
    public Position Position {
        get {return position;}
        set {SetPropertyValue(nameof(Position), ref position, value);}
    }
    //...
}
The Contact class now exposes the Position and Department reference properties.
Run the application.
After you run the application you can see that the navigation control displays two new items: Department and Position. You can click the new items to access department and position lists.
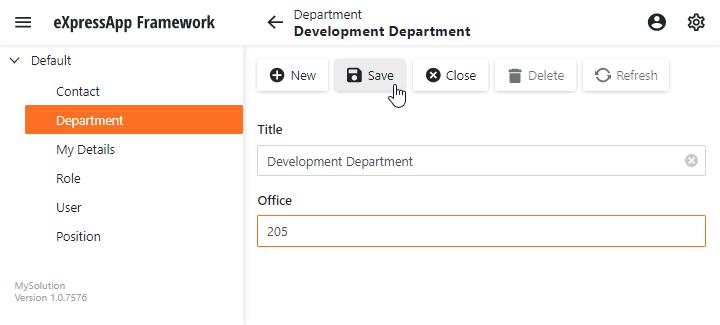
Department detail form:
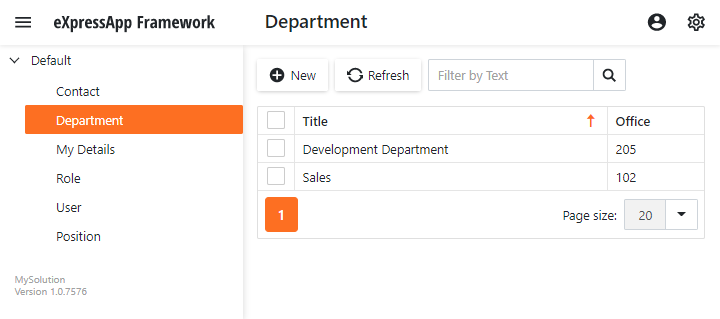
Department list:
In the Contact Detail View, XAF creates lookup editors for Department and Position. These editors use a special type of View - Lookup List View. Typically, this View includes a single column that displays values from the class’s default property. See additional information about default properties later in this topic.
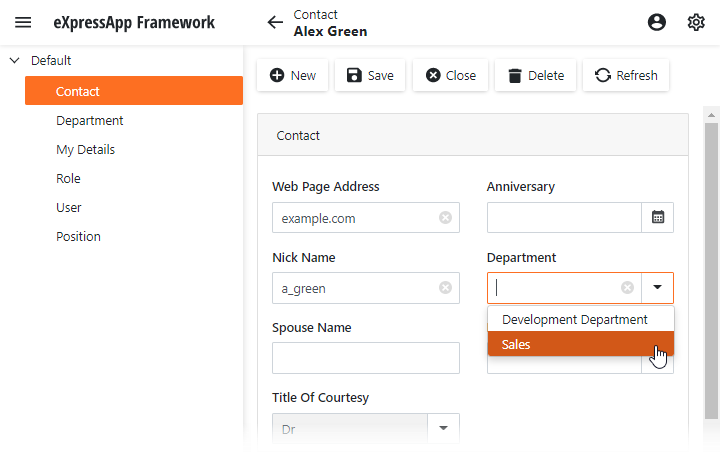
Users can select Department or Position values from the dropdown lists. Note that Lookup editors support incremental filtering:
Detailed Explanation
Default Property
The Position and Department classes are decorated with the DefaultProperty attribute. This attribute specifies the default property of the class. You can specify the most descriptive property of your class in the DefaultProperty attribute, and its values will then be displayed in the following:
- Detail form captions
- The leftmost column of a List View
- Lookup List Views
Refer to the Data Annotations in Data Model topic for more information.
Next Lesson
Set a Many-to-Many Relationship (XPO)