Create a Solution
- 2 minutes to read
This lesson explains how to create a new XAF ASP.NET Core Blazor solution.
Step-by-Step Instructions
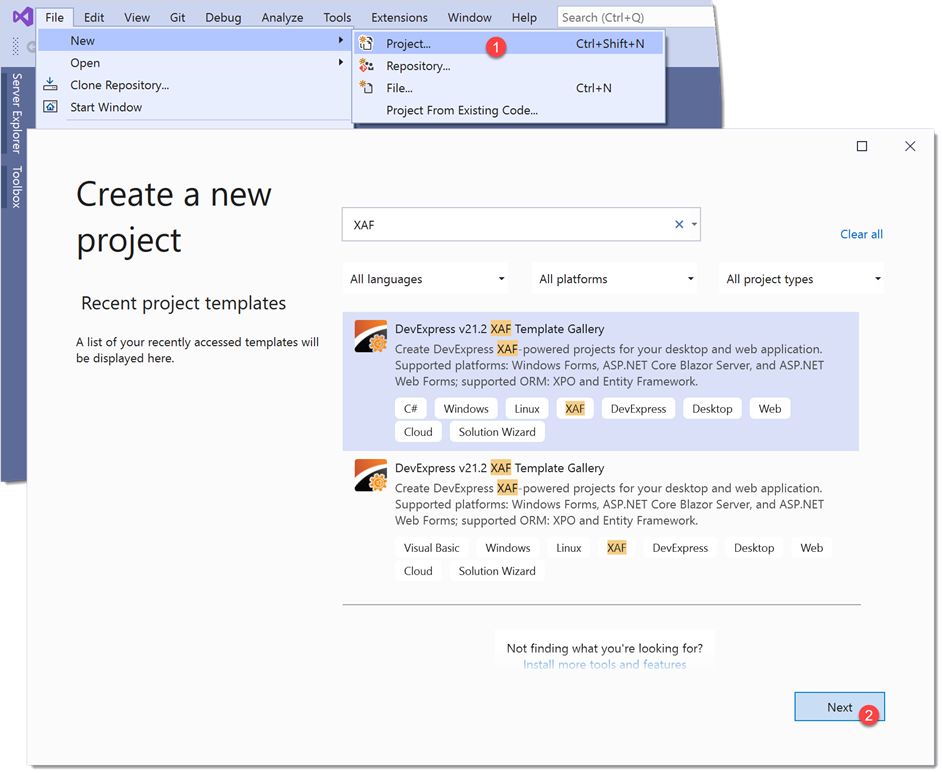
From Visual Studio’s main menu, select File | New | Project… to invoke the Create a new project dialog.
Select DevExpress v21.1 XAF Template Gallery and click Next. Specify the project name (“MySolution”) and click Create.
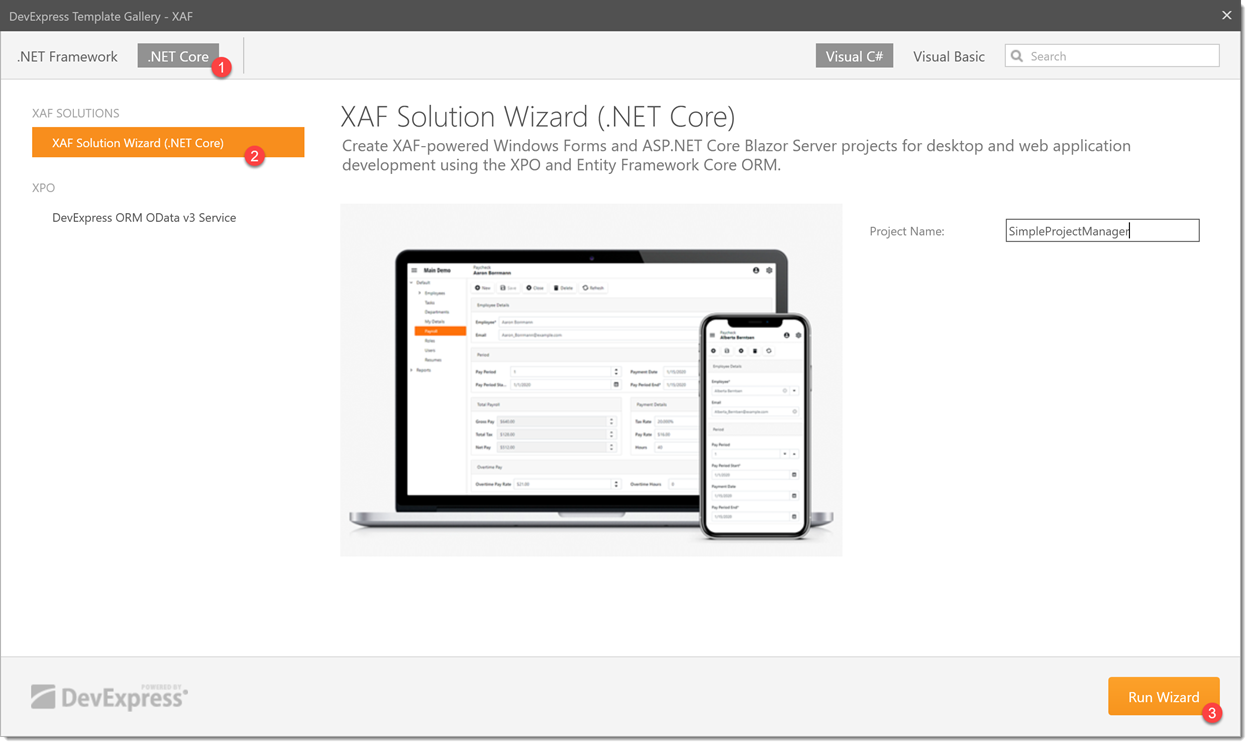
In the invoked Template Gallery, select XAF Solution Wizard (.NET Core) in the .NET Core section and click Run Wizard.
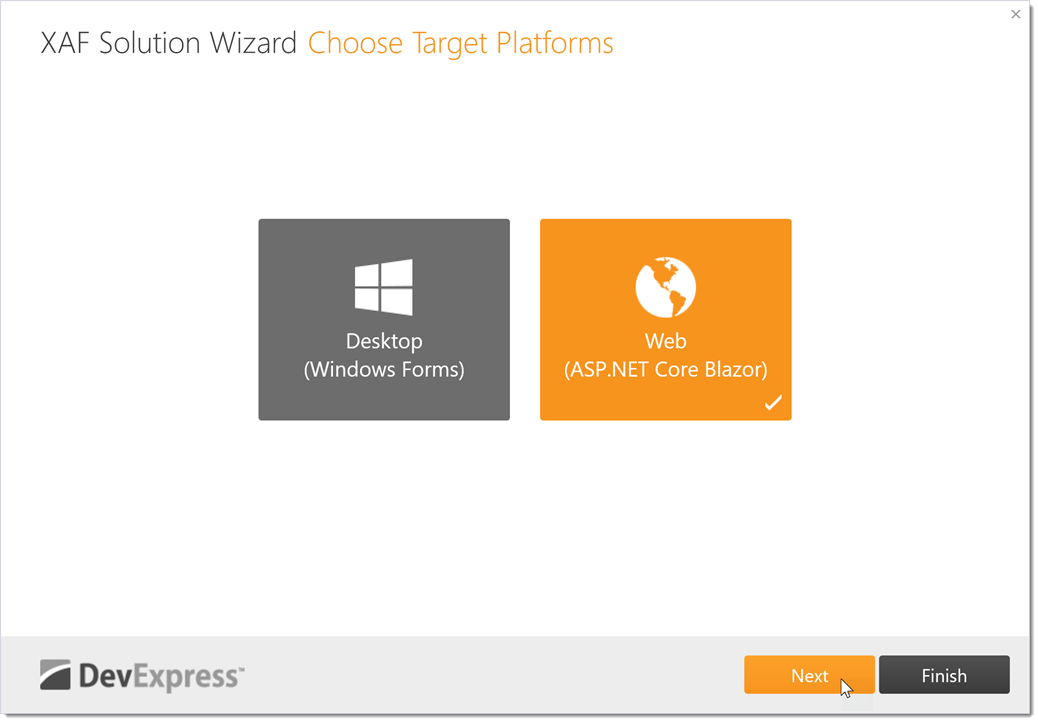
The Solution Wizard opens. Select Web (ASP.NET Core Blazor) and click Next.
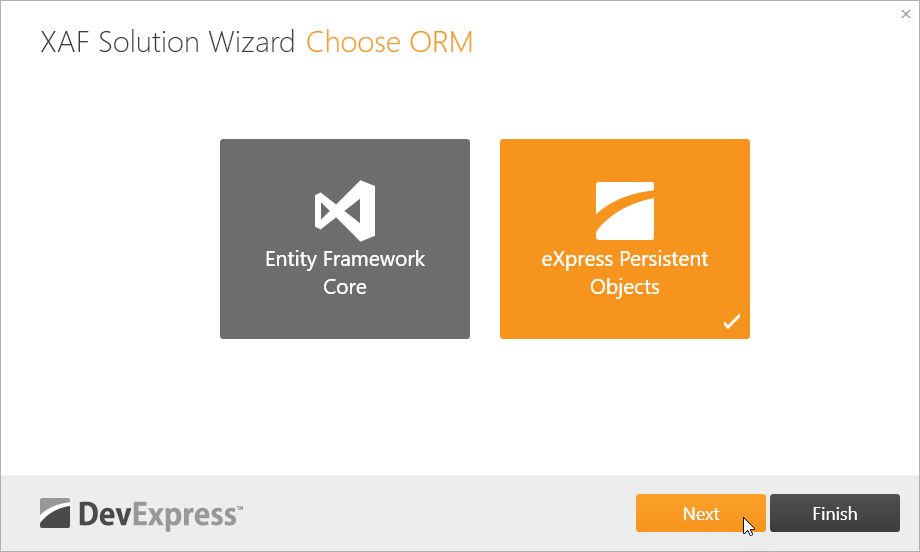
Select an ORM for your application: choose between Entity Framework Core or eXpress Persistent Objects, and click Next.
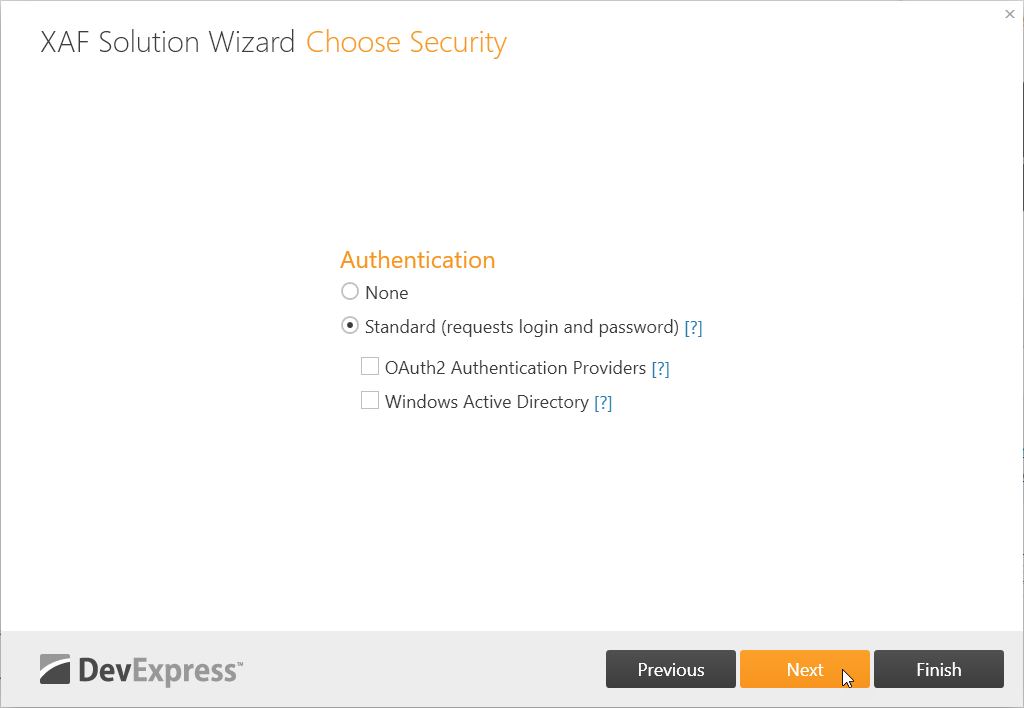
Choose the security options of your application. In this tutorial, we will use the Standard authentication type and click Next.
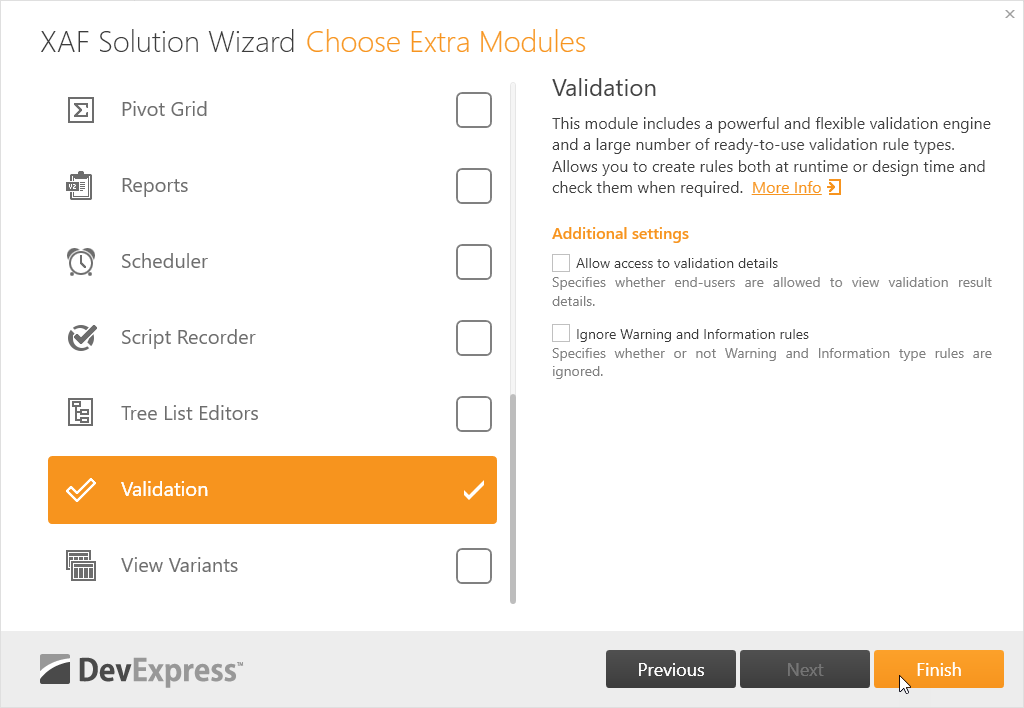
Choose the XAF modules, which are automatically added to your application. Click Finish.
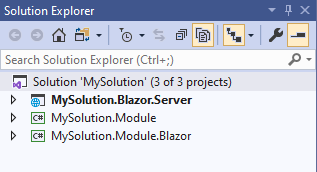
The newly created solution contains the following projects:
- MySolution.Blazor.Server - the ASP.NET Core Blazor application project, which automatically generates the ASP.NET Core Blazor CRUD user interface. This project depends on the MySolution.Module and MySolution.Module.Blazor modules. Do not use this project for feature implementation. All application logic should be implemented in the appropriate Module projects.
- MySolution.Module - the basic module project that contains platform independent code.
- MySolution.Module.Blazor - the module project that contains code specific to the ASP.NET Core Blazor application.
Refer to the Application Solution Structure topic for information on the XAF solution structure.
Note
The wizard attempts to detect your installed SQL server and changes the connection string accordingly. Supported servers are Microsoft SQL Server (including the Express and LocalDB editions). To use another database system (PostgreSQL, MySQL, Oracle, SQLite, Firebird, etc.), change the ConnectionString argument in the appsettings.json file. Refer to the Connect an XAF Application to a Database Provider topic for details about connecting to different database systems.
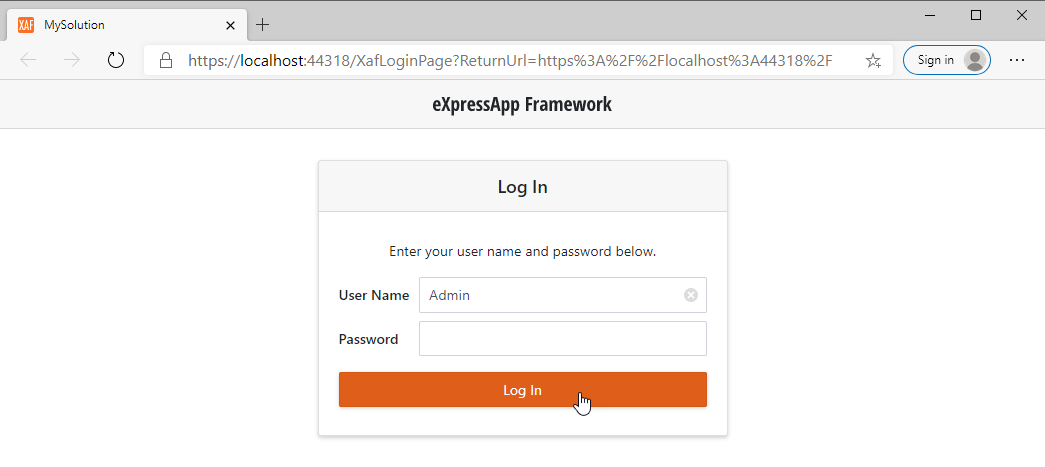
You can now run the application. Click Start Debugging or press F5.
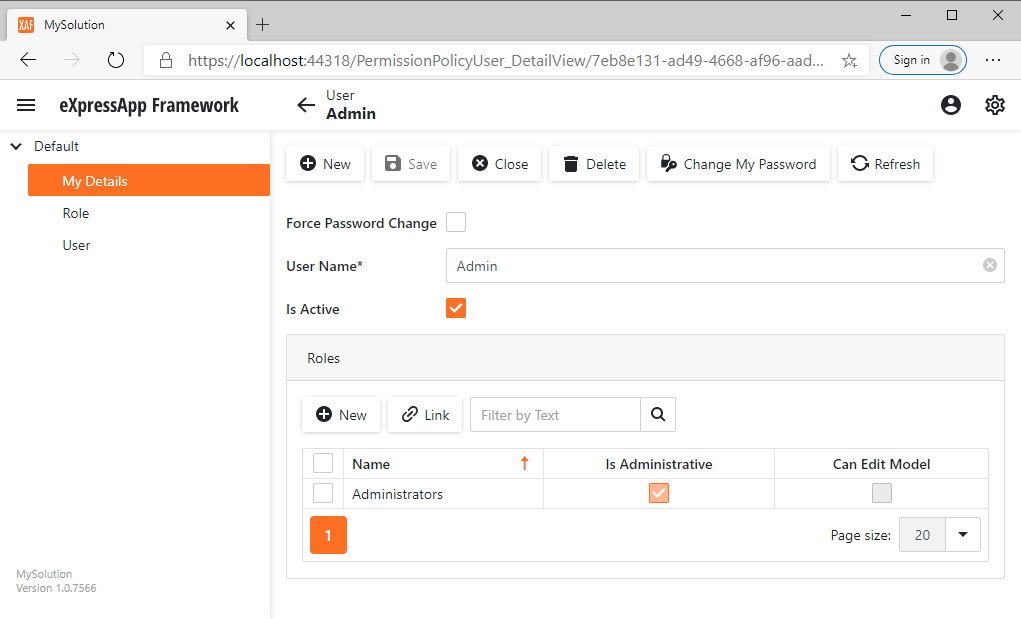
The following images show the resulting ASP.NET Core Blazor application. Use the “Admin” user name with an empty password to log in.
Next Lesson
Business Model Design with XPO
or
Business Model Design with Entity Framework Core