Production Database and Application Updates
- 9 minutes to read
This topic describes how to update an application deployed on a user machine or on an application server.
Update an ASP.NET Core Blazor Application
Update a Database
- Launch a command line interpreter, for instance, Command Prompt.
- Run your application with the
-updateDatabasecommand. You can use the following additional parameters:-silentinitiates a silent update without direct user interaction.-forceUpdateforces a schema update on each run.
- Follow the on-screen instructions.
C:\Users\Public\MyApplication\MySolution.Blazor.Server.exe -updateDatabase -silent -forceUpdate
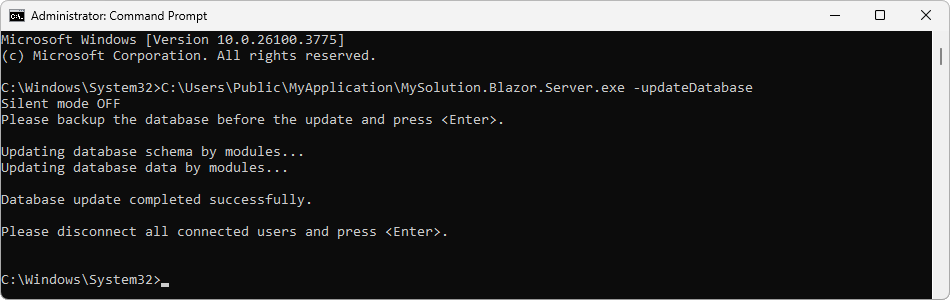
Run the application to ensure the update was successful.
Update Application Files
To update an application, you can use the same technique as when you deployed it: Deploy ASP.NET Core Blazor Server Apps to Azure, Linux with Nginx or Windows with IIS.
Update a Windows Forms Application
Update a Database
- Launch a command line interpreter, for instance, Command Prompt.
- Run your application with the
-updateDatabasecommand. You can use the following additional parameters:-silentinitiates a silent update without direct user interaction.-forceUpdateforces a schema update on each run.
- Follow the on-screen instructions.
C:\Users\Public\MyApplication\MySolution.Win.exe -updateDatabase -silent -forceUpdate
Run the application to ensure that the update was successful.
Update Application Files
To update an application, you can use the same technique as when you deployed it:
Note
Do not overwrite a user’s MySolution.Win.dll.config or Model.User.xafml files when you update an application.
Update Application Files Automatically (Application Updater Utility)
Use this technique to automate the update process at multiple workstations.
Prerequisites
Ensure that applications on end-user workstations and the new application you want to deploy meet the following conditions:
- The XafApplication.CheckCompatibilityType property is set to
ModuleInfo. NonPersistentObjectSpaceProvideris not the first registered Provider in your application. XAF uses the first registered Object Space Provider while an application updates.
Enable Auto Update
- Choose a file server in the end-user network. On this server, create a shared folder that stores newer application versions (for example, the MySolutionUpdateSource folder).
- Ensure that all end users have a read permission to this folder and do not have a write permission.
On all end-user workstations, open the MySolution.Win.dll.config file, and set the
NewVersionServerkey to the UNC path to this folder:<?xml version="1.0" encoding="utf-8"?> <configuration> <!-- ... --> <appSettings> <!-- ... --> <add key="NewVersionServer" value="\\FILESERVER\MySolutionUpdateSource\" /> </appSettings> </configuration>Copy WinForms application folder contents from the end-user workstation to the MySolutionUpdateSource shared folder.
The UNC path to the application executable should be “\FILESERVER\MySolutionUpdateSource\MySolition.Win.exe“.- Copy the %PROGRAMFILES%\DevExpress 25.2\Components\Tools\eXpressAppFrameworkNetCore\Application Updater\DevExpress.ExpressApp.Updater.exe file from the developer workstation to the MySolutionUpdateSource shared folder.
The UNC path to this file should be “\FILESERVER\MySolutionUpdateSource\DevExpress.ExpressApp.Updater.exe“. When you run the WinForms application at an end-user workstation that was not updated, the following Updater progress bar is shown:

If one of the error messages below is displayed instead, ensure the following:
- the UNC path in the configuration file is correct;
- the shared folder is readable;
- the shared folder contains the DevExpress.ExpressApp.Updater.exe file.

The application restarts automatically after an update.
To deploy a new application version, follow the steps below:
- Replace the files located in the MySolutionUpdateSource shared folder with new application files.
- Update the database version as described in the Update Database section.
When a user launches the WinForms application, it is instantly updated. The update process cannot be initiated if the database is not updated, even if the MySolutionUpdateSource folder contains a new version of the application.
Note
- The MySolutionUpdateSource folder should only store new application files. Do not store other files in this folder. Otherwise, they will be copied to each end-user workstation.
- If you want to change Updater utility behavior, change and recompile its sources. Updater tool sources are in the following folder: %PROGRAMFILES%\DevExpress 25.2\Components\Sources\DevExpress.ExpressApp.Tools\DevExpress.ExpressApp.Updater. For example, you can configure the Updater tool to download files from a remote web server instead of using a shared folder in a local network.
Update Database on Microsoft Azure
For a Blazor application, in the Azure CLI, run the application with the -updateDatabase -silent key.
Update Database in Multi-Tenant Application
Using –updateDatabase Switch for Blazor and WinForms Apps
The functionality to automatically update the database with the --updateDatabase key has a limitation in multi-tenant applications. Only the host database can be updated, as the specific tenant database is identified only after user login. These tools cannot be used to create or update database structure or data in tenant databases.
These tools can be useful for the following actions in a multi-tenant application:
- Initially create the host database (if you need to create a database before the first application launch).
- Update data in the host database (for instance, create new tenants or administrator users for the host database).
How to Use ModuleUpdater to Update Database in Multi-Tenant Applications
Since a multi-tenant application works with several databases of different structures, ModuleUpdater runs in the application in the following cases:
- When logging into the host interface
- When logging into a tenant interface for the first time
It is essential to consider whether the update applies to a tenant database or the host database.
The XAF Template Kit generates projects with DevExpress.ExpressApp.MultiTenancy.ITenantProvider.TenantId and TenantName properties to identify the current tenant. These properties return null when the host database is being updated.
The following code outlines the recommended structure of the updater class in multi-tenant applications:
using DevExpress.ExpressApp;
using DevExpress.ExpressApp.MultiTenancy;
using DevExpress.ExpressApp.Updating;
using Microsoft.Extensions.DependencyInjection;

namespace MySolution.Module.DatabaseUpdate;
public class Updater :ModuleUpdater {
    public Updater(IObjectSpace objectSpace, Version currentDBVersion) :
          base(objectSpace, currentDBVersion) {
    }
    public override void UpdateDatabaseAfterUpdateSchema() {
        base.UpdateDatabaseAfterUpdateSchema();

        if (TenantName == null) {
            // Update data in the host database
        } else {
            // Update data in tenant databases
            if (TenantName == "company1.com") {
                // Update data in the company1.com tenant database
            }
        }
        // Update data in any database—host or tenant
    }

    // Returns the current tenant identifier or `null` if the application runs in Host User Interface mode
    Guid? TenantId {
        get { return ObjectSpace.ServiceProvider.GetRequiredService<ITenantProvider>().TenantId; }
    }

    // Returns the current tenant name or `null` if the application runs in Host User Interface mode
    string TenantName {
        get { return ObjectSpace.ServiceProvider.GetRequiredService<ITenantProvider>().TenantName; }
    }
}
Register Predefined Dashboards in a Multi-Tenant Application
In a multi-tenant application, the host database cannot store Dashboards Module data. When you register a predefined dashboard in the Module Updater, call the DashboardsModule.AddDashboardData<T> method only if a tenant database is being updated. You can implement ModuleUpdater as described in the previous section.
Refer to the following help topic for more information about predefined Dashboards: Create a Predefined Dashboard and Add it to the Navigation.
Register Predefined Reports in a Multi-Tenant Application
In a multi-tenant application, the host database cannot store Reports Module data. When you register a predefined report in the Module Updater, run the Reports Module Updater only if a tenant database is being updated. You can implement ModuleUpdater as follows:
public override IEnumerable<ModuleUpdater> GetModuleUpdaters(IObjectSpace objectSpace, Version versionFromDB) {

    // Adds Module Updaters required to update tenant and host databases
    ModuleUpdater updater = new DatabaseUpdate.Updater(objectSpace, versionFromDB);
    var updaters = new List<ModuleUpdater>() { updater };

    // Returns the current tenant identifier or `null` if the application runs in Host User Interface mode
    Guid? tenantId = objectSpace.ServiceProvider.GetRequiredService<ITenantProvider>().TenantId;

    // Adds Updaters that are required for tenant databases only
    if (tenantId != null) {
        PredefinedReportsUpdater predefinedReportsUpdater =
            new PredefinedReportsUpdater(Application, objectSpace, versionFromDB);
        predefinedReportsUpdater.AddPredefinedReport<XtraReport1>("Report Name", typeof(ApplicationUser));
        updaters.Add(predefinedReportsUpdater);
    }
    return updaters;
}
Refer to the following help topic for more information about predefined Reports: Create Predefined Static Reports.
Important Notes
If you encounter issues with your application update, refer to the following help topic: Deployment Troubleshooting Guide.
To prevent a module from updating the database, specify a fixed version of this modul’s assembly (for example, 1.0.0.0). Version synchronization of your WinForms and ASP.NET Core Blazor modules may be forced. The default build and revision numbers are specified with the asterisk (*), and Visual Studio automatically increments these numbers (see AssemblyVersionAttribute). This leads to a database version mismatch on each module update.
How Database is Updated in Debug Mode
The DevExpress Template Kit configures new XAF applications so that a database is created when running the application for the first time, and updated when the application’s version grows. At startup, XAF checks if the database version is older than the application’s version.
The kit adds the DatabaseVersionMismatch event handler in new Blazor, Web API, and WinForms projects to keep the application and database versions synchronized.
- SolutionName.Blazor.Server\BlazorApplication.cs
- SolutionName.WebApi\Startup.cs
- SolutionName.Win\WinApplication.cs
public class SolutionNameBlazorApplication : BlazorApplication {
    public SolutionNameBlazorApplication() {
       DatabaseVersionMismatch += SolutionNameBlazorApplication_DatabaseVersionMismatch;
       // ...
    }
    void SolutionNameBlazorApplication_DatabaseVersionMismatch(object sender, DatabaseVersionMismatchEventArgs e) {
       e.Updater.Update();
       e.Handled = true;
       // ...
If the application includes the Middle Tier Server application, the compatibility check must be performed server side. In this case, the kit adds the DatabaseVersionMismatch event handler in the Middle Tier Security application. Client applications (Blazor, Web API, and WinForms) throw an exception when the DatabaseVersionMismatch event occurs.
// File: SolutionName.MiddleTier\Startup.cs
builder.AddBuildStep(application => {
   application.CheckCompatibilityType = DevExpress.ExpressApp.CheckCompatibilityType.DatabaseSchema;
   if (application.CheckCompatibilityType == CheckCompatibilityType.DatabaseSchema) {
      application.DatabaseUpdateMode = DatabaseUpdateMode.UpdateDatabaseAlways;
      application.DatabaseVersionMismatch += (s, e) => {
            e.Updater.Update();
            e.Handled = true;
      };
   }
   //...
You can use the CustomCheckCompatibility event to implement your own custom check of the application and database compatibility, update the database, or perform other actions.
Database Update Settings
- CheckCompatibilityType
- Specifies whether XAF ensures that the database schema matches the business model or that the database version matches the application version.
- DatabaseUpdateMode
- Specifies when the application database should be updated: at every application run, when its version is older than the application version, or never (manually).
- SchemaUpdateMode
- Allows you to disable database updates for a particular Object Space.