Setup Project Deployment of a Windows Forms Application
- 3 minutes to read
This topic describes how to deploy a Windows Forms XAF application using the Setup Project method.
Important
Download and install the Setup Project template from the Visual Studio Marketplace: Microsoft Visual Studio Installer Projects 2022.
Perform the Following Steps at the Developer Workstation.
Add a Setup Project
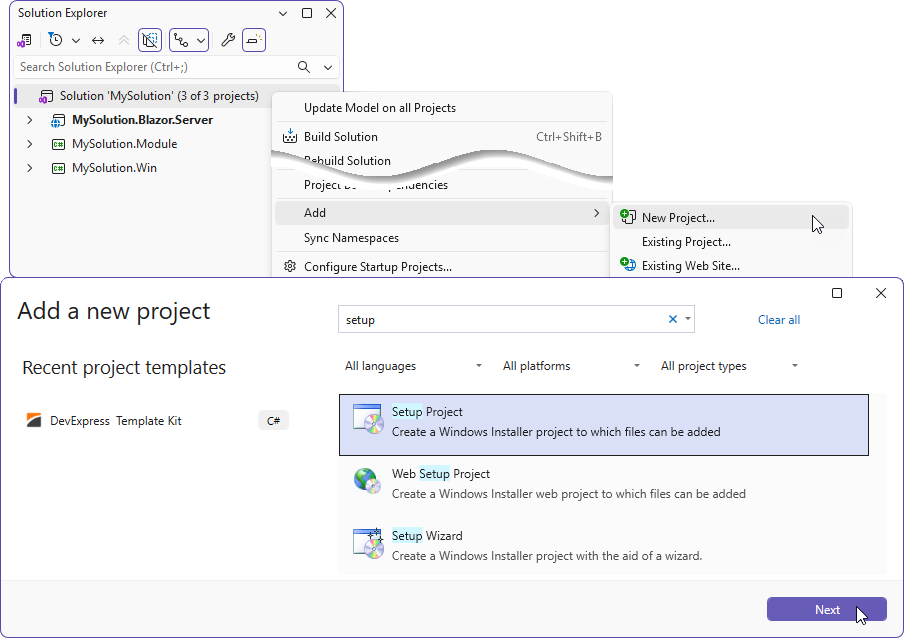
- Right-click the Solution item in the Solution Explorer and select Add | New Project…
Select Setup Project and click Next.
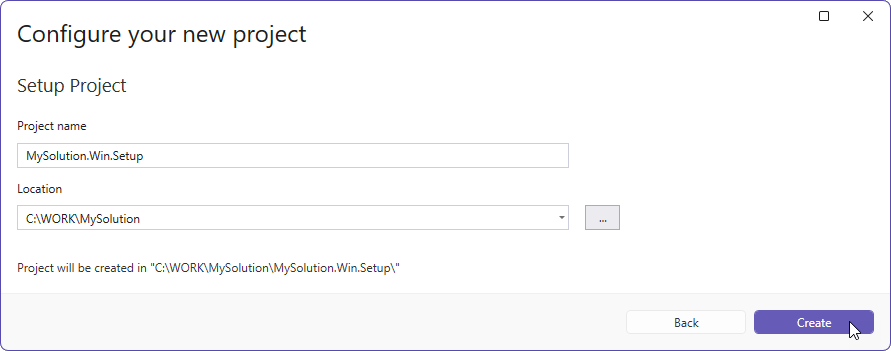
Specify the project name and click Create.
Add a Project Output
- Select Release from the Solution Configurations drop-down menu on the standard toolbar.
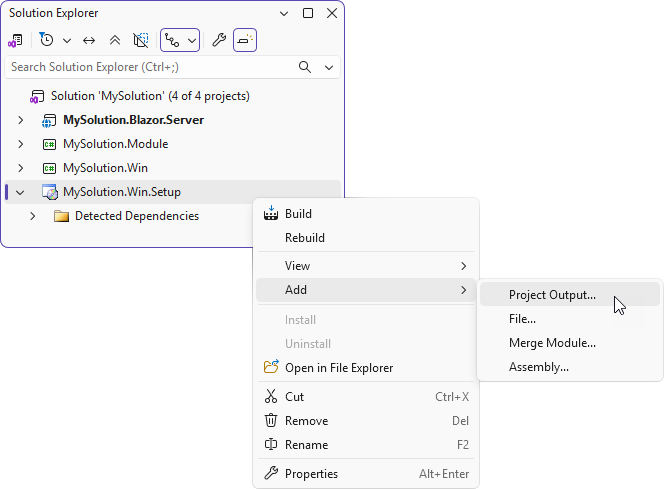
Right-click the newly created project in the Solution Explorer and select Add | Project Output…
In the invoked Add Project Output Group dialog specify the following settings:
- Select the MySolution.Win project in the Project dropdown list.
- Select the Publish Items list item.
- Select the Release Any CPU configuration.
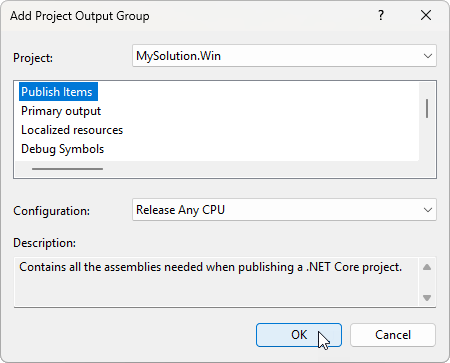
Click OK. All the dependent assemblies will be added to the Setup project.
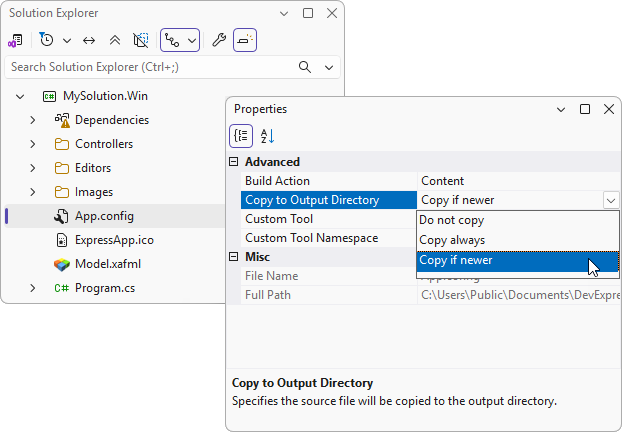
Set the Copy to Output Directory property for the MySolution.Win\App.config file to Copy if newer.
Configure Project Properties (Optional)
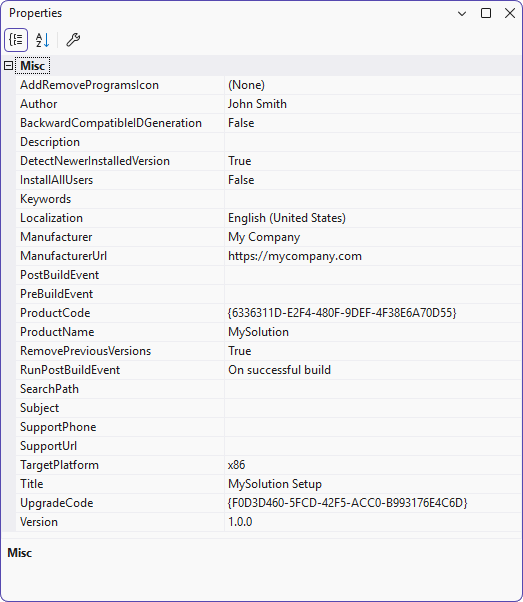
Configure MySolution.Win.Setup project properties, such as Author, Manufacturer, ProductName, and Title. Set the RemovePreviousVersions to True.
Create Desktop Shortcut (Optional)
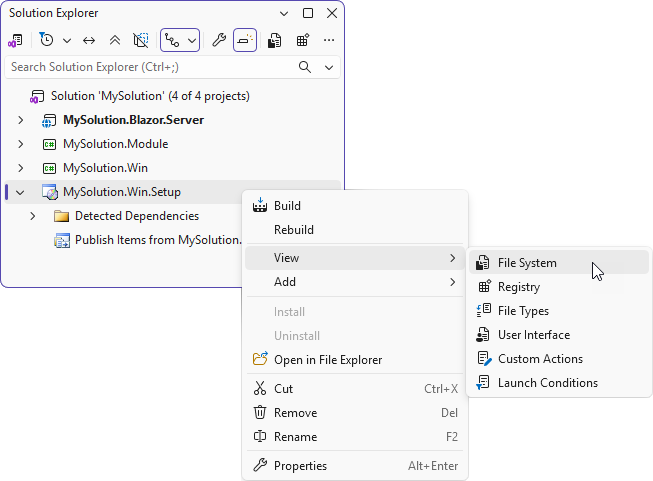
Right-click the MySolution.Win.Setup project in the Solution Explorer. In the invoked context menu, choose View | File System.
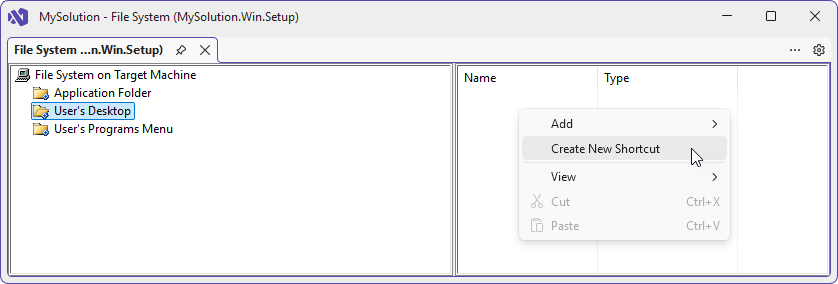
Select the User’s Desktop item. Right-click the blank space to the right and click Create New Shortcut.
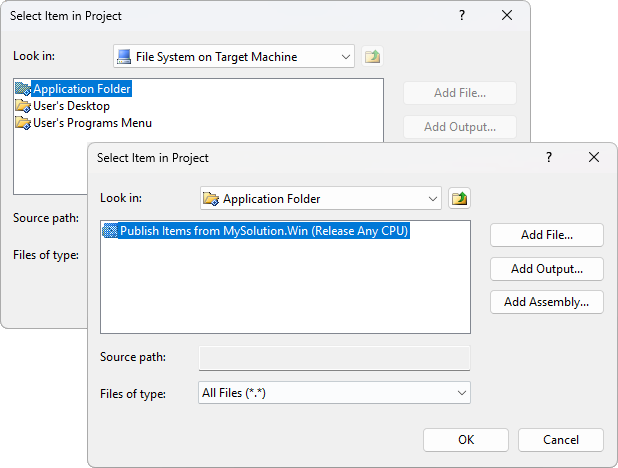
In the invoked Select Item in Project dialog, double-click the Application Folder to expand its content. Double-click the PublishItems from MySolution.Win (Release Any CPU) item to set it as the shortcut target.
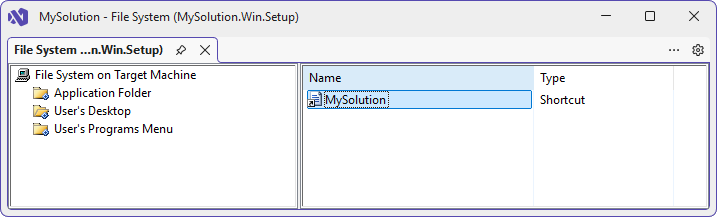
Change the shortcut name to MySolution.
Build Setup Project
Note
Ensure that the application connection string points to the production Database Server. To learn how to do this, refer to the Specify EF Core Database Provider in XAF Application topic.
Build the MySolution.Win.Setup project.
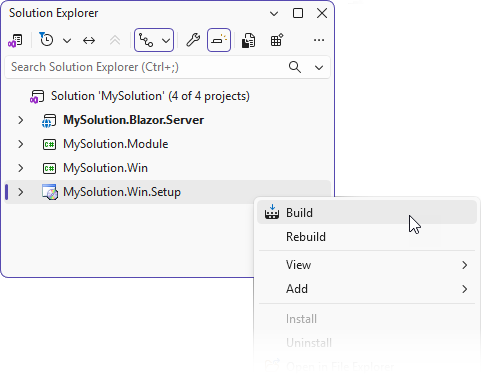
After the successful build, check that the setup.exe and MySolution.Win.Setup.msi files exist in the MySolution\MySolution.Win.Setup\Release folder. Copy these files to a location accessible by end-users.
Perform the Following Steps at Each End-User Workstation or at the Terminal Server.
- Ensure that an appropriate version of .NET is installed.
- Launch the setup.exe file as a user with administrative privileges. Follow the Setup Wizard instructions to install the application.
- Once installed, ensure that the installation folder contains application files, and there is a MySolution shortcut located on the Desktop.
Run the application.
If the application displays an error message, refer to the eXpressAppFramework.log file located in the application folder for details. If the error is related to database access, verify the application’s connection string. Refer to the following help topic for detailed information: Set Up the Database Connection for a Deployed Application.
If you are deploying your Windows Forms application to the Terminal Server, follow the steps from the following lesson to learn how to provide end-users with access to the application: Connect Clients to the Terminal Server.