Report Designer Server-Side Configuration (ASP.NET Core)
- 7 minutes to read
This document describes how to create and configure an ASP.NET Core application as a server-side solution to use the End-User Web Report Designer in JavaScript. You can use the DevExpress or Visual Studio template to create an application.
Step 1. Create an ASP.NET Core Application
Use DevExpress Template
You can use the Template Gallery to create a new ASP.NET Core project as follows:
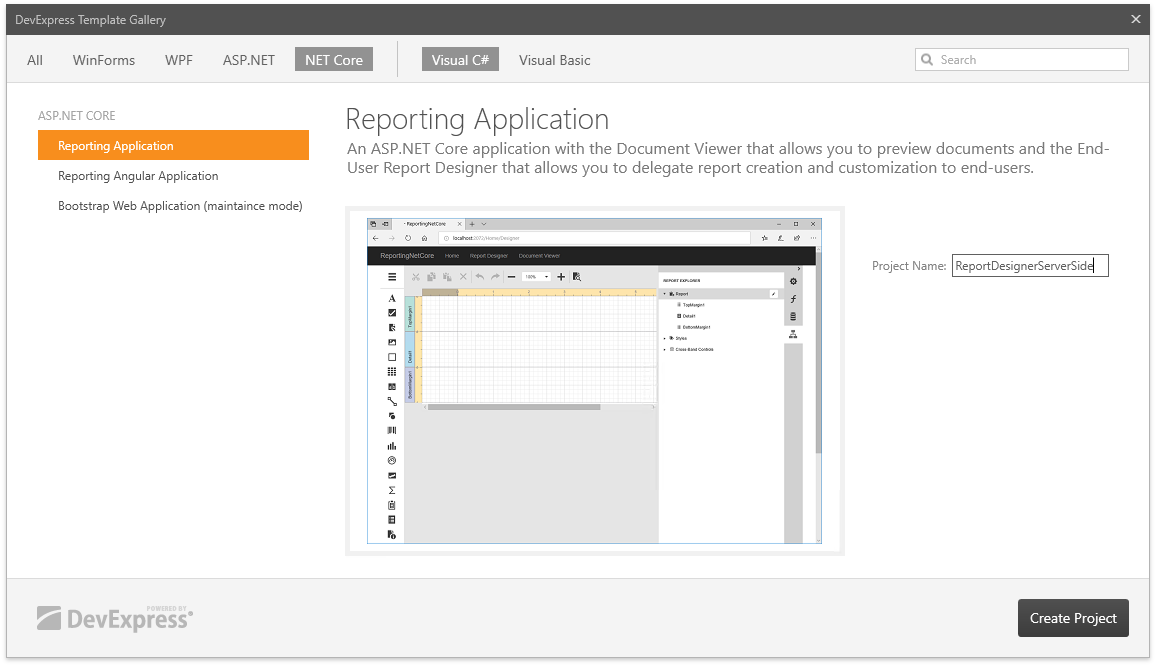
Invoke the DevExpress Template Gallery, select Reporting Application under the ASP .NET Core category and click Create Project.
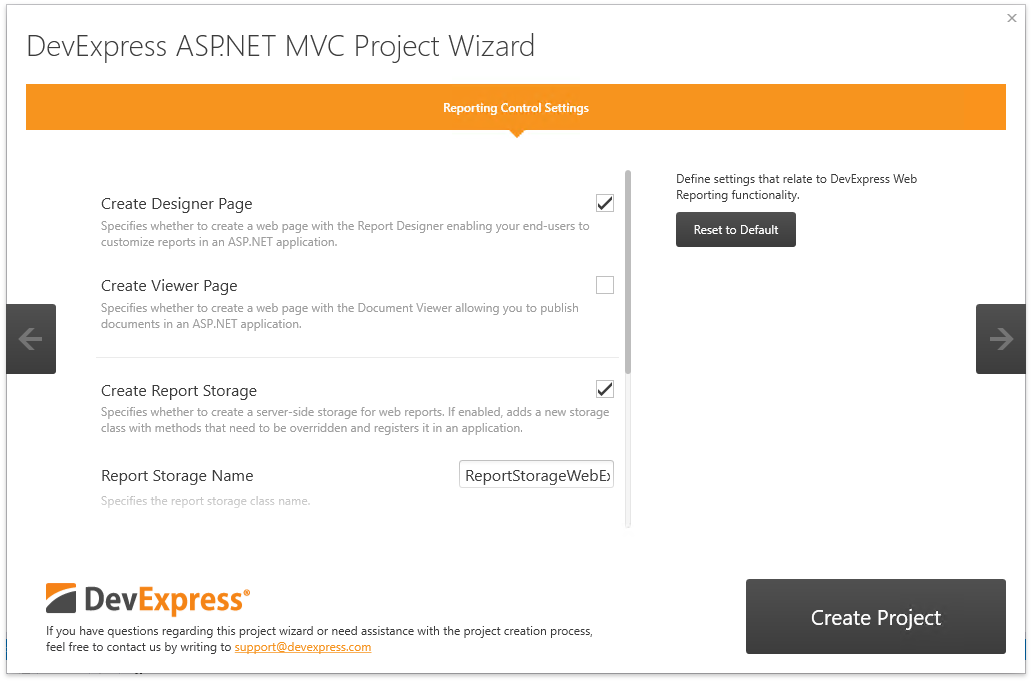
In the DevExpress ASP.NET MVC Project Wizard, enable the Create Designer Page and Create Report Storage check boxes and click Create Project.
(optionally) Open the ReportStorageWebExtension file and customize the report storage implementation.
Note
The template generates a sample storage (a ReportStorageWebExtension descendant) for demonstration purposes only. Create your own implementation for use in production.
For a detailed tutorial, refer to the following help topic: Create an ASP.NET Core Application with a Report Designer.
Use Microsoft Visual Studio Template
You can create an ASP.NET Core application based on the built-in Visual Studio template and configure it for the DevExpress Report Designer as follows:
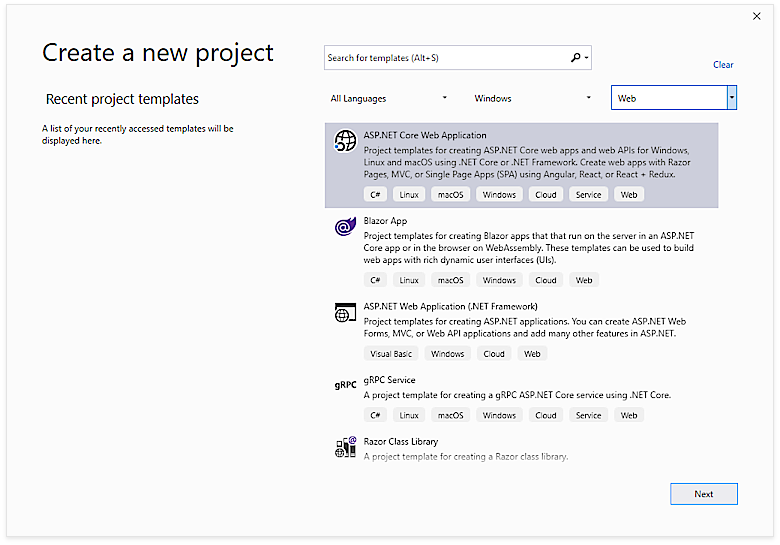
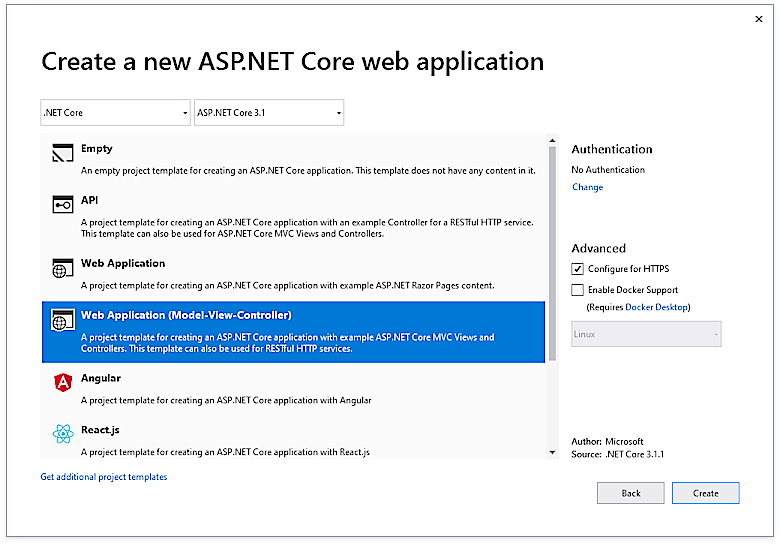
- Create a new ASP.NET Core Web Application (or open an existing application).
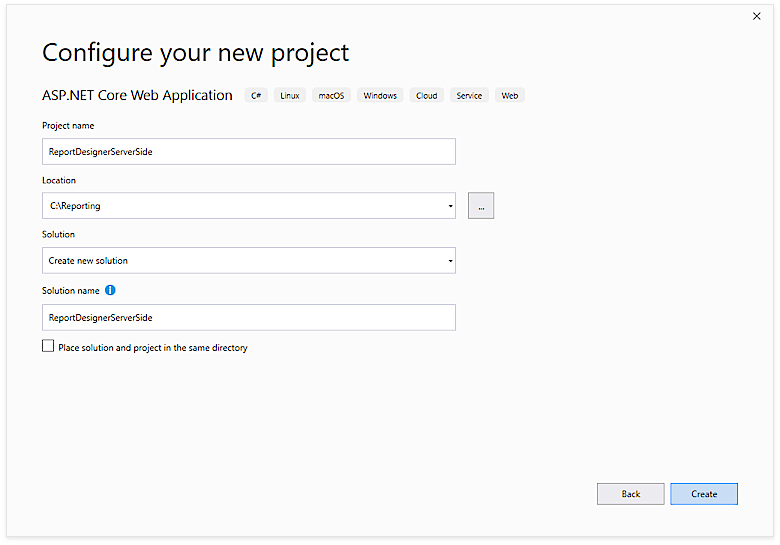
- Configure a new project.
Select Web Application (Model-View-Controller).
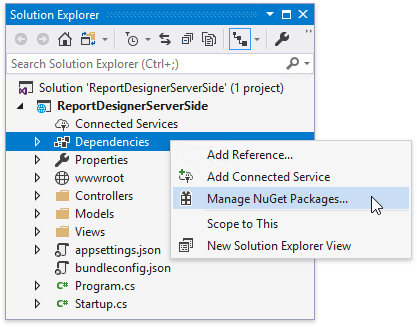
Right-click the Dependencies node in the Solution Explorer and select Manage NuGet Packages in the invoked context menu.
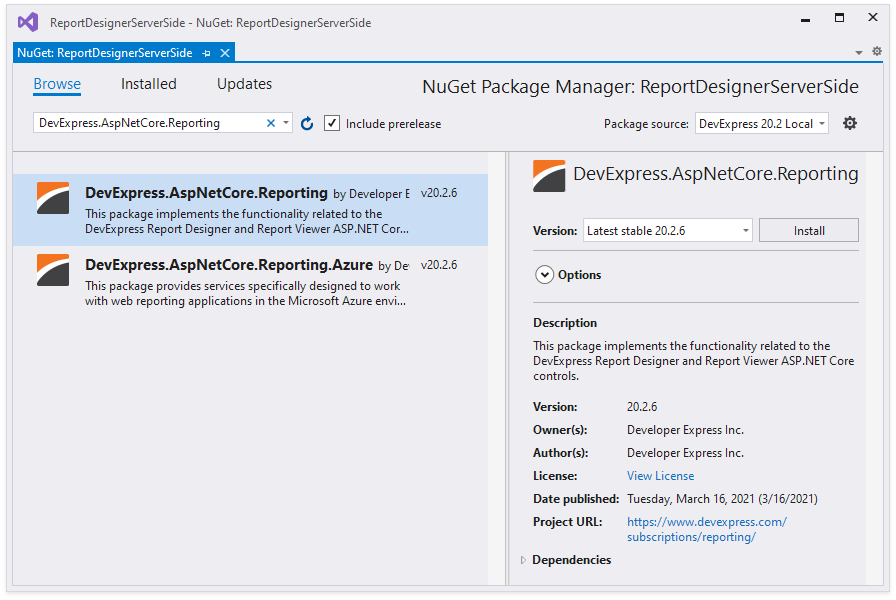
Select DevExpress 20.2 Local in the Package source drop-down list and go to the Browse page. Find the DevExpress.AspNetCore.Reporting package v20.2.13 and install it.
Open the Startup file and modify it to configure services as demonstrated below.
using DevExpress.AspNetCore;
using DevExpress.AspNetCore.Reporting;
//...

public class Startup {
//...
   public void ConfigureServices(IServiceCollection services) {
     // Register reporting services in an application's dependency injection container.
      services.AddDevExpressControls();
      // Use the AddMvcCore (or AddMvc) method to add MVC services.
       services.AddMvcCore();
 }

 public void Configure(IApplicationBuilder app, IHostingEnvironment env) {
       // ...
       // Initialize reporting services.
       app.UseDevExpressControls();
        // ...
  }
}
Create the
Reportsfolder and add a report to the application. Use theSavecommand in the Visual Studio Report Designer smart tag to save the created report to a file in Report Xml (.repx) format in theReportsfolder.Add a server-side report storage. To implement a report storage, add a new class, inherit it from the abstract ReportStorageWebExtension class and override its methods:
using DevExpress.XtraReports.UI;
using Microsoft.AspNetCore.Hosting;
using System;
using System.Collections.Generic;
using System.IO;
using System.Linq;

namespace ReportDesignerServerSide
{
    public class CustomReportStorageWebExtension : DevExpress.XtraReports.Web.Extensions.ReportStorageWebExtension
    {
        readonly string ReportDirectory;
        const string FileExtension = ".repx";
        public ReportStorageWebExtension1(IWebHostEnvironment env)
        {
            ReportDirectory = Path.Combine(env.ContentRootPath, "Reports");
            if (!Directory.Exists(ReportDirectory))
            {
                Directory.CreateDirectory(ReportDirectory);
            }
        }

        public override bool CanSetData(string url) { return true; }
        public override bool IsValidUrl(string url) { return true; }
        public override byte[] GetData(string url)
        {
            try
            {
                if (Directory.EnumerateFiles(ReportDirectory).
                    Select(Path.GetFileNameWithoutExtension).Contains(url))
                {
                    return File.ReadAllBytes(Path.Combine(ReportDirectory, url + FileExtension));
                }
                throw new DevExpress.XtraReports.Web.ClientControls.FaultException(
                    string.Format("Could not find report '{0}'.", url));
            }
            catch (Exception)
            {
                throw new DevExpress.XtraReports.Web.ClientControls.FaultException(
                    string.Format("Could not find report '{0}'.", url));
            }
        }

        public override Dictionary<string, string> GetUrls()
        {
            return Directory.GetFiles(ReportDirectory, "*" + FileExtension)
                                     .Select(Path.GetFileNameWithoutExtension)
                                     .ToDictionary<string, string>(x => x);
        }

        public override void SetData(XtraReport report, string url)
        {
            report.SaveLayoutToXml(Path.Combine(ReportDirectory, url + FileExtension));
        }

        public override string SetNewData(XtraReport report, string defaultUrl)
        {
            SetData(report, defaultUrl);
            return defaultUrl;
        }
    }
}
Review the following help topic for more information and examples: Add Report Storage to ASP.NET Core Application.
Register the report storage implemented in the previous step as a scoped service. Open the Startup.cs file and add the following code in the ConfigureServices method:
using DevExpress.XtraReports.Web.Extensions;
// ...
public void ConfigureServices(IServiceCollection services) {
    //...
    services.AddScoped<ReportStorageWebExtension, CustomReportStorageWebExtension>();
    //...
}
Step 2. Configure the Application
Use CORS Policy
Enable cross-origin requests (CORS) in the newly created ASP.NET Core application. In the ConfigureServices method, specify the policy that allows any local application to access the report’s back-end. Use the SetIsOriginAllowed method to set it up. Open the Startup.cs file and insert the following code:
//...

public class Startup {
//...
    public void ConfigureServices(IServiceCollection services) {
        // ...
            services.AddCors(options => {
                options.AddPolicy("AllowCorsPolicy", builder => {
                    // Allow all ports on local host.
                    builder.SetIsOriginAllowed(origin => new Uri(origin).Host == "localhost");
                    builder.WithHeaders("Content-Type");
                });
            });
        // ...
    }
// ...
}
In the Configure method, call the UseCors method.
Important
The UseCors method should be called after the UseRouting method and before any MVC-related code. Place the UseCors method before the UseMvc or UseEndpoints methods.
Pass the policy name as a parameter:
//...
public class Startup {
//...
    public void Configure(IApplicationBuilder app, IHostingEnvironment env) {
        // ...
        app.UseRouting();
        // ...
        app.UseCors("AllowCorsPolicy");
        // ...
        app.UseEndpoints(endpoints => {
            endpoints.MapControllerRoute(
                name: "default",
                pattern: "{controller=Home}/{action=Index}/{id?}");
        });
    }
// ...
}
Add a Controller
Create a controller and add an action to create the Report Designer model. In this action, use the ReportDesignerClientSideModelGenerator class and provide the following initialization data:
- the report name (reportURL) (required);
- available data sources (optional);
- default reporting controller URIs (required).
using Microsoft.AspNetCore.Mvc;
using DevExpress.XtraReports.Web.ReportDesigner;
//...
public class ReportDesignerController : Controller {
    //...
    public ActionResult GetReportDesignerModel([FromForm] string reportUrl,
    [FromServices] IReportDesignerClientSideModelGenerator reportDesignerClientSideModelGenerator)
    {
        string modelJsonScript =
            reportDesignerClientSideModelGenerator
            .GetJsonModelScript(
                // The name of a report (reportUrl)
                // that the Report Designer opens when the application starts.
                reportUrl,
                // Data sources for the Report Designer.
                GetAvailableDataSources(),
                // The URI path of the default controller
                // that processes requests from the Report Designer.
                DevExpress.AspNetCore.Reporting.ReportDesigner.ReportDesignerController.DefaultUri,
                // The URI path of the default controller
                // that processes requests from the Web Document Viewer.
                DevExpress.AspNetCore.Reporting.WebDocumentViewer.WebDocumentViewerController.DefaultUri,
                // The URI path of the default controller
                // that processes requests from the Query Builder.
                DevExpress.AspNetCore.Reporting.QueryBuilder.QueryBuilderController.DefaultUri
            );
        return Content(modelJsonScript, "application/json");
    }
}
You can customize controllers and change routes, but it is not necessary in most situations. The following table lists controllers that process requests from reporting components, and their default routes:
| Component | Controller | Predefined Route |
|---|---|---|
| Report Designer | ReportDesignerController | DXXRD |
| Document Viewer | WebDocumentViewerController | DXXRDV |
| Query Builder | QueryBuilderController | DXXQB |
An application with End-User Report Designer requires all three controllers for proper operation.
To implement a custom controller, create a descendant of the class listed above and use the HandlerUri property to specify the route:
| Component | Handler Uri |
|---|---|
| Report Designer | ReportDesignerHandlerUri, ReportPreviewHandlerUri, QueryBuilderHandlerUri |
| Document Viewer | HandlerUri |
For more code samples with custom controllers, review the following example:
Add Data Sources
Implement a method declared in the previous step that creates data sources for the Report Designer (the GetAvailableDataSources method in this example).
using System.Collections.Generic;
using DevExpress.DataAccess.Sql;

public class ReportDesignerController : ReportDesignerApiController {
    // ...

    Dictionary<string, object> GetAvailableDataSources() {
        var dataSources = new Dictionary<string, object>();
        SqlDataSource ds = new SqlDataSource("NWindConnectionString");
        var query = SelectQueryFluentBuilder.AddTable("Products").SelectAllColumns().Build("Products");
        ds.Queries.Add(query);
        ds.RebuildResultSchema();
        dataSources.Add("SqlDataSource", ds);
        return dataSources;
    }
}
If you started with the DevExpress template to create an application, the project already contains the SQLite database and the
NWindConnectionStringis a connection string for this database.If you started with the Microsoft generic template, create the NorthWind sample database on the local SQL Server and add the following element to the
appsettings.jsonfile:"ConnectionStrings": { "NWindConnectionString": "XpoProvider=MSSqlServer;data source=localhost;integrated security=SSPI;initial catalog=Northwind" }
Run the Application
Step 3. Determine the Host URL
Examine the address string in the browser to determine the host URL and application port.
You can use the Debug section of the Project Properties dialog to view and change the port number:
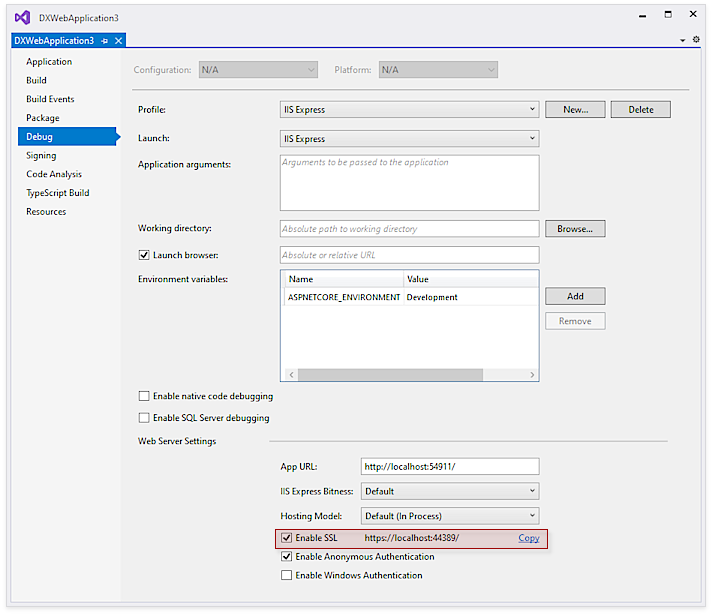
If you do not use Visual Studio to run the project, inspect the launchSettings.json file. If your application uses HTTPS redirection and calls the UseHttpsRedirection method at startup, the port number is specified in the sslPort setting.
The URL and port number are required for the host setting when you configure the client application as described in the following help topics:
- Create an Angular Front-End Application with a Report Designer
- Report Designer Integration in React
- Report Designer Integration in Vue