Basic Report Designer Integration (with Node.js Package Manager)
- 4 minutes to read
You can use the End-User Web Report Designer in JavaScript based on the server-side model. You should create two projects: a server (backend) project and a client (frontend) part that includes all the necessary styles, scripts, and HTML-templates.
Important
Perform the steps from one of the following topics to prepare a backend application:
This document describes how to create the client part, install the required npm packages and create a bundle with Webpack:
- Install Node.js and npm if they do not exist on your machine.
Open the console window and execute the following command to install the Webpack CLI globally:
npm install -g webpack

npm install -g webpack-cli
Create a new folder to store all the files related to the client-side functionality (for instance, name it ClientSide).
Add the package.json configuration file to the created folder and list the following third-party packages the Web Report Designer requires:
{
    "name": "report-designer",
    "version": "1.0.0",
    "dependencies": {
        "devextreme": "~19.2.15",
        "devexpress-richedit": "~19.2.15",
        "@devexpress/analytics-core": "~19.2.15",
        "devexpress-reporting": "~19.2.15"
    },
    "devDependencies": {
        "webpack": "~4.10.1",
        "file-loader": "~2.0.0",
        "html-loader": "~0.5.4"
    }
}
Note
Frontend and backend applications should use the same version of DevExpress controls.
Tip
Add the devexpress-richedit package if you want to enable the Rich Text Editor for the XRRichText control.
Navigate to your folder, open the console and run the command below to install packages:
npm installYou can find all the libraries in the node_modules folder after installation is completed.
Create a new webpack.config.js file and specify configuration settings as shown below. Define the index.js file as the bundle’s entry point (this file is created later) and the bundle.js file as the output file.
var path = require('path');
var webpack = require('webpack');

module.exports = {
    entry: './index.js',
    output: {
        filename: 'bundle.js'
    },
    mode: "development",
    module: {
        rules: [
            {
                test: /\.html$/,
                loader: "html-loader"
            },
            {
                test: /\.css$/,
                loader: "style-loader"
            }
        ]
    }
};
Create a View file (the index.html file in this example) and specify this View’s HTML template. At the body section, use the dxReportDesigner binding with the designerOptions parameter and link the bundle script file (bundle.js) specified at the previous step.
<!DOCTYPE html>
<html>
    <head>
         <!-- ... -->
    </head>

    <body>
        <div style="width:100%; height: 1000px" data-bind="dxReportDesigner: designerOptions"></div>
        <!-- Include the bundle script -->
        <script type="text/javascript" src="dist/bundle.js" charset="utf-8"></script>
    </body>
</html>
Add a new JavaScript file (index.js) to provide data to the View. Link the required modules, create the designerOptions variable and activate the Knockout bindings.
var $ = require('jquery');
var ko = require('knockout');

require('devexpress-reporting/dx-reportdesigner')
require('devexpress-reporting/dx-richedit')

const
    host = 'http://localhost:54111/', // URI of your backend project.
    reportUrl = "Products";
    var viewModel = {
        designerOptions: {
            reportUrl: reportUrl, // The URL of a report that is opened in the Report Designer when the application starts.
            requestOptions: { // Options for processing requests from the Report Designer.
                host: host,
                getDesignerModelAction: "/ReportDesigner/GetReportDesignerModel" // Action that returns the Report Designer model.
            },
        }
    };
ko.applyBindings(viewModel);
Create a new style.css file with the following content:
@import url("node_modules/jquery-ui/themes/base/all.css");
@import url("node_modules/devextreme/dist/css/dx.common.css");
@import url("node_modules/devextreme/dist/css/dx.light.css");
@import url("node_modules/devexpress-richedit/dist/dx.richedit.css");
@import url("node_modules/@devexpress/analytics-core/dist/css/dx-analytics.common.css");
@import url("node_modules/@devexpress/analytics-core/dist/css/dx-analytics.light.css");
@import url("node_modules/@devexpress/analytics-core/dist/css/dx-querybuilder.css");
@import url("node_modules/devexpress-reporting/dist/css/dx-webdocumentviewer.css");
@import url("node_modules/devexpress-reporting/dist/css/dx-reportdesigner.css");
Link this file in the index.html file’s head section.
...
<head>
    <link rel="stylesheet" type="text/css" href="style.css" />
</head>
...
Run the following command in the console to create the bundle:
webpackHost your client-side part on the web server.
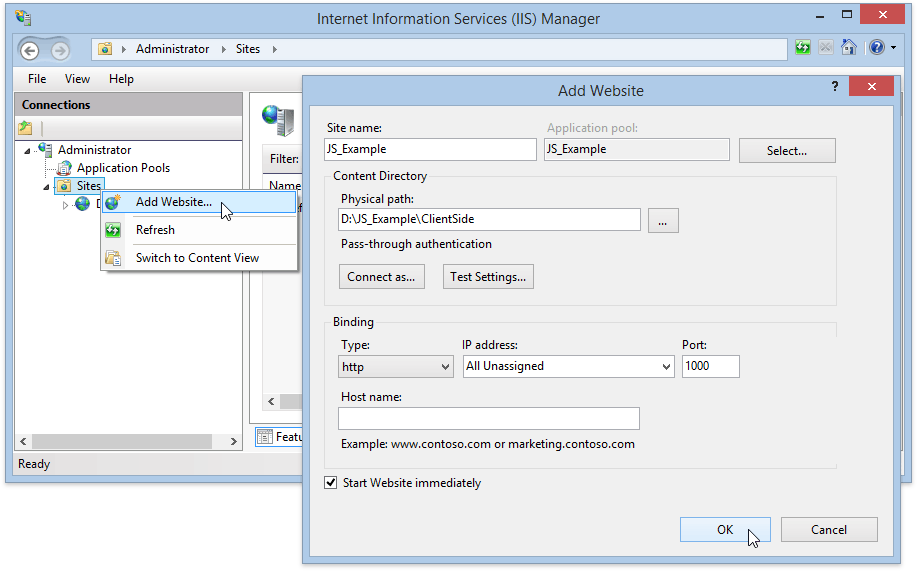
For instance, start the Internet Information Services (IIS) Manager, right-click the Sites item in the Connections section and select Add Website. In the invoked dialog, specify the site name, path to the folder with the client-side functionality, and the website’s IP address.
- For the example to work correctly, you should first run a backend project in Visual Studio, and then, run a client part.