How To: Generate Data Access Layer with Entity Framework Database First
- 3 minutes to read
This topic gives a step-by-step description of how to connect to a database and generate the Data Access Layer with the Entity Framework.
Note
In this tutorial, you will use the newly improved and freely distributed Northwind database commonly used for demonstration purposes. You can download our version from here, or continue with the standard Northwind database provided by Microsoft.
Create an empty WPF application (you can use the Template Gallery to do this), or open an existing project and follow the following steps.
The complete sample project is available in the DevExpress Code Examples database at: http://www.devexpress.com/example=T319499.
Run Entity Data Model Wizard
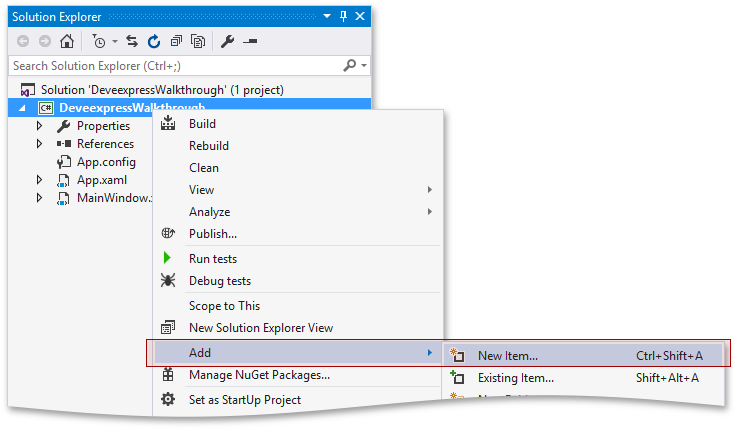
To connect to a database and construct an Entity Framework data model, right-click the project in the Solution Explorer and select the Add | New Item option.
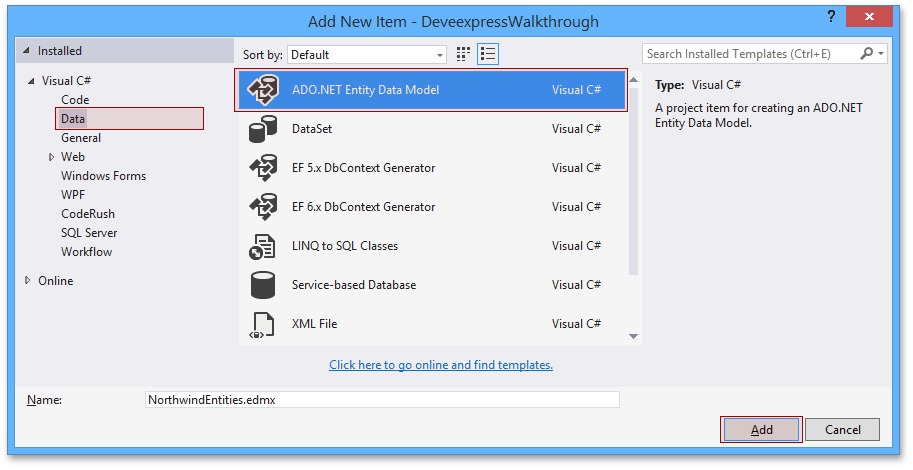
Next, in the Data category, select the ADO.NET Entity Data Model item, set its name and click Add.
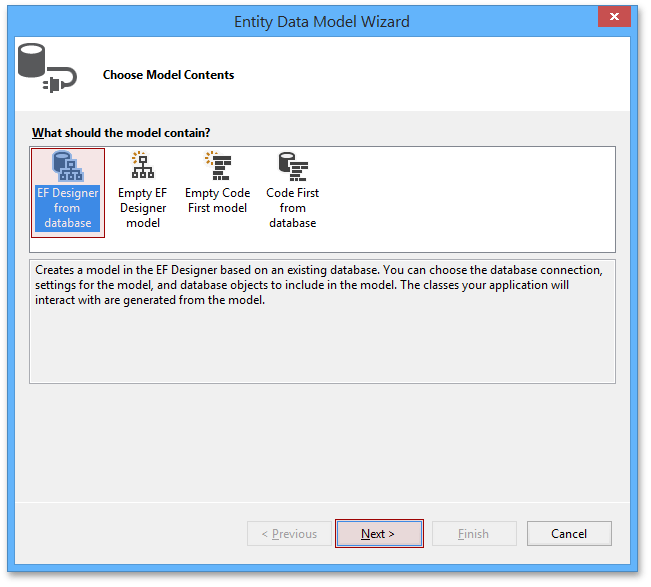
The standard Entity Data Model Wizard is displayed. Select EF Designer from database and click Next to specify the connection settings.
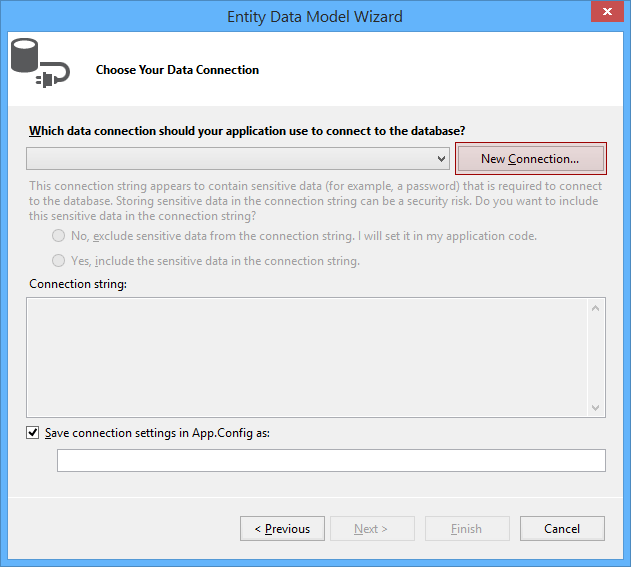
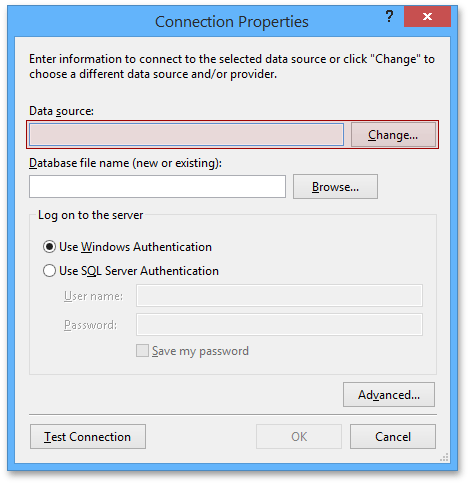
Click the New Connection button to set connection properties.
Set Connection Properties
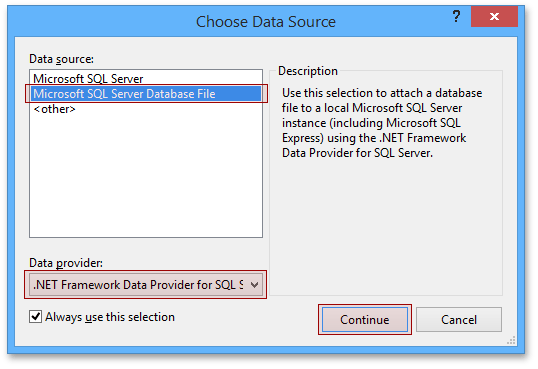
In the Connection Properties window, click the Change button and select the Microsoft SQL Server Database File as the data source provider.
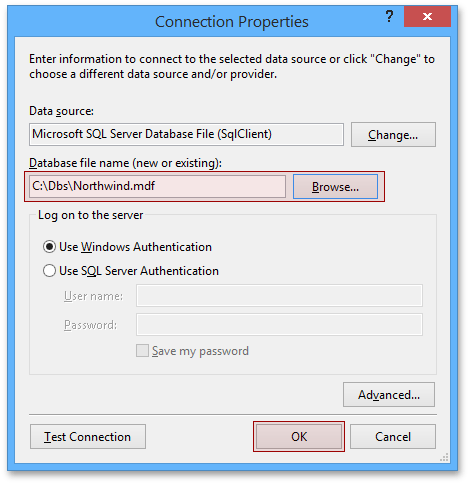
Next, click the Browse button in the Connection Properties window to locate the database file, and then click OK.
Complete Model Generation
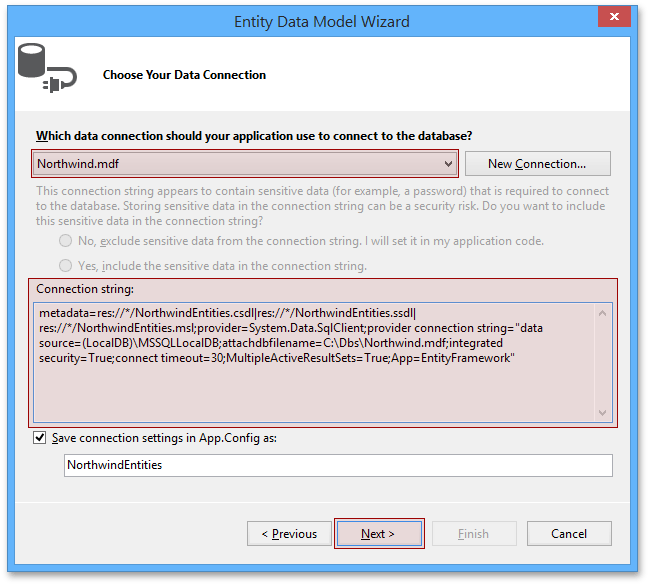
When the data source is chosen, Visual Studio shows the connection string in the Entity Data Model Wizard. Check this information and click Next.
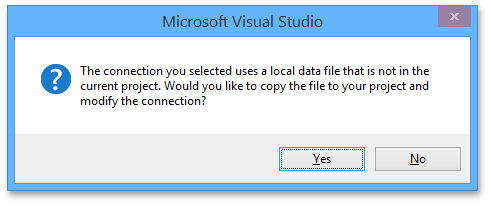
Next, Visual Studio asks whether to copy the database file to your project. You can select Yes or No, based on your requirements.
Note
Visual Studio may ask you to choose the Entity Framework version. DevExpress Scaffolding Wizards do not support Entity Framework versions older than 6. If you working with a version older than 6, you will need to upgrade to Entity Framework 6.
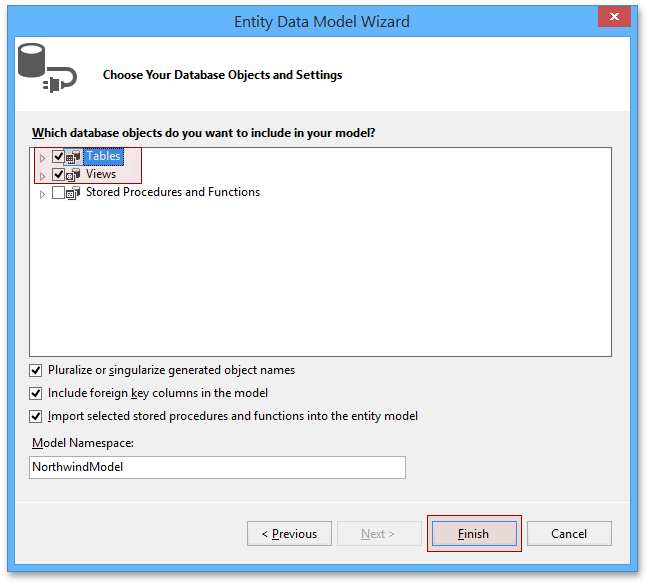
After that, you will see the database structure. In this screen, you can select tables and views to include them in the model.
Rebuild the project to compile the generated classes.
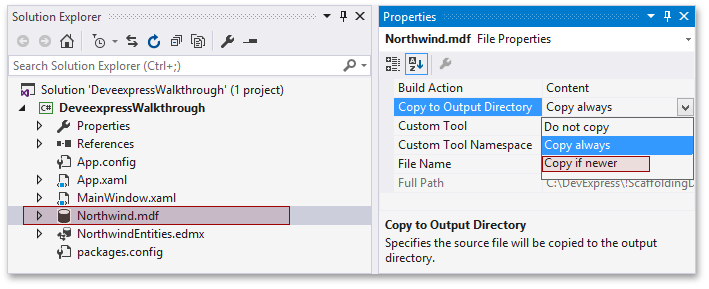
If you chose to add a database file to a project, then a database is copied to the output directory each time the project is rebuilt – this is default behavior. That is, changes made to data are discarded after rebuilding. If you would like the database file to persist, select the database from the Solution Explorer and set its Copy to Output Directory property to Copy if newer. This way, the database is only replaced when scheme conflicts are detected.
What is Next?
When, the Data Access Layer is generated, you can use our Scaffolding Wizard to generate the other parts of a database-oriented application. The UI Generation topic describes how to do this step-by-step.