Create a Blazor WebAssembly Dashboard Application
- 5 minutes to read
Important
If you are not familiar with basic Blazor concepts and patterns of Blazor, please review product fundamentals before you continue: Introduction to ASP.NET Core Blazor
You can also watch free training videos on Blazor: Free Blazor Training Course
This tutorial adds a new page with a Dashboard component to a Blazor WebAssembly application. The Dashboard component wraps the JavaScript DashboardControl and uses an ASP.NET Core backend with the Dashboard Controller to handle client data requests.
You can also download the pre-configured example and use it as a template to get started:
Prerequisites
To use the Dashboard component for Blazor, make sure that the following requirements are met:
- .NET 8.0 SDK or later
- Visual Studio 2022 version 17.0 or higher with the ASP.NET and web development workload
- DevExpress Universal Subscription v25.2
Create a Blazor Application
Create a new Blazor app named BlazorDashboardApp. Use one of the following options:
- In Visual Studio, select the Blazor WebAssembly App template and enable the ASP.NET Core hosted check box.
Run this console command:
dotnet new blazorwasm -n BlazorDashboardApp --hosted
Note
The hosted Blazor WebAssembly project template isn’t available in ASP.NET Core 8.0 or later. To create a hosted Blazor WebAssembly app, a Framework option earlier than .NET 8.0 must be selected with the ASP.NET Core Hosted checkbox.
For more information, refer to the following article: Tooling for ASP.NET Core Blazor.
Configure the Server Part
Open the BlazorDashboardApp.Server project and configure it as follows:
Install the NuGet Package
In the project, open the NuGet Package Manager and set the package source to All. Install the following NuGet packages:
DevExpress.AspNetCore.Dashboard
Refer to the following topic to install and manage libraries using the DevExpress NuGet feed: Setup Visual Studio’s NuGet Package Manager.
Configure the Dashboard Controller
In the Controller folder, create an empty MVC Controller named DefaultDashboardController. Inherit the DashboardController:
using DevExpress.DashboardAspNetCore;
using DevExpress.DashboardWeb;
using Microsoft.AspNetCore.DataProtection;

namespace BlazorDashboardApp.Server {
    public class DefaultDashboardController : DashboardController {
        public DefaultDashboardController(DashboardConfigurator configurator, IDataProtectionProvider? dataProtectionProvider = null)
            : base(configurator, dataProtectionProvider) {
        }
    }
}
In the project, create the Data/Dashboards folder to store dashboards.
In the Program.cs file, add services for DevExpress Controls and set up the dashboard backend. The controllerName parameter in the RouteBuilderExtension.MapDashboardRoute method is the name of the controller you created in the previous step (without Controller postfix):
using DevExpress.AspNetCore;
using DevExpress.DashboardAspNetCore;
using DevExpress.DashboardCommon;
using DevExpress.DashboardWeb;
using DevExpress.DataAccess.Json;
using Microsoft.Extensions.FileProviders;

var builder = WebApplication.CreateBuilder(args);

IFileProvider fileProvider = builder.Environment.ContentRootFileProvider;
IConfiguration configuration = builder.Configuration;

// Add services to the container.
builder.Services.AddControllersWithViews();
builder.Services.AddRazorPages();
builder.Services.AddDevExpressControls();
builder.Services.AddScoped<DashboardConfigurator>((IServiceProvider serviceProvider) => {
    DashboardConfigurator configurator = new DashboardConfigurator();
    // Register Dashboard Storage
    configurator.SetDashboardStorage(new DashboardFileStorage(fileProvider.GetFileInfo("Data/Dashboards").PhysicalPath));
    // Create a sample JSON data source
    DataSourceInMemoryStorage dataSourceStorage = new DataSourceInMemoryStorage();
    DashboardJsonDataSource jsonDataSourceUrl = new DashboardJsonDataSource("JSON Data Source (URL)");
    jsonDataSourceUrl.JsonSource = new UriJsonSource(
            new Uri("https://raw.githubusercontent.com/DevExpress-Examples/DataSources/master/JSON/customers.json"));
    jsonDataSourceUrl.RootElement = "Customers";
    dataSourceStorage.RegisterDataSource("jsonDataSourceUrl", jsonDataSourceUrl.SaveToXml());
    configurator.SetDataSourceStorage(dataSourceStorage);
    return configurator;
});

var app = builder.Build();

// Configure the HTTP request pipeline.
if (app.Environment.IsDevelopment()) {
    app.UseWebAssemblyDebugging();
} else {
    app.UseExceptionHandler("/Error");
    // The default HSTS value is 30 days. You may want to change this for production scenarios, see https://aka.ms/aspnetcore-hsts.
    app.UseHsts();
}

app.UseHttpsRedirection();

app.UseBlazorFrameworkFiles();
app.UseStaticFiles();
app.UseDevExpressControls();
app.UseRouting();
app.MapDashboardRoute("api/dashboard", "DefaultDashboard");

app.MapRazorPages();
app.MapControllers();
app.MapFallbackToFile("index.html");

app.Run();
Configure the Client Part
Open the BlazorDashboardApp.Client project and configure it as follows:
Install NuGet Packages
Install the DevExpress.Blazor.Dashboard NuGet package.
Refer to the following topic to install and manage libraries using the DevExpress NuGet feed: Setup Visual Studio’s NuGet Package Manager.
Add Stylesheets
In the wwwroot folder, open the index.html file, and reference the following stylesheets:
<head>
<!-- ... -->
    <link href="_content/DevExpress.Blazor.Dashboard/ace.css" rel="stylesheet" />
    <link href="_content/DevExpress.Blazor.Dashboard/ace-theme-dreamweaver.css" rel="stylesheet" />
    <link href="_content/DevExpress.Blazor.Dashboard/ace-theme-ambiance.css" rel="stylesheet" />
    <link href="BlazorDashboardApp.Client.styles.css" rel="stylesheet" />
    <link href="_content/DevExpress.Blazor.Dashboard/dx.light.css" rel="stylesheet" />
    <link href="_content/DevExpress.Blazor.Dashboard/dx-analytics.common.css" rel="stylesheet" />
    <link href="_content/DevExpress.Blazor.Dashboard/dx-analytics.light.css" rel="stylesheet" />
    <link href="_content/DevExpress.Blazor.Dashboard/dx-querybuilder.css" rel="stylesheet" />
    <link href="_content/DevExpress.Blazor.Dashboard/dx-dashboard.light.min.css" rel="stylesheet" />
</head>
Add References
In the _Imports.razor file, add the DevExpress.DashboardBlazor and DevExpress.DashboardWeb references.
@using DevExpress.DashboardBlazor
@using DevExpress.DashboardWeb
Add the Dashboard Component
In the Pages folder, add a new Dashboard Razor component (Dashboard.razor) to the app and add the following code sample to render the Web Dashboard. Set the Endpoint property to the same value you use in the MapDashboardRoute method (api/dashboard) to send data requests to the server:
@page "/dashboard"

<DxDashboard Endpoint="api/dashboard" style="width: 100%; height: 800px;">
</DxDashboard>
Add Navigation
In the Shared/NavMenu.razor file, add a new NavLink component to the list to display the Web Dashboard item in the navigation menu:
<div class="@NavMenuCssClass" @onclick="ToggleNavMenu">
    <nav class="flex-column">
        <div class="nav-item px-3">
            <NavLink class="nav-link" href="" Match="NavLinkMatch.All">
                <span class="oi oi-home" aria-hidden="true"></span> Home
            </NavLink>
        </div>
        <div class="nav-item px-3">
            <NavLink class="nav-link" href="dashboard">
                <span class="oi oi-list-rich" aria-hidden="true"></span> Web Dashboard
            </NavLink>
        </div>
    </nav>
</div>
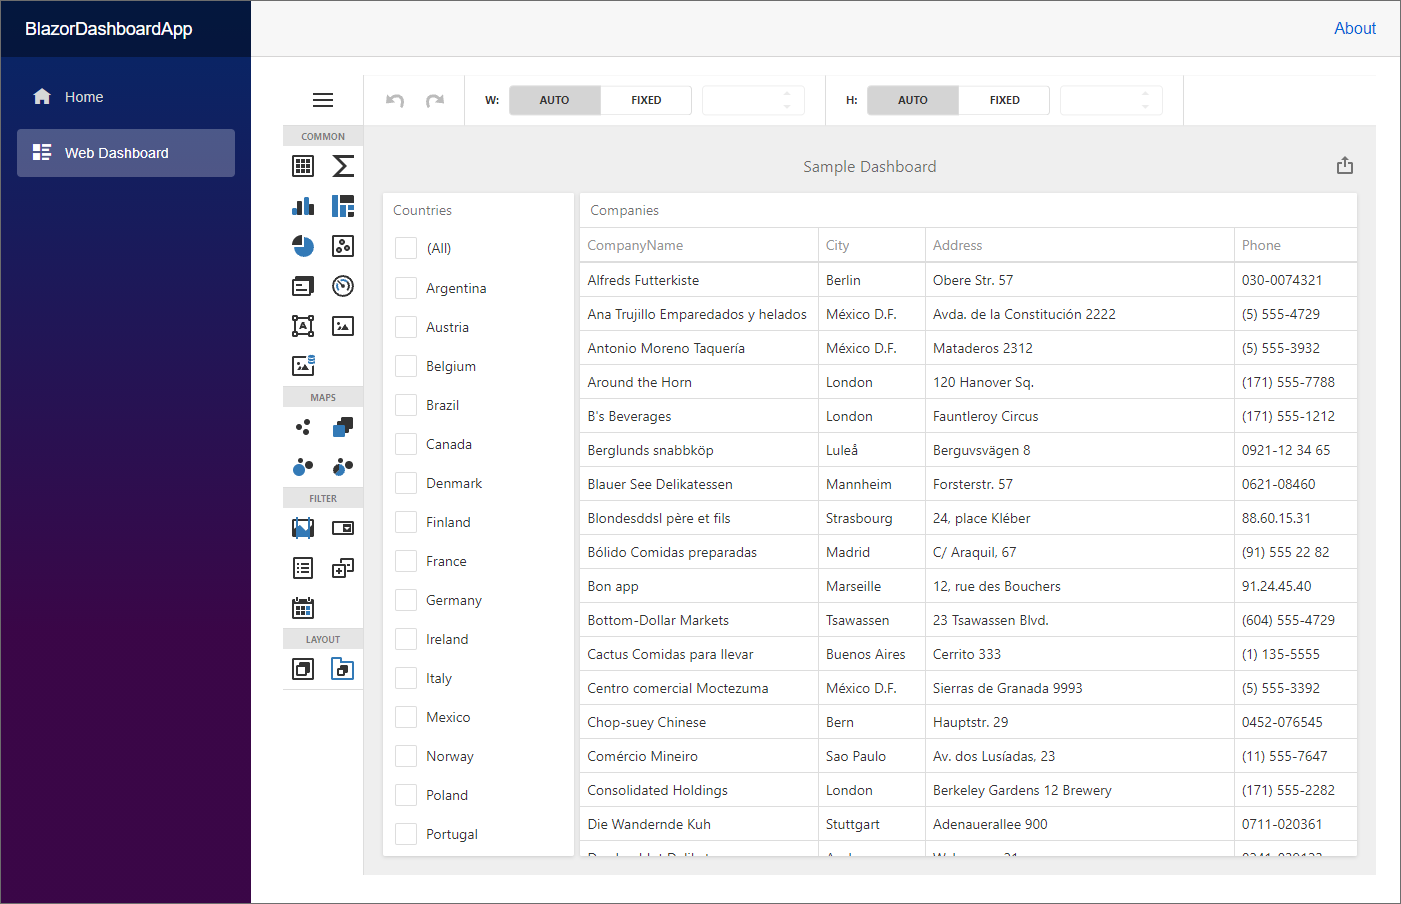
Run the Project
Run the project to see the result. You can now create a dashboard and bind it to the pre-configured JSON data source:
Switch to Viewer Mode
In Designer mode, the control loads the extensions required to design dashboards. Users can access the Data Source Wizard, preview underlying data, and modify dashboards from storage. Requests from the dashboard backend server can be sent to third-party resources. A user can also switch the control to Viewer mode.
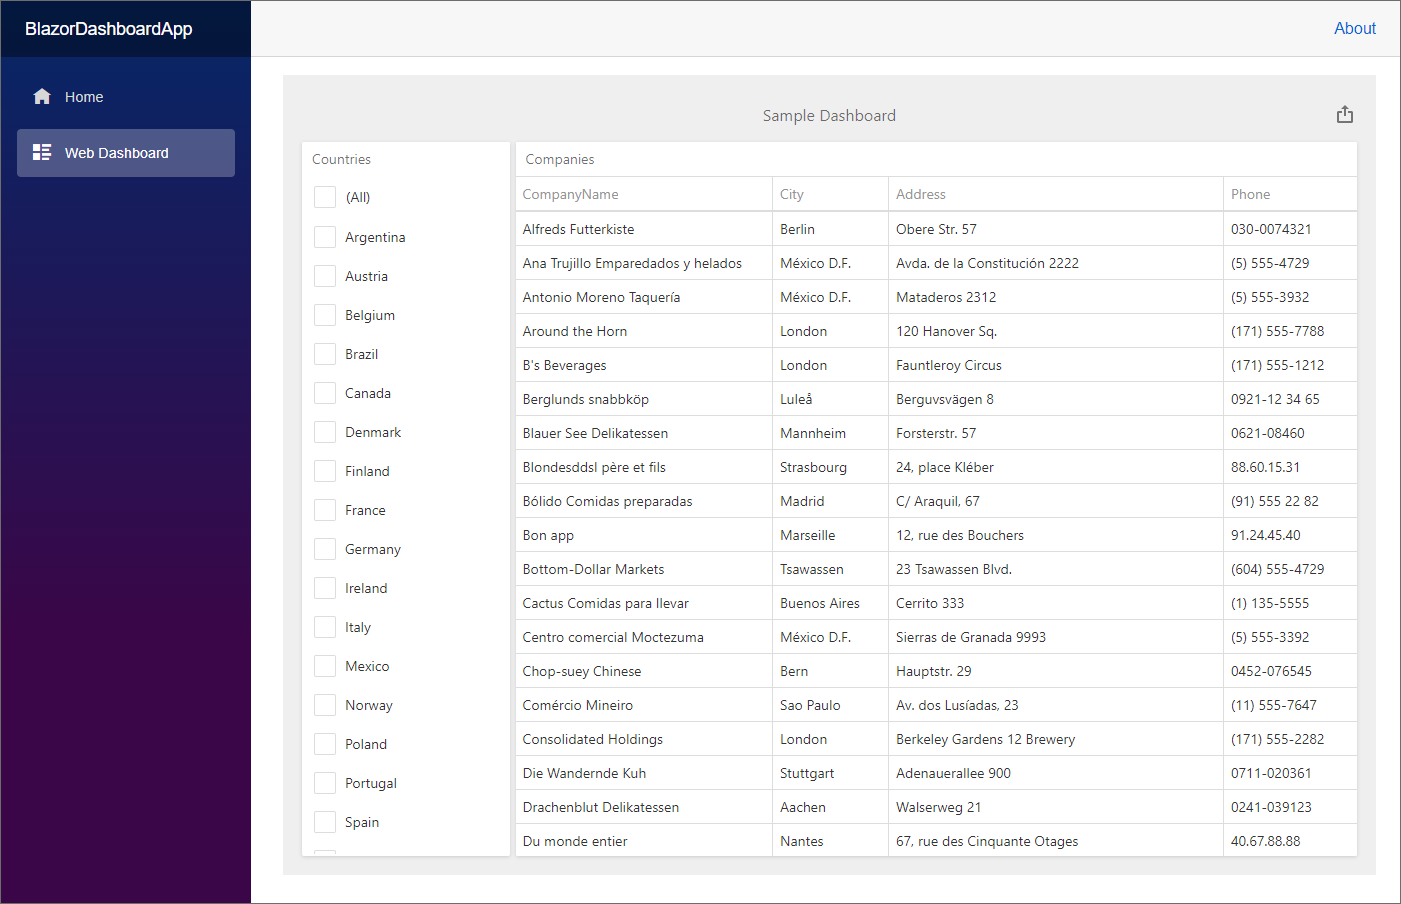
After you created and saved a dashboard, switch your Dashboard Designer application to ViewerOnly mode to prevent users from modifying the dashboard and its data.
Open the newly created Dashboard Razor component (Dashboard.razor). Add the DxDashboard.WorkingMode option and set it to ViewerOnly.
@page "/dashboard"

<DxDashboard Endpoint="api/dashboard" WorkingMode="WorkingMode.ViewerOnly" style="width: 100%; height: 800px;">
</DxDashboard>
Run the application. The Dashboard component displays the dashboard from Data/Dashboards in Viewer mode.
Warning
Working mode does not influence server settings. Initially, the server works at the ClientTrustLevel.Full trust level. Verify trust levels and specify the actions a client can initiate on the server. See the following topic for details: Working Mode Access Rights.
Next Steps
- Create Dashboards on the Web
- Describes how to create and configure dashboards in the Web Dashboard control.
- Dashboard Component for Blazor
- Contains instructions on how to integrate the DxDashboard component into a Blazor application.
- Dashboard Backend
- Contains instructions that show how to configure the Web Dashboard server side.