Tab Container
- 4 minutes to read
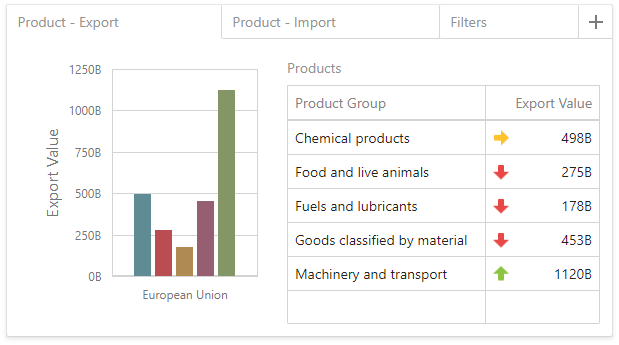
Like the Dashboard Item Group, the Tab Container dashboard item (the TabContainerItem class) allows you to combine elements within a dashboard. The main Tab Container’s purpose is to split the dashboard layout into several pages. For example, you can place common filter elements on a separate tab page to display only data dashboard items.
Create a Tab Container in UI
To create a tab container, use the Tab Container button (the  icon) in the Toolbox. The created tab container always contains one empty tab page (Page 1).
![]()
Click the Add page button (the  icon) to add a new page to the tab container.
A tab page can contain dashboard items and dashboard item groups. You can add them to a tab page using one of the following ways:
- Create a new item using the buttons inside the empty tab page.
- Drag a new item from the Toolbox and drop it to the tab page.
- Use drag-and-drop to move existing items to the tab page.
Note
Tab containers cannot be added to another tab container.
Use the Options item menu to configure the tab page settings in the UI (for example, change the order of tab pages, manage interactivity settings, or delete the tab page). In code, use the DashboardTabPage class members to customize a tab page.
Interactivity
The tab page allows you to manage the interaction between dashboard items inside and outside the page.
The image below shows a tab page’s default interactivity settings:
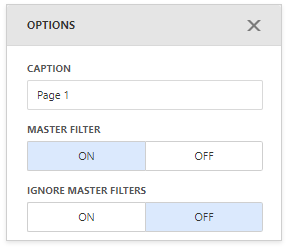
The Master Filter button controls whether the current tab page allows you to filter dashboard items outside the page using master filter items contained within the page. By default, this option is enabled: master filter items in the page can filter any dashboard items.
The Ignore Master Filters button allows you to isolate dashboard items contained within the tab page from external master filter items. By default, this option is disabled: external master filter items can filter the dashboard items contained within the tab page.
Use the DashboardTabPage.interactivityOptions property to access the dashboard item page’s interactivity settings in code. This property returns the DashboardItemGroupInteractivityOptions object that exposes the following members:
Property | Description |
|---|---|
Gets or sets whether external dashboard items can be filtered using master filter items contained in the current DashboardItemGroup / TabContainerDashboardItem. | |
FilterableDashboardItemInteractivityOptions.IgnoreMasterFilters | Gets or sets whether the current dashboard item ignores filtering applied by master filters. |
Create a Tab Container in Code
Follow the steps below to create a tab container in code:
- Create a TabContainerItem class instance.
- A tab container cannot be empty and always contains one empty tab page (a DashboardTabPage class instance). Create one more DashboardTabPage instance and add it to the TabContainerItem.tabPages collection to add an additional tab page.
- Add the created tab container to the Dashboard.items collection.
- Rebuild the current dashboard’s layout using the Dashboard.rebuildLayout property.
Use the SelectedTabPageChanged event to indicate whether the selected tab page is changed.
The following example shows how to add the tab container with two tab pages (tabPage1 and tabPage2).
After you add the created dashboard item to the Dashboard.items collection, call the Dashboard.rebuildLayout method to rebuild the dashboard layout and display changes.
// Use the line below for a modular approach:
// import * as Model from 'devexpress-dashboard/model'
// Use the line below for an approach with global namespaces:
// var Model = DevExpress.Dashboard.Model;

public createTabs() {
    var tabContainer1 = new Model.TabContainerItem();
    tabContainer1.tabPages()[0].name("Difference");

    var page2 = new Model.DashboardTabPage();
    page2.name("Sales");
    tabContainer1.tabPages.push(page2);

    tabContainer1.tabPages()[0].componentName("tabPage1");
    tabContainer1.tabPages()[1].componentName("tabPage2");

    dashboardControl.dashboard().items.push(tabContainer1);
    // ...
    dashboardControl.dashboard().rebuildLayout();
}
To add a dashboard item to the tab container, assign the tab page’s componentName to the dashboard item’s parentContainer property.
dashboardItem.parentContainer("tabPage1");