Create a WinForms Dashboard Viewer (.NET Framework)
This topic describes how to build a Dashboard Viewer application in the .NET Framework and use it to display the dashboard created in the Dashboard Designer.
Follow the steps below.
- In Visual Studio, create a new project and select Windows Forms App (.NET Framework) on the start page as the project template.
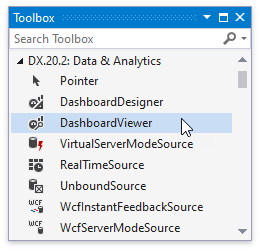
Drag the DashboardViewer control from the DX.25.2: Data & Analytics Toolbox tab and drop it onto the main form.
Click the control’s smart tag button and select Dock in Parent Container to allow the DashboardViewer to fill the entire window.

In the same menu, click Load Dashboard, use the invoked dialog to locate the dashboard XML file created in the first lesson, and choose this file as the DashboardSource.

Important
The dashboard XML file created in the first lesson uses an Access 97 database. If you have Windows x64, make sure that the WinForms Dashboard Designer application is built with its Platform target set to x86.
As an alternative, you can select a dashboard created at design time.

Run the application to see the result.

Next Steps
-
Describes how to prepare the DashboardViewer control to display a dashboard in the WinForms application.