Get Started with Scheduler
- 8 minutes to read
This tutorial describes how to build a simple Blazor application with a DevExpress Scheduler component. Follow the steps below to setup three different scheduler view types and then populate the control with different appointment types (including all-day and recurrent events).
Create an Application
Refer to the Create an application section for instructions.
If you use Microsoft project templates, do the following:
- Configure the application as described in this topic: Microsoft Templates (Visual Studio).
- Apply the DevExpress Blazing Berry theme as described in this topic: Apply a DevExpress Bootstrap Theme.
Create a Data Source
This tutorial shows you how to bind the Scheduler to runtime data.
Declare the following classes:
Appointment- An appointment that is rendered in the Scheduler.AppointmentCollection- A data source for the Scheduler.
public class Appointment {
    public Appointment() {}

    public int AppointmentType { get; set; }
    public DateTime StartDate { get; set; }
    public DateTime EndDate { get; set; }
    public string Caption { get; set; }
    public string Description { get; set; }
    public string Location { get; set; }
    public int Label { get; set; }
    public int Status { get; set; }
    public bool AllDay { get; set; }
}
Note
You can also bind the Scheduler to a remote data source. Refer to the following example: Scheduler for Blazor - How to implement CRUD operations with a Web API Service.
Add a Scheduler and Bind It to Data
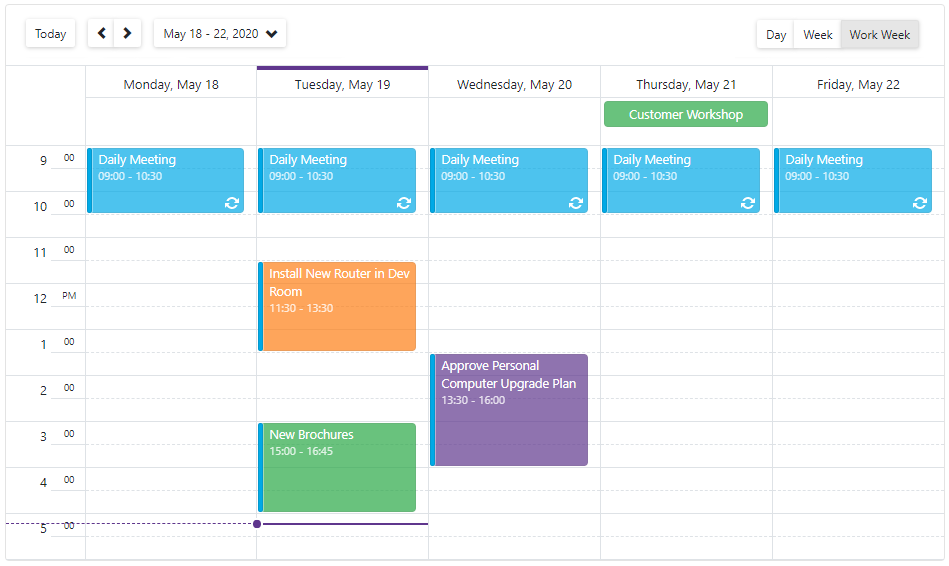
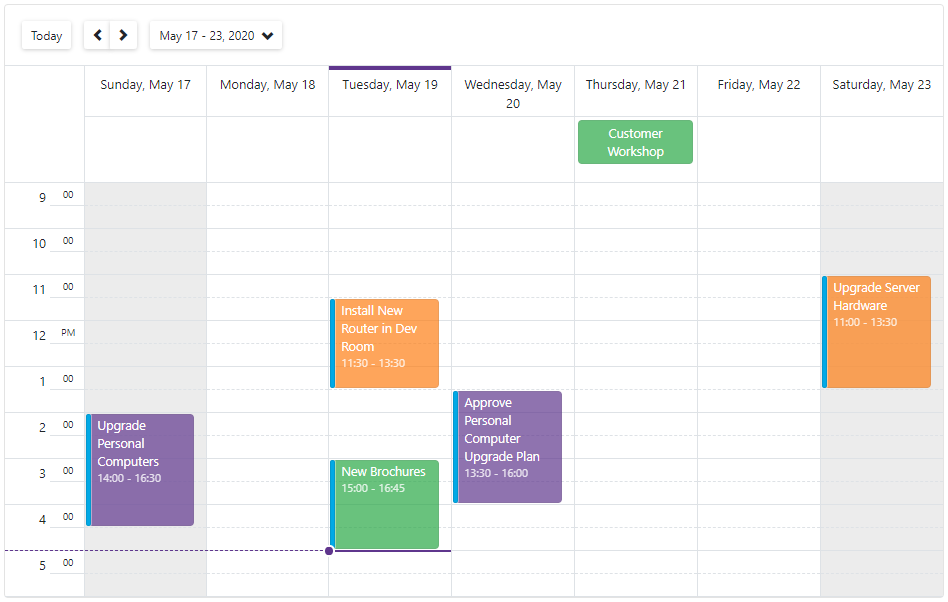
Add a Scheduler component (<DxScheduler>) with a Week view (<DxSchedulerWeekView>) to a page. Set the view’s ShowWorkTimeOnly property to true.
<DxScheduler>
    <DxSchedulerWeekView ShowWorkTimeOnly="true" />
</DxScheduler>
Follow the steps below to bind the Scheduler to data:
- In the Razor
@codeblock, create a DxSchedulerDataStorage object. Use the constructor without parameters. - Use the DxSchedulerDataStorage.AppointmentsSource property to fill the storage with a collection of data objects.
- Create a DxSchedulerAppointmentMappings object and map data source fields to appointment properties.
- Assign the newly created object to the DxSchedulerDataStorage.AppointmentMappings property.
- Assign the data source to the Scheduler’s DataStorage property.
<DxScheduler DataStorage="@DataStorage">
    <DxSchedulerWeekView ShowWorkTimeOnly="true" />
</DxScheduler>

@code {
    DxSchedulerDataStorage DataStorage = new DxSchedulerDataStorage() {
        AppointmentsSource = AppointmentCollection.GetAppointments(),
        AppointmentMappings = new DxSchedulerAppointmentMappings() {
            Type = "AppointmentType",
            Start = "StartDate",
            End = "EndDate",
            Subject = "Caption",
            AllDay = "AllDay",
            Location = "Location",
            Description = "Description",
            LabelId = "Label",
            StatusId = "Status"
        }
    };
}
Add Views
You can add multiple views to the Scheduler. The code below defines the Day, Week, and Work Week views.
<DxScheduler DataStorage="@DataStorage">
    <DxSchedulerDayView ShowWorkTimeOnly="true" />
    <DxSchedulerWeekView ShowWorkTimeOnly="true" />
    <DxSchedulerWorkWeekView ShowWorkTimeOnly="true" />
</DxScheduler>
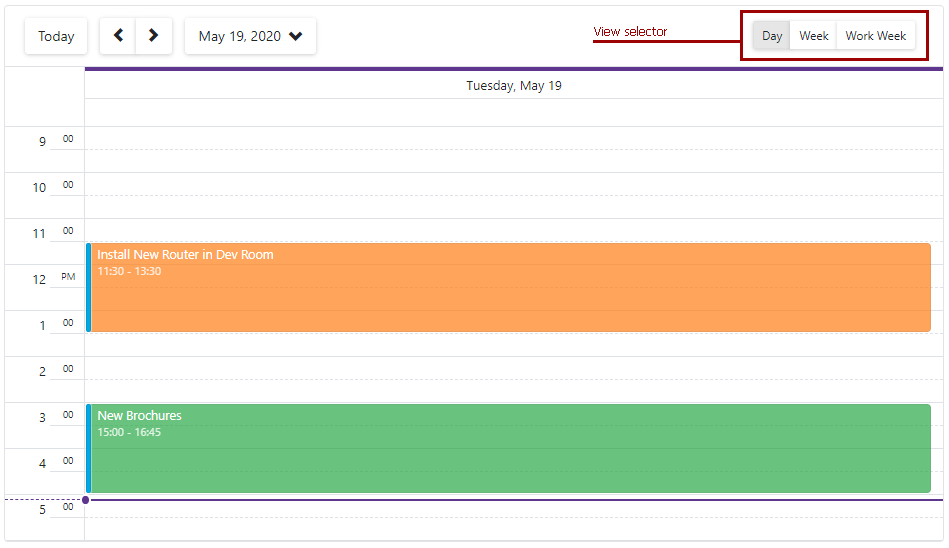
The Scheduler now displays the Day view because it is defined first. The view selector allows users to switch between views.
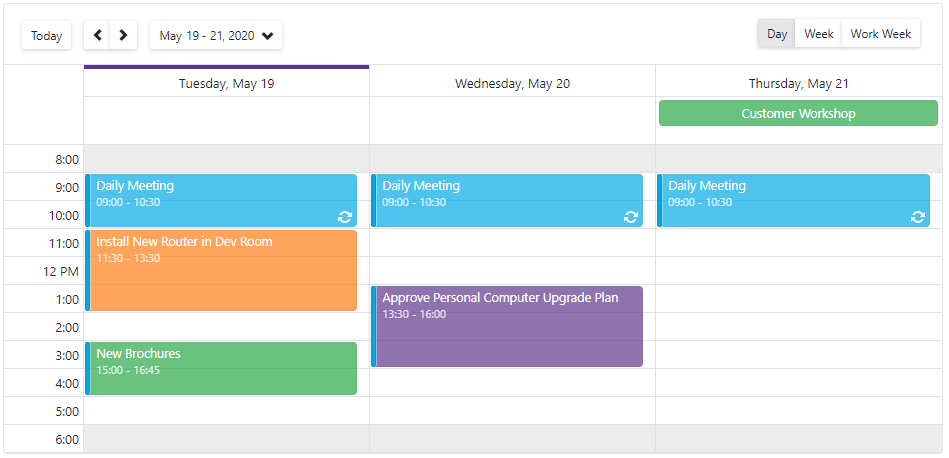
Customize Views
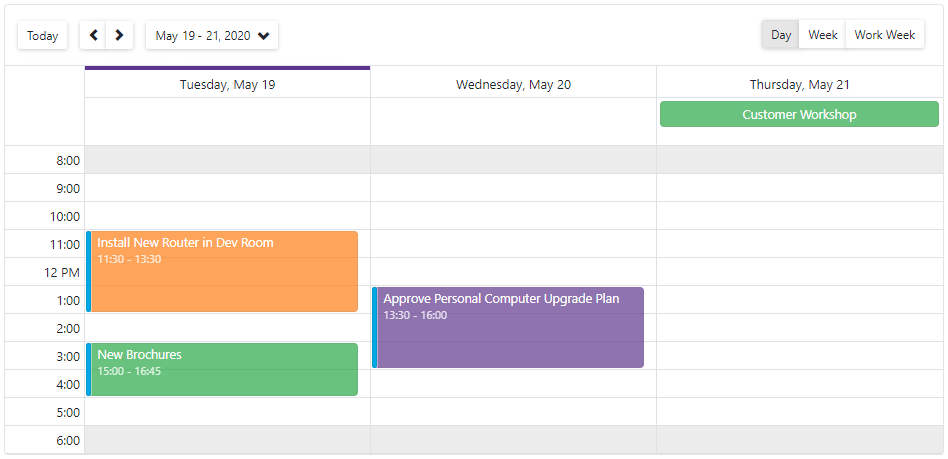
Each view has its customization settings. Specify the following settings for the Day view:
- Display 3 days at a time.
- Set the time scale interval to 1 hour.
- Set work time to 9AM - 6PM.
- Set the visible time interval to 8AM - 7PM. Time cells outside the work time interval have a gray background.
- Hide the current time indicator.
<DxSchedulerDayView
    DayCount="3"
    TimeScale="@(new TimeSpan(1,0,0))"
    WorkTime="new DxSchedulerTimeSpanRange(TimeSpan.FromHours(9), TimeSpan.FromHours(18))"
    VisibleTime="new DxSchedulerTimeSpanRange(TimeSpan.FromHours(8), TimeSpan.FromHours(19))"
    TimeIndicatorVisibility="SchedulerTimeIndicatorVisibility.Never">
</DxSchedulerDayView>
Create a Recurrent Appointment
To enable the Scheduler to manage recurrent appointments, declare a Recurrence field in the Appointment object and map this field to the appointment’s RecurrenceInfo property.
public class Appointment {
    // ...
    public string Recurrence { get; set; }
}
In the application, a user should follow the steps below to create a recurrent appointment.
- Click an empty cell in a view. This invokes the compact Appointment form.
Specify the appointment caption (Daily Meeting), start and end time.
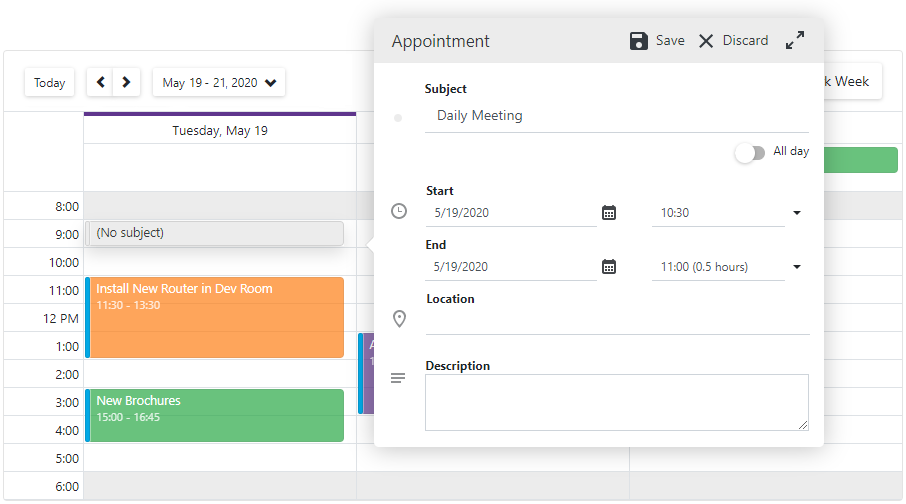
Click the Expand Arrows button
 to open the full Appointment form.
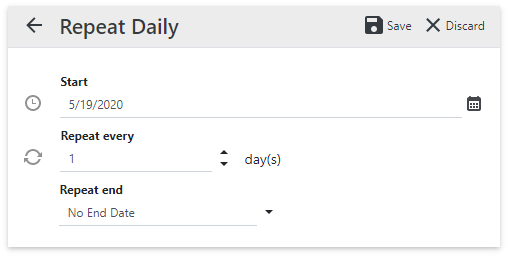
 In the Repeat field, select Daily and specify the rule:

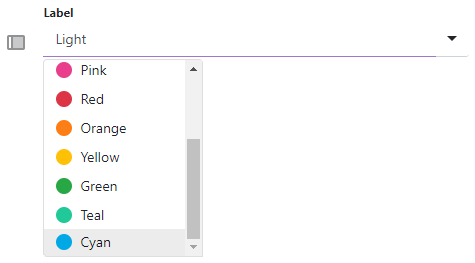
Optionally. In the Label and Status field, specify the appointment label and status.
Click Save.
The newly created appointment is marked with the “recurrent” icon: ![]() .
.
Note
The Scheduler is bound to data created at runtime. Newly created appointments do not persist when you close the application. To save changes, bind the Scheduler to a remote data source. Refer to the following example: Scheduler for Blazor - How to implement CRUD operations with a Web API Service.
To create the Daily Meeting recurrent appointment in code, add a new appointment to the data source and initialize the Recurrence field as shown below:
public static partial class AppointmentCollection {
    public static List<Appointment> GetAppointments() {
        DateTime date = DateTime.Today;
        var dataSource = new List<Appointment>() {
            // appointments
            // ...
            new Appointment {
                AppointmentType = 1,
                Caption = "Daily Meeting",
                StartDate = date + (new TimeSpan(0, 9, 00, 0)),
                EndDate = date + (new TimeSpan(0, 10, 00, 0)),
                Label = 10,
                Status = 1,
                Recurrence = string.Format("<RecurrenceInfo Type=\"0\" Start=\"{0}\" Range=\"1\"
                    OccurrenceCount=\"10\" Frequency =\"1\" Id=\"72e3db8f-cdb6-4aaa-afe1-e3c6b80ce995\"/>",
                    ToString(date + (new TimeSpan(0, 9, 00, 0))))
            }
        };
        return dataSource;
    }
}
Refer to DxSchedulerRecurrenceInfo for more information.
Complete Code
<DxScheduler DataStorage="@DataStorage">
   <DxSchedulerDayView DayCount="3"
                       TimeScale="@(new TimeSpan(1,0,0))"
                       WorkTime="new DxSchedulerTimeSpanRange(TimeSpan.FromHours(9), TimeSpan.FromHours(18))"
                       VisibleTime="new DxSchedulerTimeSpanRange(TimeSpan.FromHours(8), TimeSpan.FromHours(19))"
                       TimeIndicatorVisibility="SchedulerTimeIndicatorVisibility.Never">
   </DxSchedulerDayView>
   <DxSchedulerWeekView ShowWorkTimeOnly="true" />
   <DxSchedulerWorkWeekView ShowWorkTimeOnly="true" />
</DxScheduler>

@code {
   DxSchedulerDataStorage DataStorage = new DxSchedulerDataStorage() {
       AppointmentsSource = AppointmentCollection.GetAppointments(),
       AppointmentMappings = new DxSchedulerAppointmentMappings() {
           Type = "AppointmentType",
           Start = "StartDate",
           End = "EndDate",
           Subject = "Caption",
           AllDay = "AllDay",
           Location = "Location",
           Description = "Description",
           LabelId = "Label",
           StatusId = "Status",
           RecurrenceInfo = "Recurrence"
       }
   };
}