Configure a Visual Studio Project
- 3 minutes to read
Install Required Packages
Perform the following steps to install the Rich Text Editor and Spreadsheet controls’ NuGet packages:
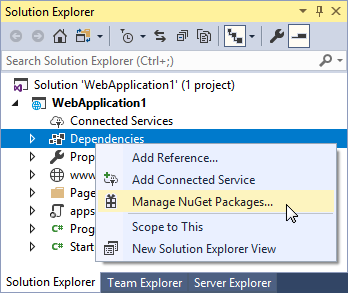
Right-click the Dependencies node in the Solution Explorer and select Manage NuGet Packages in the invoked context menu.
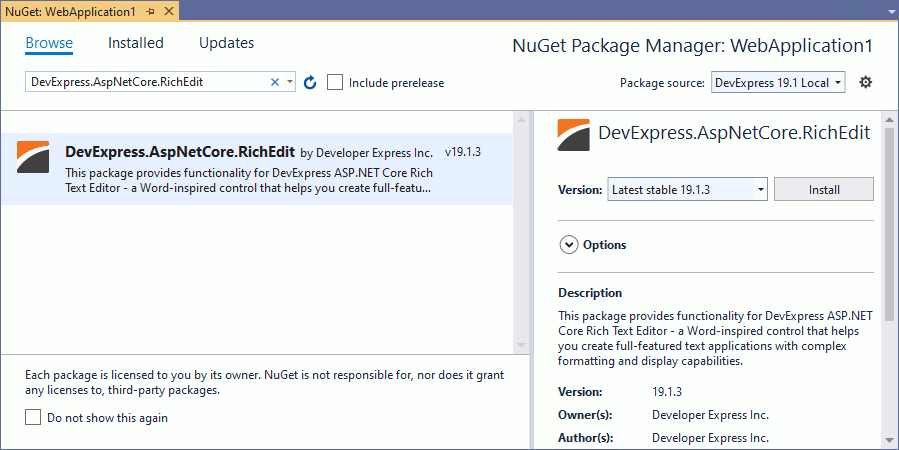
Select DevExpress 19.2 Local in the Package source drop-down list and go to the Browse page. Locate the control’s package and install it.
The following packages are available:
- DevExpress.AspNetCore.RichEdit
- DevExpress.AspNetCore.Spreadsheet
Configure the Project
Right-click the application’s name in the Solution Explorer and select Add | Add New Item. In the invoked Add New Item dialog, select the Installed | Visual C# | ASP.NET Core | Web category and the npm Configuration File item template. Click Add.
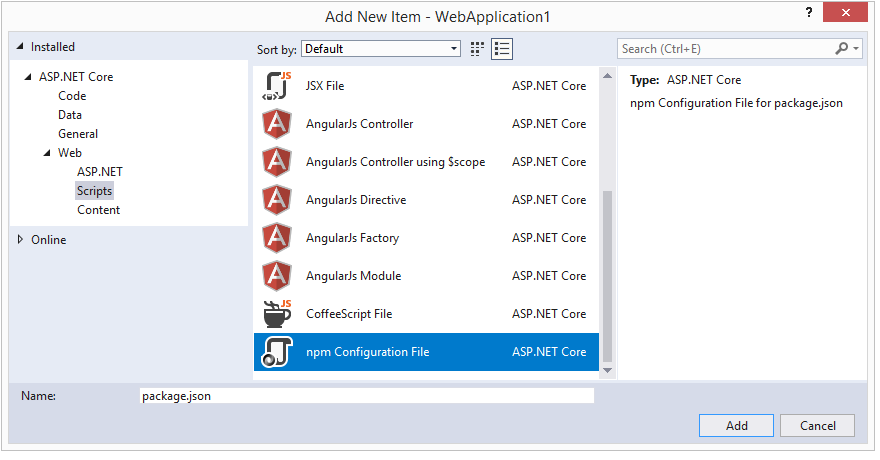
This adds the package.json file to the project. Open this file and add the following dependencies:
{ "version": "1.0.0", "name": "asp.net", "private": true, "dependencies": { "devextreme": "19.2.X", "devexpress-richedit": "19.2.X" } }Right-click the package.json file and select Restore Packages. This adds the node_modules directory to the application folder.
Add the following code to the Startup.cs file to configure the application so that it can serve the node_modules directory’s files:
using Microsoft.Extensions.FileProviders;
using System.IO;
//...

public class Startup {
//...
    public void Configure(IApplicationBuilder app, IHostingEnvironment env) {
        // ...
        app.UseStaticFiles();
        // ...
        app.UseStaticFiles(new StaticFileOptions {
            FileProvider = new PhysicalFileProvider(Path.Combine(env.ContentRootPath, "node_modules")),
            RequestPath = "/node_modules"
        });
    }
}
Note that the code above makes all the files in the node_modules directory accessible from the client. To restrict access, bundle and minify assets (for example, using Gulp).
Configure Razor Pages web apps
If you use a Spreadsheet or save a Rich Text Editor’s document server side using the ExportUrl(String) property in a Razor Pages web app, it is necessary to add the following adjustments.
Disable the AntiForgeryToken option (enabled for Razor Pages web apps by default).
- To disable the AntiForgeryToken for an application, add the following code to the ConfigureServices method in Startup.cs.
services.AddMvc().AddRazorPagesOptions(o => { o.Conventions.ConfigureFilter(new IgnoreAntiforgeryTokenAttribute()); });- To disable the AntiForgeryToken for a page, add the following code to a page model.
[IgnoreAntiforgeryToken]
public class IndexModel : PageModel
{
    public void OnPost()
    {
    }
}
Declare a POST action handler.
public void OnPostExport(string base64, string fileName, DevExpress.AspNetCore.RichEdit.DocumentFormat format) { byte[] fileContents = System.Convert.FromBase64String(base64); }Use this handler in the ExportUrl(String) method (for Rich Text Editor) or in the DocumentRequestHandlerUrl(String) method (for Spreadsheet) as follows.
.ExportUrl("RichEditPage?handler=export")
Register Static Resources
- In the _ViewImports.cshtml file, import the DevExpress.AspNetCore namespace all the views in the project should use.
@using DevExpress.AspNetCore
- Create or open an existing view (for example, the Index.cshtml file), and register the resources in a header section as shown below.
<script src="~/node_modules/jszip/dist/jszip.min.js" type="text/javascript"></script>
<script src="~/node_modules/devextreme/dist/js/dx.all.js"></script>
<link href="~/node_modules/devextreme/dist/css/dx.common.css" rel="stylesheet" />
<link href="~/node_modules/devextreme/dist/css/dx.light.css" rel="stylesheet" />

@* If you localize the control, you should register localization resources before the control script registration.*@
<script src="~/node_modules/devexpress-richedit/localization/dx-rich.de.js"></script>

<script src="~/node_modules/devexpress-richedit/dist/dx.richedit.js"></script>
<link href="~/node_modules/devexpress-richedit/dist/dx.richedit.css" rel="stylesheet" />