Web Part Creation
- 3 minutes to read
This topic describes how to use DevExpress ASP.NET controls in a standard Visual Studio Web Part project.
Requirements
In this tutorial, the following assemblies are used:
- DevExpress.Data - the core DevExpress assembly;
- DevExpress.Web - contains the main ASP.NET product code.
The above assemblies should be registered in the GAC. If they have not yet been installed, use the following commands in the “gacutil” tool (found in the “C:\Program Files (x86)\Microsoft SDKs\Windows\v8.0A\bin\NETFX 4.0 Tools\gacutil.exe” path for .NET v4) to install them in the GAC.
gacutil –i DevExpress.Data.v20.2.dllgacutil –i DevExpress.Web.v20.2.dllRegister the ASPxHttpHandlerModule module entry in the target SharePoint site’s Web.config file - as demonstrated in the code below.
Registration for v14.2 and newer
<?xml version="1.0" encoding="UTF-8" standalone="yes"?>
<configuration>
  ...
  <system.webServer>
    ...
    <modules runAllManagedModulesForAllRequests="true">
      ...
      <add type="DevExpress.Web.ASPxHttpHandlerModule, DevExpress.Web.v20.2, Version=20.2.13.0, Culture=neutral, PublicKeyToken=b88d1754d700e49a" name="ASPxHttpHandlerModule" />
    </modules>
  </system.webServer>
</configuration>
Registration for v14.1 and older
<?xml version="1.0" encoding="UTF-8" standalone="yes"?>
<configuration>
  ...
  <system.webServer>
    ...
    <modules runAllManagedModulesForAllRequests="true">
      ...
      <add type="DevExpress.Web.ASPxClasses.ASPxHttpHandlerModule, DevExpress.Web.v14.1, Version=14.1.8.0, Culture=neutral, PublicKeyToken=b88d1754d700e49a" name="ASPxHttpHandlerModule"/>
    </modules>
  </system.webServer>
</configuration>
Register the ASPxUploadProgressHttpHandler handler entry in the target SharePoint site Web.config as demonstrated in the code below.
Registration for v14.2 and newer
<?xml version="1.0" encoding="UTF-8" standalone="yes"?>
<configuration>
  ...
  <system.webServer>
    ...
    <handlers>
        ...
        <add type="DevExpress.Web.ASPxUploadProgressHttpHandler, DevExpress.Web.v20.2, Version=20.2.13.0, Culture=neutral, PublicKeyToken=b88d1754d700e49a" verb="GET,POST" path="ASPxUploadProgressHandlerPage.ashx" name="ASPxUploadProgressHandler" preCondition="integratedMode" />
     </handlers>
  </system.webServer>
</configuration>
Registration for v14.1 and older
<?xml version="1.0" encoding="UTF-8" standalone="yes"?>
<configuration>
  ...
  <system.webServer>
    ...
    <handlers>
        ...
        <add type="DevExpress.Web.ASPxUploadControl.ASPxUploadProgressHttpHandler, DevExpress.Web.v14.1, Version=14.1.8.0, Culture=neutral, PublicKeyToken=b88d1754d700e49a" verb="GET,POST" path="ASPxUploadProgressHandlerPage.ashx" name="ASPxUploadProgressHandler" preCondition="integratedMode" />
     </handlers>
  </system.webServer>
</configuration>
Mark each control/type from DevExpress assemblies as safe to use. See the following article for more information: How to: Mark Controls as Safe Controls.
Note that when you use a SharePoint-based project template (SharePoint Empty Project + Web Part Item), the entire assembly is marked as safe – as shown below.
<SafeControl Assembly="VisualWebPartProject1, Version=1.0.0.0, Culture=neutral, PublicKeyToken=931f27ff907e0eed" Namespace="VisualWebPartProject1.VisualWebPart1" TypeName="*" Safe="True" />When you use standard Class Library projects (for older SharePoint SDKs), it is necessary to mark all required types as safe.
The following namespaces are used in this tutorial.
- DevExpress.Data;
- DevExpress.Web.
The code sample below marks required namespaces (for ASPxCalendar) as safe.
<SafeControl Assembly="DevExpress.Data.v20.2, Version=20.2.13.0, Culture=neutral, PublicKeyToken=b88d1754d700e49a" Namespace="DevExpress.Data" TypeName="*" Safe="True" SafeAgainstScript="False" />
<SafeControl Assembly="DevExpress.Web.v20.2, Version=20.2.13.0, Culture=neutral, PublicKeyToken=b88d1754d700e49a" Namespace="DevExpress.Web" TypeName="*" Safe="True" SafeAgainstScript="False" />
Create a Web Part
- Create an Empty SharePoint Project and add the Web Part item to the project. (See the following article for more information: How to: Create a SharePoint Web Part.) Select the Deploy as a farm solution trust level.
- Add references to the required assemblies.
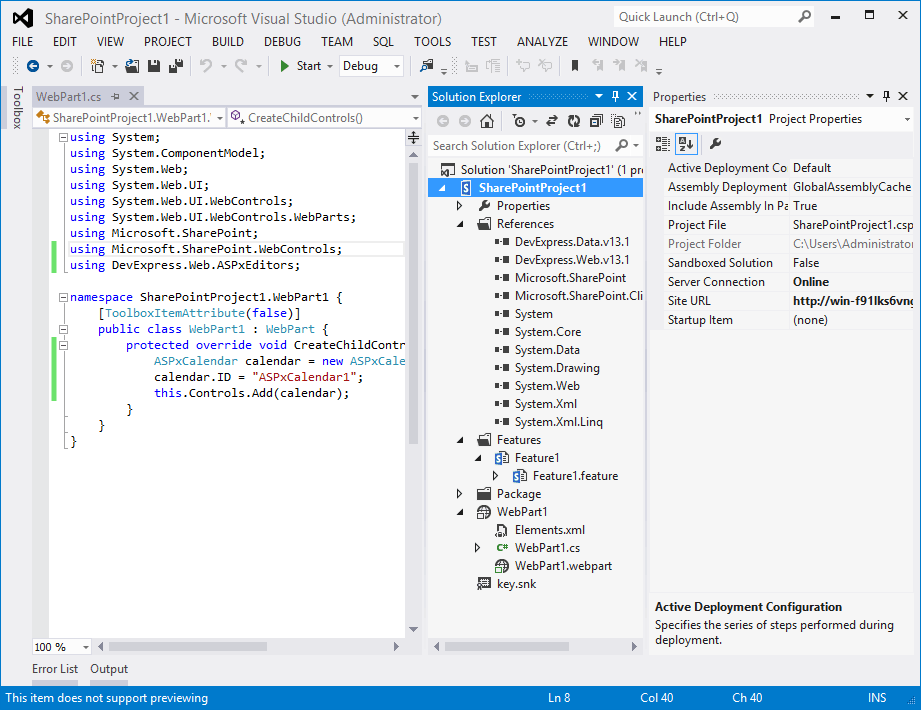
- Implement the CreateChildControls method and add the required control (e.g., ASPxCalendar) to the Web Part Controls collection.
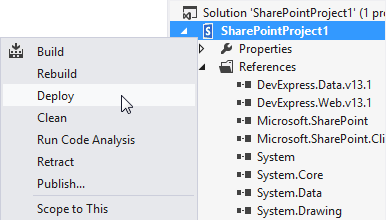
Use the Deploy command to build the project and deploy it to the target SharePoint site.
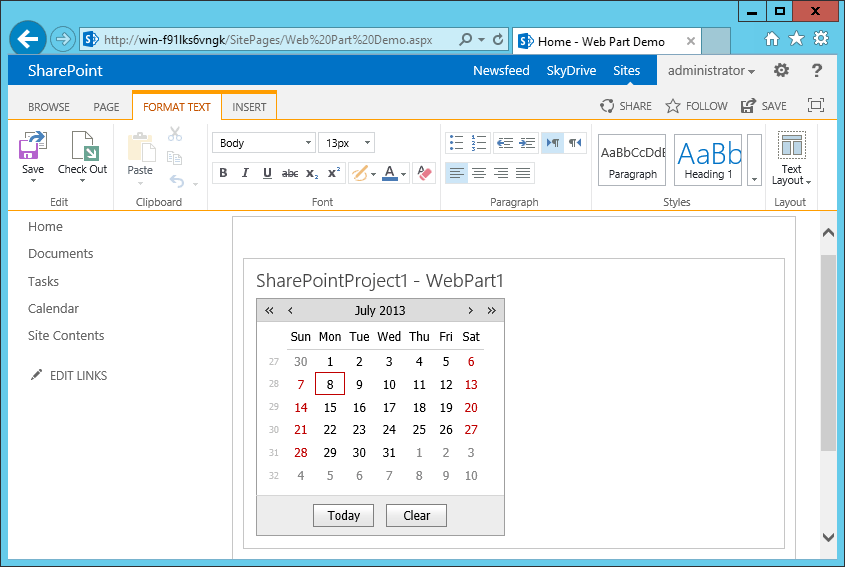
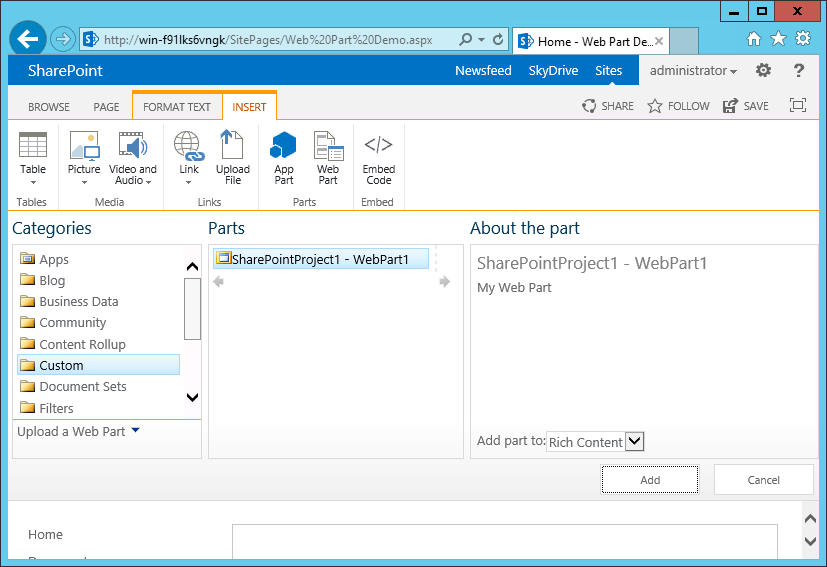
If the Deploy command is successfully completed, navigate to the required page and insert the deployed Web Part via the Site Actions -> Edit Page -> Insert -> Web Part command. By default, custom Web Parts are available in the Custom group.
The image below shows the result.