Add an Item to the Navigation Control
- 3 minutes to read
In this lesson, you will learn how to add an item to the navigation control. For this purpose, the Note business class from the Business Class Library will be used.
Note
Before proceeding, we recommend that you review the following lessons:
- If the Note class is not used as an ancestor in your code, you will need to add it to the UI generation process. To do this, use the Module Designer. In the Exported Types pane, focus the Referenced assemblies | DevExpress.Persistent.BaseImpl.Xpo.v22.1 | Note item and press the space bar. Refer to the Add a Class from the Business Class Library (XPO) lesson for details.
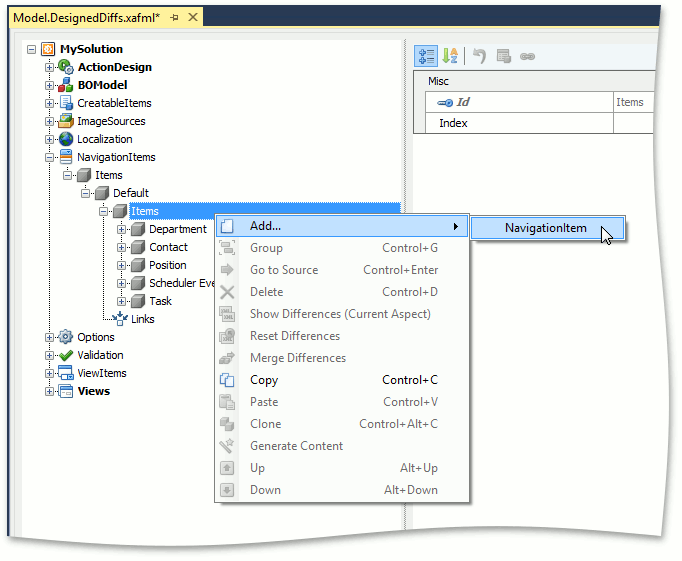
The XAF application’s navigation structure is defined by the NavigationItems node in the Application Model. To customize the navigation, invoke the Model Editor by double-clicking the Model.DesignedDiffs.xafml file in the MySolution.Module project. In the tree view, navigate to the NavigationItems | Items | Default | Items node. To add a child item to the required navigation item, right-click the Items node and select Add… | NavigationItem from the invoked context menu.

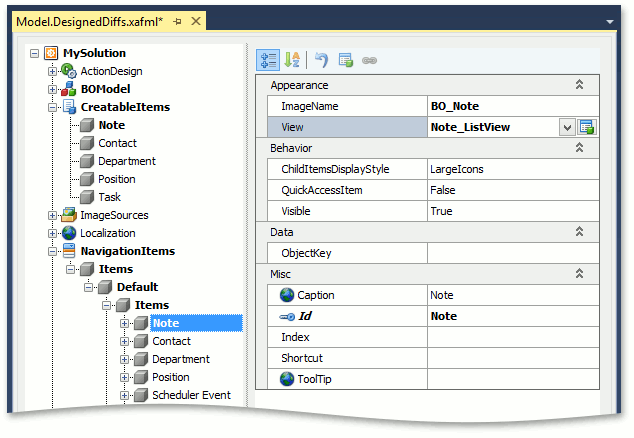
For the newly added node, select “Note_ListView” in the View dropdown list. The Caption property will automatically be set to “Note”. Optionally, you can set a user-friendly Id value.

As you have seen, there are many ready-to-use Views available in the View dropdown list. These views are automatically generated based on business classes loaded to the Application Model. One of these classes is Note. So, you only need to add a corresponding View to the navigation items collection.
Note
You can set shortcuts for navigation items via the Shortcut property. In this instance, you will not have to use a mouse to switch between Views, even if the navigation control is hidden via the View | Panels | Navigation | Hidden menu item.
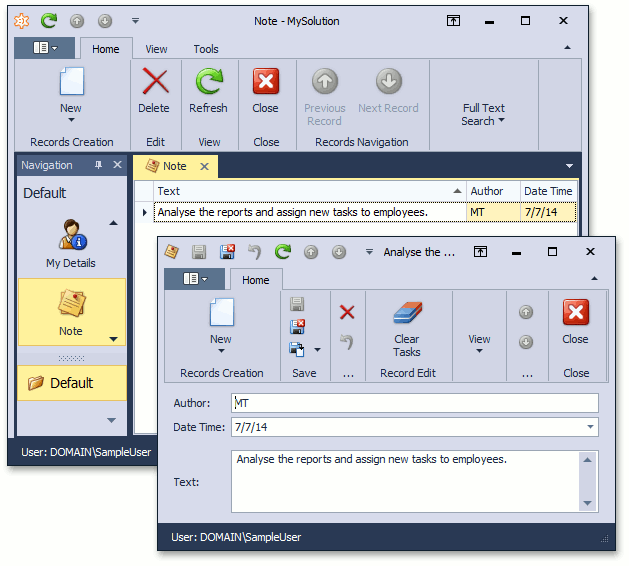
Run the WinForms or ASP.NET Web Forms application. You now have an additional navigation item that allows you to add and edit plain text notes. Also note that this item already has an image assigned.

Note
When you define a business class in your application, you can apply the DefaultClassOptionsAttribute or NavigationItemAttribute attribute instead of using the Application Model. See the Inherit from the Business Class Library Class (XPO) lesson.
You can see the changes made in this lesson in the Model Editor invoked for the Model.DesignedDiffs.xafml file located in the Main Demo | MainDemo.Module project.
Next Lesson: Implement Property Value Validation in the Application Model