TaskbarAssistant.IconsAssembly Property
Gets or sets the name of the assembly that contains icons (in resources) for Jump List tasks.
Namespace: DevExpress.Utils.Taskbar
Assembly: DevExpress.Utils.v18.2.dll
Declaration
Property Value
| Type | Default | Description |
|---|---|---|
| String | String.Empty | A string value that specifies the name of the assembly that contains icons (in resources) for Jump List tasks. |
Remarks
You can assign icons (ICO files) to Jump List tasks. To do this, first create a resource file containing icons (ICO files) and then use a task’s IconIndex property to assign an icon to the task.
The following tutorial describes these steps in more detail.
Create a resource file that will contain icons.
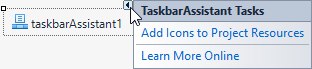
Click the TaskBarAssistant‘s smart tag and select the Add Icons to Project Resources command:
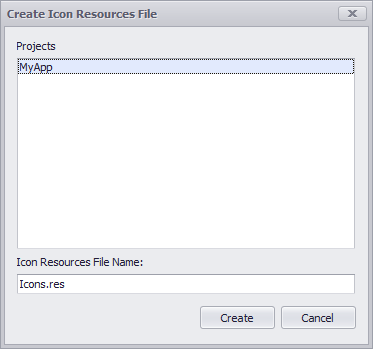
Select the name of the resource file and the name of the project to which the resource file will be added:
Add icons to the resources.
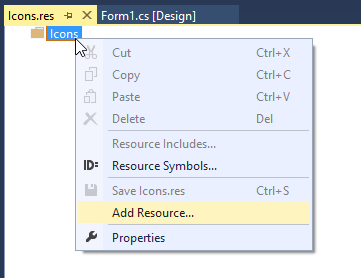
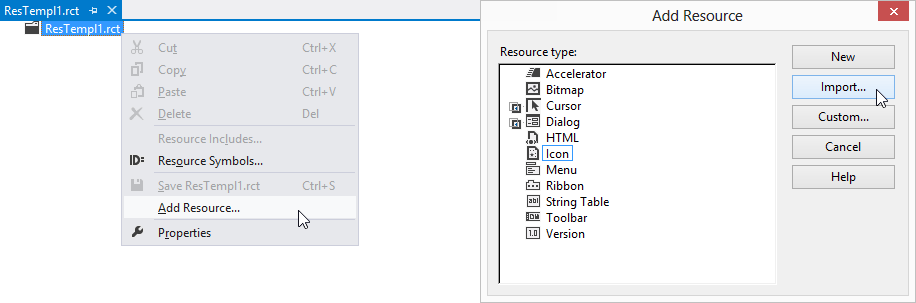
Right-click within the opened resource file and select Add Resource:
Create or import an icon(s).
You can create a new icon (by clicking New) or import an existing icon from disk (by clicking Import):
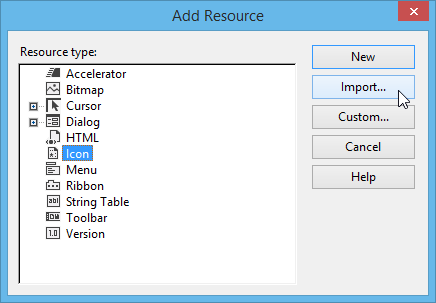
If you choose the Import command, load an ICO file or files using the Open File dialog that will be invoked.
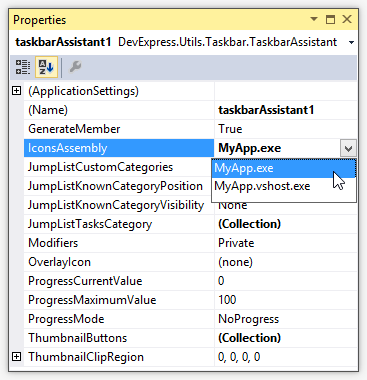
Set the IconsAssembly property to the project that contains the added resource file with icons:
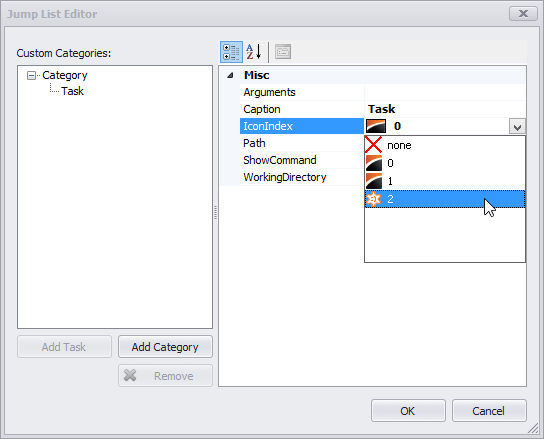
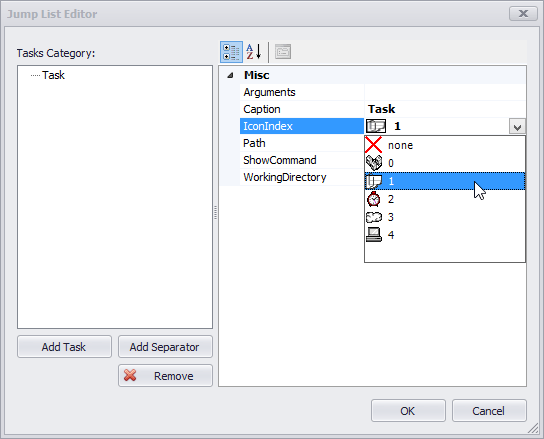
Assign icons to specific tasks via their IconIndex properties:
You can also override the IconsAssembly property setting and specify an individual image source for a particular JumpListItemTask with the JumpListItemTask.IconPath property.
Using a Separate Class Library to Store Icons
You can also use a separate Class Library to store icons. To do this, create a new Class Library in your solution, specify a resource file with icons, add this library to the References section of your project and rebuild the solution. After these steps, you can assign the created Class Library to the TaskbarAssistant.IconsAssembly property and specify task icons with the JumpListItemTask.IconIndex property.
The following tutorial describes these steps in more detail.
First, create the resource file with icons that will be used in the Class Library. If you already have one, go to Step 4.
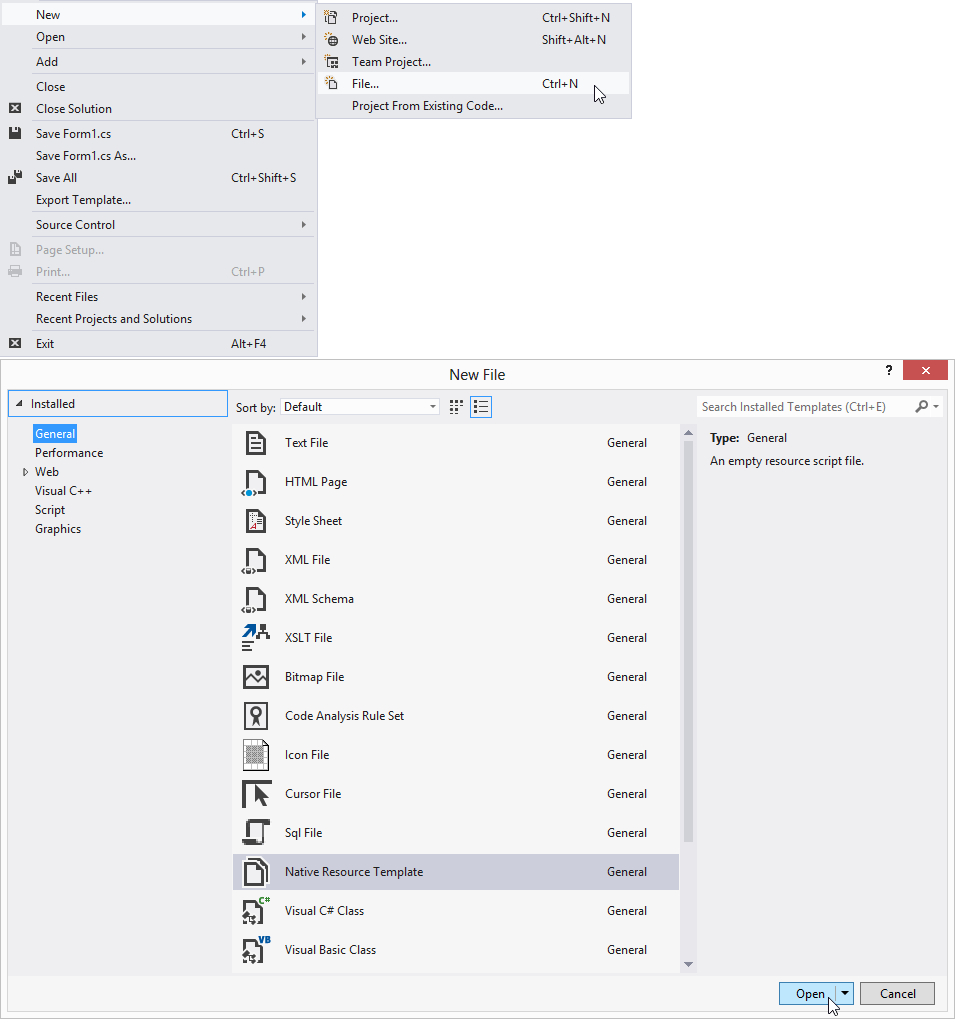
In Visual Studio, create a new Native Resource Template file.
Create new icons or import existing icons to the created Native Resource Template file.
Save the created Native Resource Template file as a .res file.
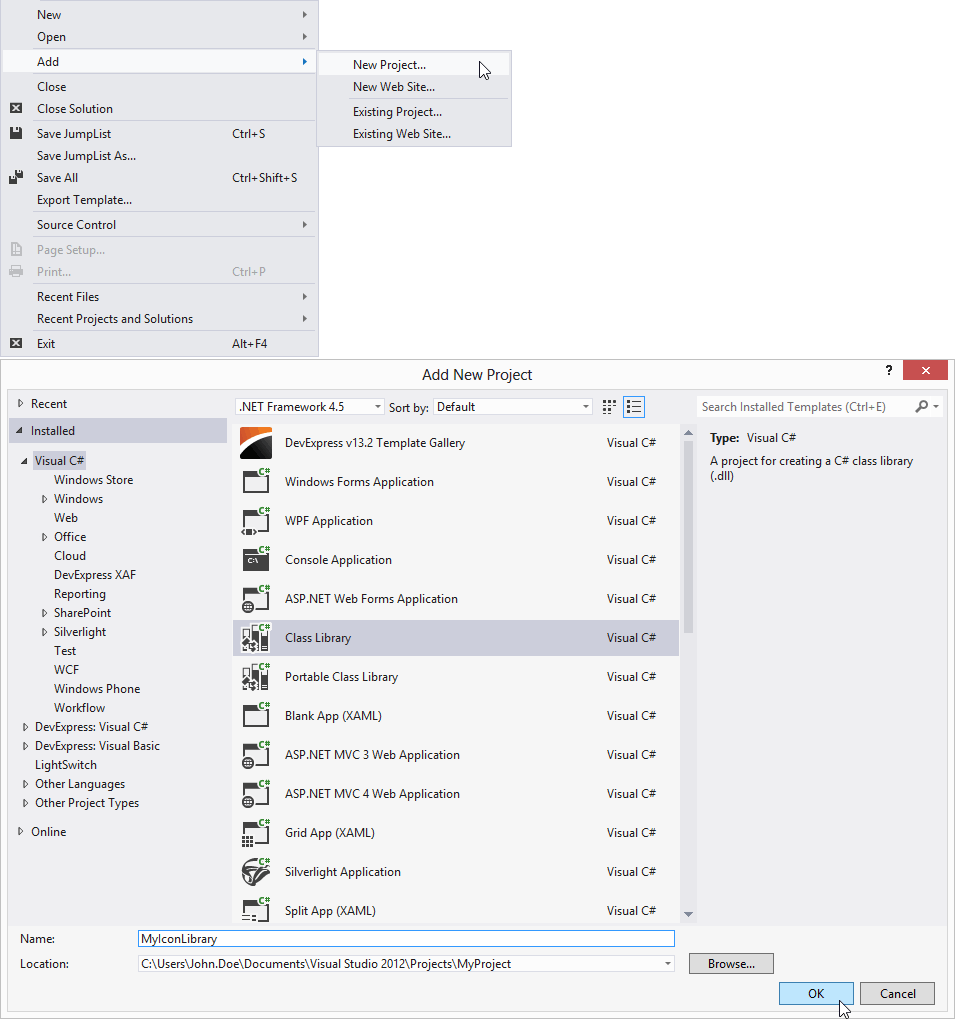
Create a new Class Library in your solution and enter a name for your project. In this sample, it is called MyIconLibrary.
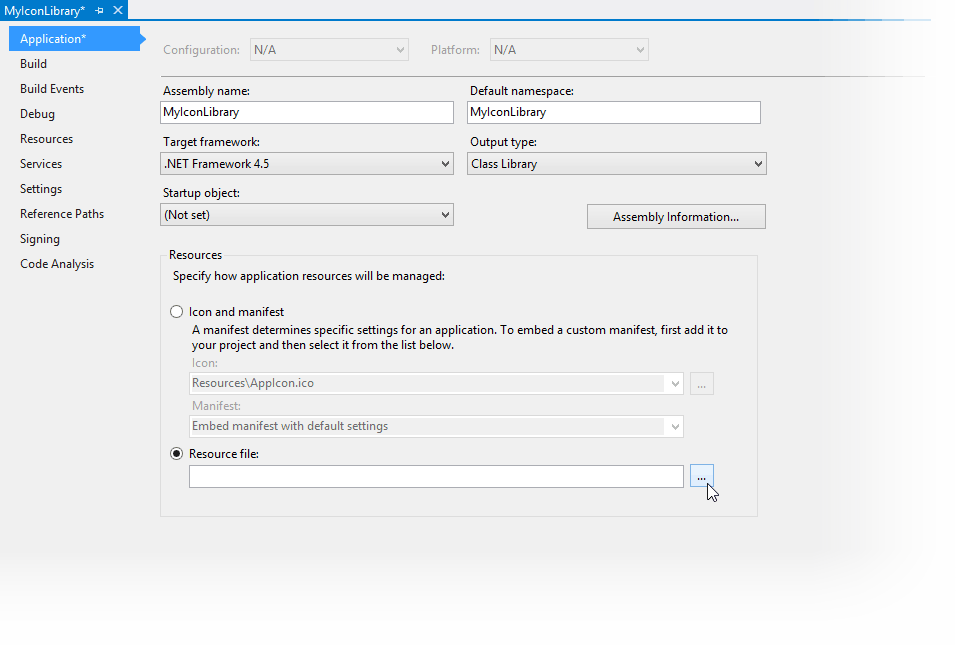
Then, in the project properties editor, specify the path to the created earlier resource file.
Add the reference to MyIconLibrary to your project.
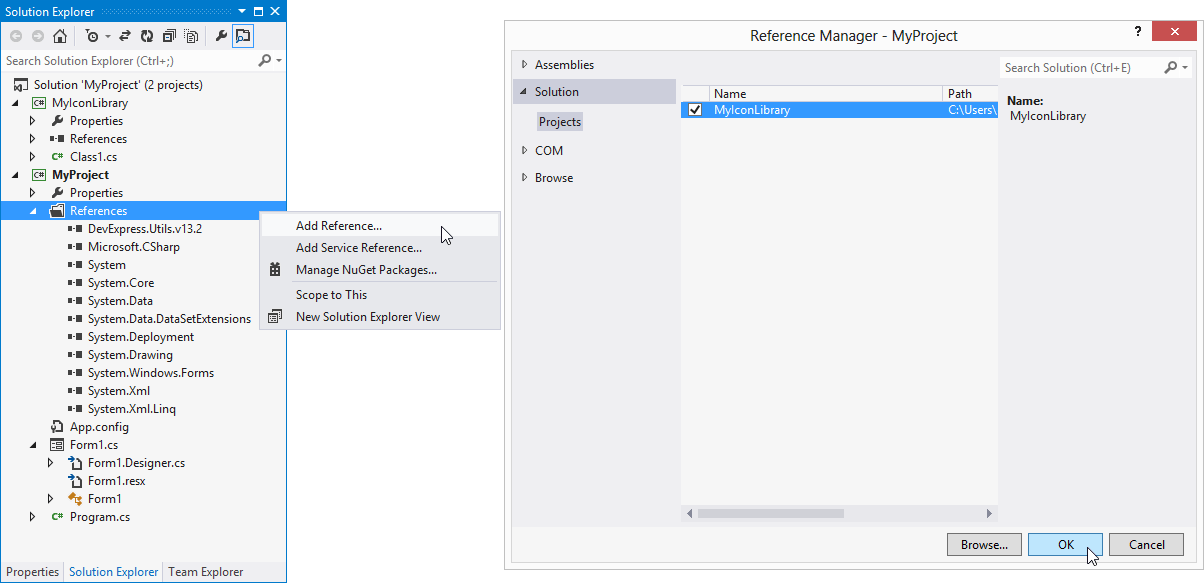
- Rebuild the solution.
Set the
TaskbarAssistant.IconsAssemblyproperty to MyIconLibrary.dll.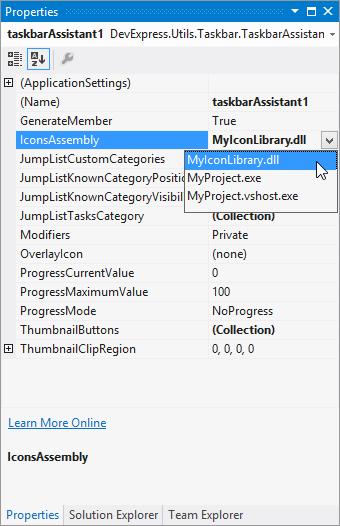
Now you can use icons from the MyIconLibrary.dll and specify task icons with the JumpListItemTask.IconIndex property.