Lesson 4 - Create a RangeControl
- 3 minutes to read
This document demonstrates how to create a RangeControl and bind it to data.
Follow these steps.
- Run MS Visual Studio 2017.
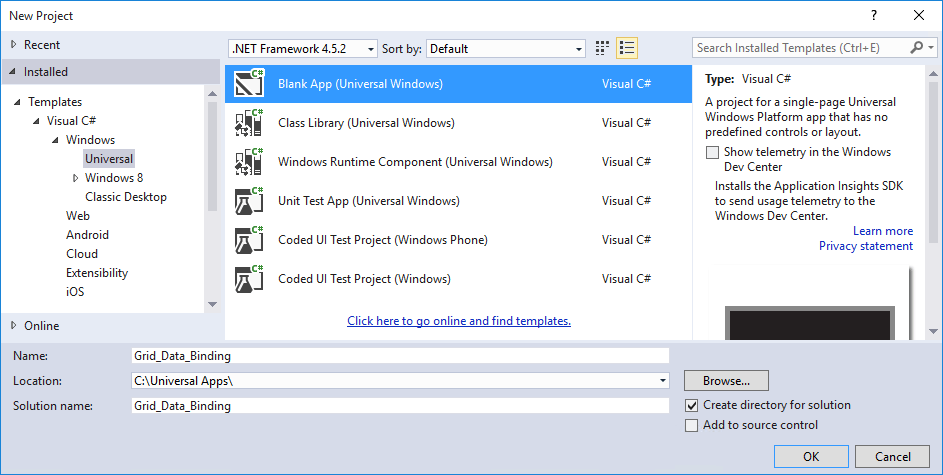
Create a new Windows Universal Application project. Choose New Project on the File menu or press Ctrl+Shift+N, choose the Windows Universal template category, and then choose Blank App (XAML).
Open the MainPage.xaml.cs file and add data classes. In XAML, set DataContext:
<Grid> <Grid.DataContext> <local:DateTimeViewModel Count="1000" Step="06:00:00" Start="10000" /> </Grid.DataContext> </Grid>using System; using System.Collections; using System.Collections.Generic; using Windows.UI.Xaml.Controls; namespace RangeControl_example { public sealed partial class MainPage : Page { public MainPage() { this.InitializeComponent(); } } public class DateTimeViewModel { public int Count { get; set; } public double Start { get; set; } IEnumerable itemsSource; public IEnumerable ItemsSource { get { return itemsSource ?? (itemsSource = CreateItemsSource(Count)); } } protected double GenerateStartValue(Random random) { return Start + random.NextDouble() * 100; } protected double GenerateAddition(Random random) { double factor = random.NextDouble(); if (factor == 1) factor = 50; else if (factor == 0) factor = -50; return (factor - 0.5) * 50; } readonly Random random = new Random(); DateTime start = new DateTime(2000, 1, 1); public TimeSpan Step { get; set; } protected IEnumerable CreateItemsSource(int count) { var points = new List<DateTimeDataPoint>(); double value = GenerateStartValue(random); points.Add(new DateTimeDataPoint() { Value = start, DisplayValue = value }); for (int i = 1; i < count; i++) { value += GenerateAddition(random); start = start + Step; points.Add(new DateTimeDataPoint() { Value = start, DisplayValue = value }); } return points; } } public class NumericDataPoint { public int Value { get; set; } public double DisplayValue { get; set; } } public class DateTimeDataPoint { public DateTime Value { get; set; } public double DisplayValue { get; set; } } }Open the Visual Studio toolbox and locate the “DX.19.2: Common Controls” tab. Choose the RangeControl toolbox item and drop it onto the window.
Note
Dropping the RangeControl toolbox item onto the window will automatically add all of the required references (DevExpress.Core and DevExpress.Controls). To add the RangeControl in code, reference these assemblies manually.
- Right-click the RangeControl and select Reset Layout - All.
Press the F4 key to invoke the Properties window. Set the editor’s ShowRangeThumbs and ShowRangeBar properties to true.
<Controls:RangeControl ShowRangeThumbs="True" ShowRangeBar="True"/>Set the Range Control Client. Locate the Content property and press the New button to invoke a SelectObject dialog box.

- Select SparkPointClient and press OK.
Bind the Range Control Client to data using its ItemsSource, ValueMember and DisplayMember properties. The code below shows how to do it in XAML.
<Controls:RangeControl ShowRangeThumbs="True" ShowRangeBar="True">
    <Controls:SparkPointClient DisplayMember="DisplayValue" ValueMember="Value" ItemsSource="{Binding Path=ItemsSource}" />
</Controls:RangeControl>
Customize the Range Control Client. Set its ValueScaleType property to DateTime and the DisplayScaleType to Numeric to process data correctly. Set the ShowAxisLabels, ShowAxisXGridLines and ShowAxisXMinorGridLines properties to true to display the vertical axis.
<Controls:RangeControl ShowRangeThumbs="True" ShowRangeBar="True">
    <Controls:SparkPointClient
                    ShowAxisLabels="True"
                    ShowAxisXGridLines="True"
                    ShowAxisXMinorGridLines="True"
                    DisplayMember="DisplayValue"
                    ValueMember="Value"
                    DisplayScaleType="DateTime"
                    ValueScaleType="Numeric" ItemsSource="{Binding Path=ItemsSource}" >
    </Controls:SparkPointClient>
</Controls:RangeControl>
Locate the Range Control Client’s IntervalFactories property and invoke the IntervalFactory Collection Editor:

Add a MonthIntervalFactory and a DayIntervalFactory (to limit zooming) and press OK.

The XAML should look like the following:
<Page
    xmlns="http://schemas.microsoft.com/winfx/2006/xaml/presentation"
    xmlns:x="http://schemas.microsoft.com/winfx/2006/xaml"
    xmlns:local="using:RangeControl_example"
    xmlns:d="http://schemas.microsoft.com/expression/blend/2008"
    xmlns:mc="http://schemas.openxmlformats.org/markup-compatibility/2006"
    xmlns:Controls="using:DevExpress.UI.Xaml.Controls"
    x:Class="RangeControl_example.MainPage"
    mc:Ignorable="d">

    <Grid>
        <Grid.DataContext>
            <local:DateTimeViewModel Count="1000" Step="06:00:00" Start="10000" />
        </Grid.DataContext>
        <Controls:RangeControl ShowRangeThumbs="True" ShowRangeBar="True">
            <Controls:SparkPointClient
                            ShowAxisLabels="True"
                            ShowAxisXGridLines="True"
                            ShowAxisXMinorGridLines="True"
                            DisplayMember="DisplayValue"
                            ValueMember="Value"
                            DisplayScaleType="DateTime"
                            ValueScaleType="Numeric" ItemsSource="{Binding Path=ItemsSource}" >
                <Controls:SparkPointClient.IntervalFactories>
                    <Controls:MonthIntervalFactory/>
                    <Controls:DayIntervalFactory/>
                </Controls:SparkPointClient.IntervalFactories>
            </Controls:SparkPointClient>
        </Controls:RangeControl>

    </Grid>
</Page>
Run the example to see the result:
