Azure App Service Container for an Office File API Application
- 6 minutes to read
This topic uses the Microsoft Visual Studio UI to create a sample ASP.NET Core Web API application that merges uploaded documents, adds a barcode, creates a PDF file, and deploys the application to Azure App Services using a Docker container.
Prerequisites
- .NET 6.0 SDK or later.
- An Azure account with an active subscription.
- Visual Studio 2022 with ASP.NET and web development workload.
- The latest version of Docker desktop. You can find more information about Docker in the following topic: Get Docker.
- Your personal DevExpress NuGet credentials. Refer to the following help topic for instructions on how to obtain the feed URL and authorization key: Choose Between Offline and Online DevExpress NuGet Feeds.
Office File API Linux Support
For more information on Office File API on Linux, review the following help topics:
Create an ASP.NET Core Web API Application
- From the File menu, select New > Project.
- Enter Web API in the search box.
- Select the ASP.NET Core Web API template and click Next.
- In the Configure your new project dialog, name the project DXOfficeAzureDockerSample and click Next.
In the Additional information dialog, specify the .NET version, enable Docker, specify the Docker OS (Linux), enable OpenAPI support, and ensure that the checkbox for Use controllers is selected:
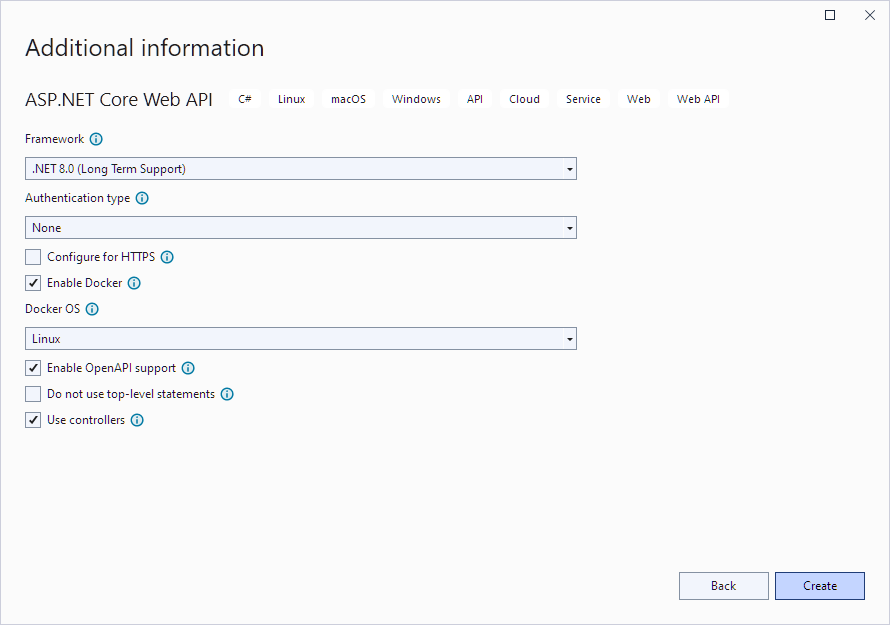
Click Create.
Always Generate Swagger Definitions
To ensure that Swagger definitions are always present in Azure API Management, they must be generated independently of the application environment. To generate these definitions, comment out the conditional block:
//if (app.Environment.IsDevelopment()) {
    app.UseSwagger();
    app.UseSwaggerUI();
//}
Install DevExpress NuGet Packages
Visit nuget.devexpress.com, log in to your account, and click Obtain Feed URL. Open the NuGet Package Manager in Visual Studio and register the DevExpress NuGet feed as the package source. Install the following packages:
- DevExpress.Document.Processor
- This package includes the Word Processing Document API and other Office File API libraries. You need a license for the DevExpress Office File API Subscription or the DevExpress Universal Subscription to use this package in production code.
- DevExpress.Drawing.Skia
- This package implements the cross-platform PDF renderer based on the Skia Graphics Library. For more information, review the following help topic: DevExpress.Drawing Graphics Library.
If you are new to NuGet packages, see the following installation guide for assistance: Install DevExpress Packages Using NuGet Package Manager.
Implement Web API Controller
Add a new SampleController.cs class file to the Controllers folder. Override its contents with the following code snippet:
using DevExpress.BarCodes;
using DevExpress.Drawing;
using DevExpress.Office.Services;
using DevExpress.XtraRichEdit.API.Native;
using DevExpress.XtraRichEdit;
using Microsoft.AspNetCore.Mvc;
using System.Drawing;
using System.Text;
using DevExpress.XtraSpreadsheet.Services;

namespace DXOfficeAzureDockerSample.Controllers {
    [ApiController]
    [Route("[controller]")]
    public class SampleController : ControllerBase {
        [HttpPost]
        public async Task<IActionResult> Get(IFormFile[] files) {
            try {
                OfficeCharts.Instance.ActivateCrossPlatformCharts(); // enable chart support
                using (var server = new RichEditDocumentServer()) {
                    await MergeDocuments(server, files);
                    server.Document.AppendSection();
                    Stream imageStream = GenerateBarCode();
                    server.Document.Images.Append(DocumentImageSource.FromStream(imageStream));

                    MemoryStream resultStream = new MemoryStream();
                    server.ExportToPdf(resultStream);
                    resultStream.Seek(0, SeekOrigin.Begin);
                    return File(resultStream, "application/pdf", "result.pdf");
                }
            }
            catch (Exception e) {
                return StatusCode(500, e.Message + Environment.NewLine + e.StackTrace);
            }
        }

        async Task MergeDocuments(RichEditDocumentServer server, IFormFile[] files) {
            using (var stream = new MemoryStream()) {
                await files[0].CopyToAsync(stream);
                stream.Seek(0, SeekOrigin.Begin);
                server.LoadDocument(stream);
            }
            for (int i = 1; i < files.Length; i++) {
                using (var stream = new MemoryStream()) {
                    await files[i].CopyToAsync(stream);
                    stream.Seek(0, SeekOrigin.Begin);
                    server.Document.AppendDocumentContent(stream);
                }
            }
        }

        Stream GenerateBarCode() {
            // Create a QR code.
            BarCode barCode = new BarCode();
            barCode.Symbology = Symbology.QRCode;
            barCode.CodeText = "https://www.devexpress.com";
            barCode.BackColor = Color.White;
            barCode.ForeColor = Color.Black;
            barCode.RotationAngle = 0;
            barCode.CodeBinaryData = Encoding.Default.GetBytes(barCode.CodeText);
            barCode.Options.QRCode.CompactionMode = QRCodeCompactionMode.Byte;
            barCode.Options.QRCode.ErrorLevel = QRCodeErrorLevel.Q;
            barCode.Options.QRCode.ShowCodeText = false;
            barCode.DpiX = 72;
            barCode.DpiY = 72;
            barCode.Module = 2f;

            // Save the barcode as an image.
            var stream = new MemoryStream();
            barCode.Save(stream, DXImageFormat.Png);
            return stream;
        }
    }
}
Open the DXOfficeAzureDockerSample.http file in the editor and replace the weatherforecast route with the sample route to the newly created controller:
// ...
GET {{DXOfficeAzureDockerSample_HostAddress}}/sample/
// ...
Delete the WeatherForecastController.cs and WeatherForecast.cs files as they are no longer needed.
Add a Secret File
The secrets.dev.yaml file is used to manage sensitive information securely within a development environment. It helps developers work with sensitive data while minimizing security risks.
Add the secrets.dev.yaml file to the project’s root. Copy the personal NuGet feed URL to the file:
https://nuget.devexpress.com/{your-feed-authorization-key}/api
Add Dockerfile Build Arguments to the Project File
To use a secret, modify the Docker build command line. To do this, select Edit Project File to open the DXOfficeAzureDockerSample.csproj file in the editor, and add the following statement to the PropertyGroup section:
<DockerfileBuildArguments>--secret id=dxnuget,source=secrets.dev.yaml</DockerfileBuildArguments>
Modify the Dockerfile
The Dockerfile in your project folder contains instructions required to build a Docker image and deploy it inside a container. Add the following commands to your Dockerfile:
FROM mcr.microsoft.com/dotnet/aspnet:8.0 AS base

WORKDIR /app
EXPOSE 8080

# DX
# Install the latest version of font libraries
RUN apt update &&\
         apt install -y libc6 libicu-dev libfontconfig1

# (Optional step) Install the ttf-mscorefonts-installer package
# to use Microsoft TrueType core fonts in the application
RUN echo "deb http://ftp.debian.org/debian/ bullseye contrib" >> /etc/apt/sources.list
RUN apt update
RUN apt install -y ttf-mscorefonts-installer
# /DX

FROM mcr.microsoft.com/dotnet/sdk:8.0 AS build
ARG BUILD_CONFIGURATION=Release
WORKDIR /src

# DX
# Specify your DevExpress NuGet Feed URL as the package source
RUN --mount=type=secret,id=dxnuget dotnet nuget add source $(cat /run/secrets/dxnuget) -n devexpress-nuget
# /DX

COPY ["DXOfficeAzureDockerSample/DXOfficeAzureDockerSample.csproj", "DXOfficeAzureDockerSample/"]
RUN dotnet restore "./DXOfficeAzureDockerSample/DXOfficeAzureDockerSample.csproj"
COPY . .
WORKDIR "/src/DXOfficeAzureDockerSample"
RUN dotnet build "./DXOfficeAzureDockerSample.csproj" -c $BUILD_CONFIGURATION -o /app/build

FROM build AS publish
ARG BUILD_CONFIGURATION=Release
RUN dotnet publish "./DXOfficeAzureDockerSample.csproj" -c $BUILD_CONFIGURATION -o /app/publish /p:UseAppHost=false

FROM base AS final
WORKDIR /app
COPY --from=publish /app/publish .
ENTRYPOINT ["dotnet", "DXOfficeAzureDockerSample.dll"]
Publish the Application to the Azure App Service
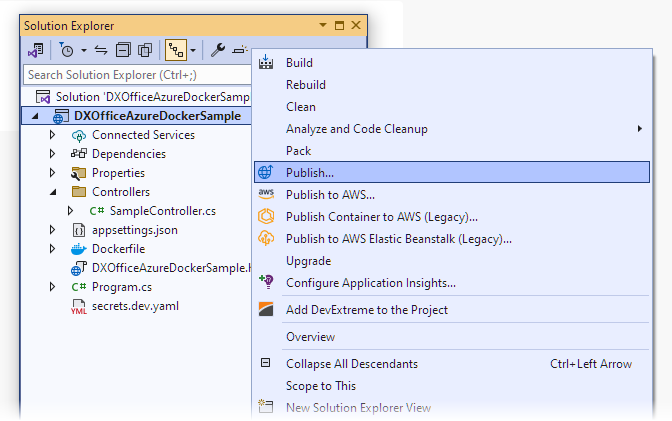
In Solution Explorer, right-click the project and select Publish.
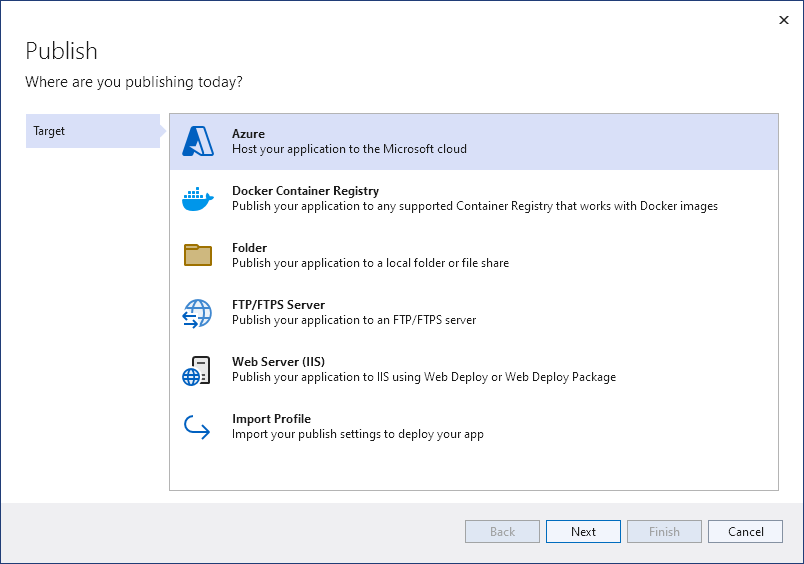
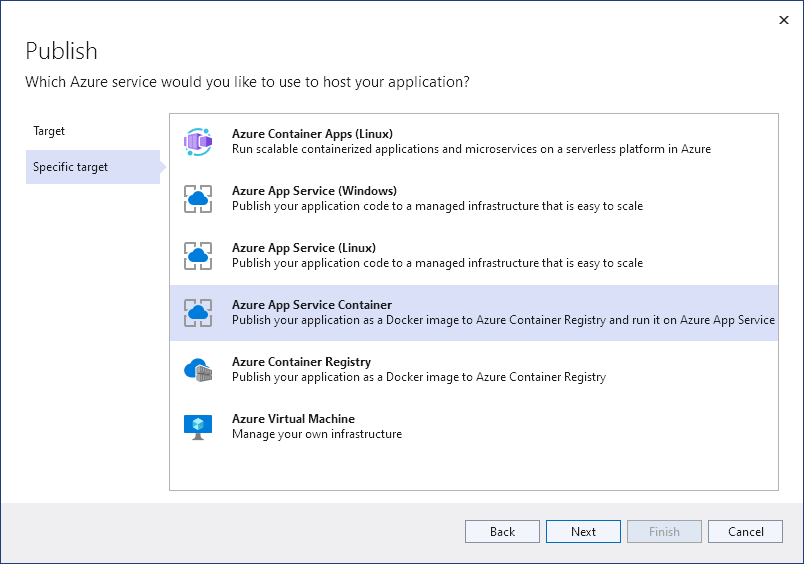
In the Publish dialog, select Azure and click Next:
Select Azure App Service Container and click Next:
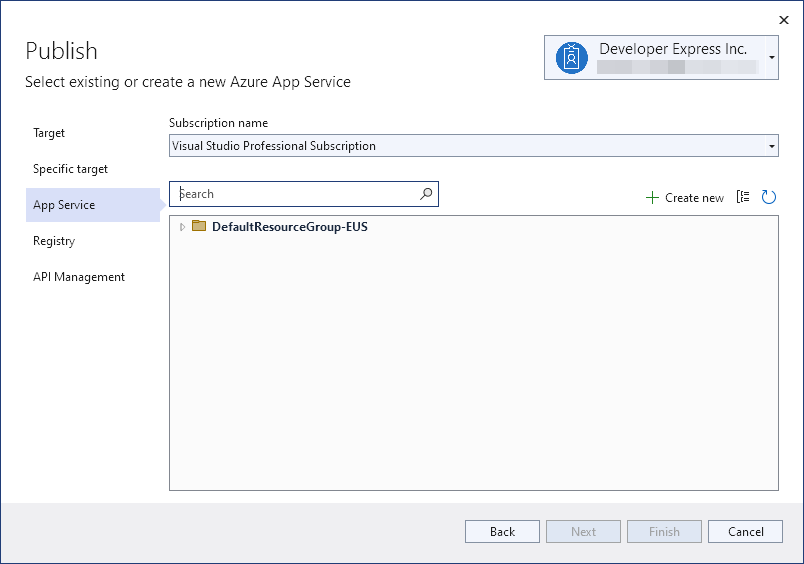
Click Create new:
The App Service (Linux) dialog appears with pre-populated fields for App Name, Resource Group, and App Service Plan. You may choose to keep these names or you can modify them.
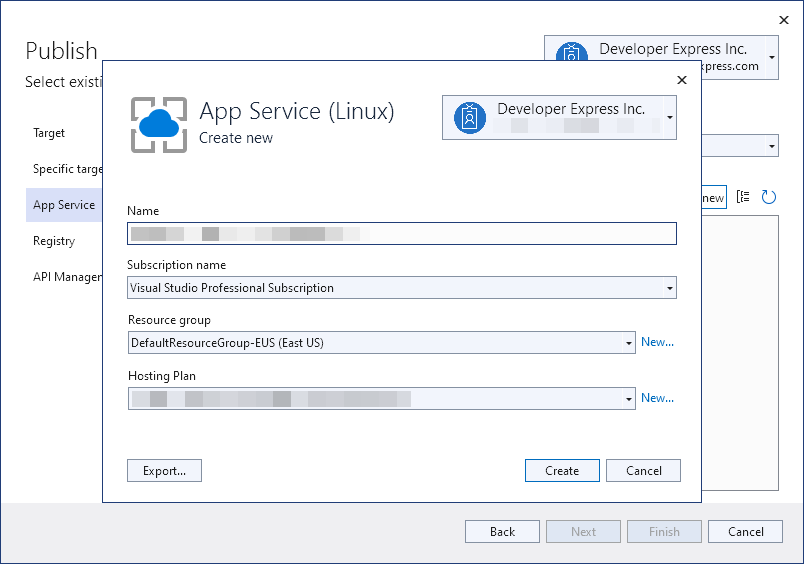
Click the Create button.
Once the app service is created, click the Next button.
You can select the available registry or create a new registry. If you click Create new, the Azure Container Registry dialog appears. You may choose to keep names in pre-populated fields or you can modify them.
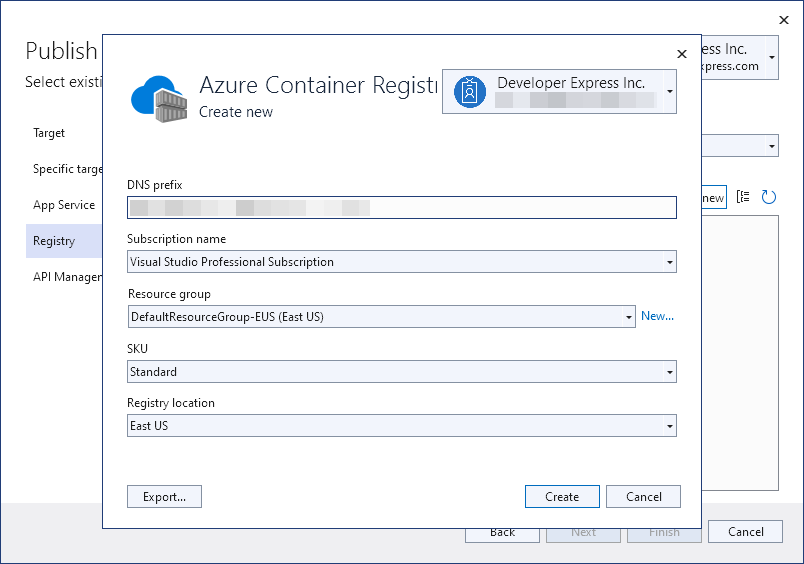
Click the Create button.
Once the app service is created, click the Next button.
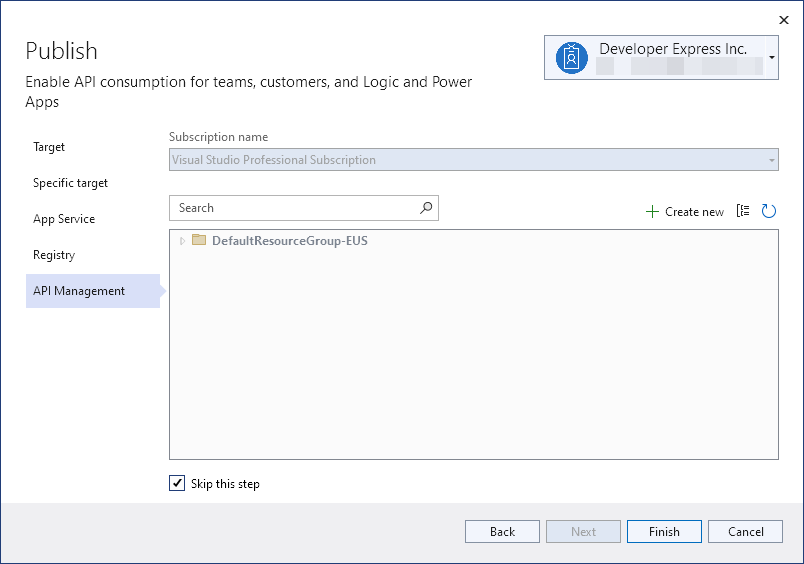
You can skip the API Management step and create the API next time using the Azure portal. Make sure that the Skip this step checkbox is checked:
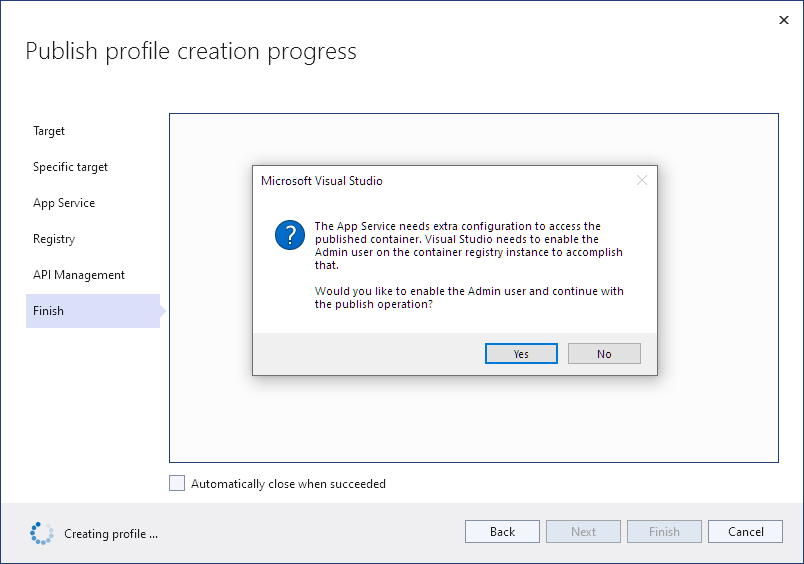
You may be prompted to enable the Admin user on the container registry instance. Click Yes.
When that completes, select the Finish button.
This will close the dialog box and a summary screen will appear with information about the publication. Click the Publish button.
Verify Web API Operation
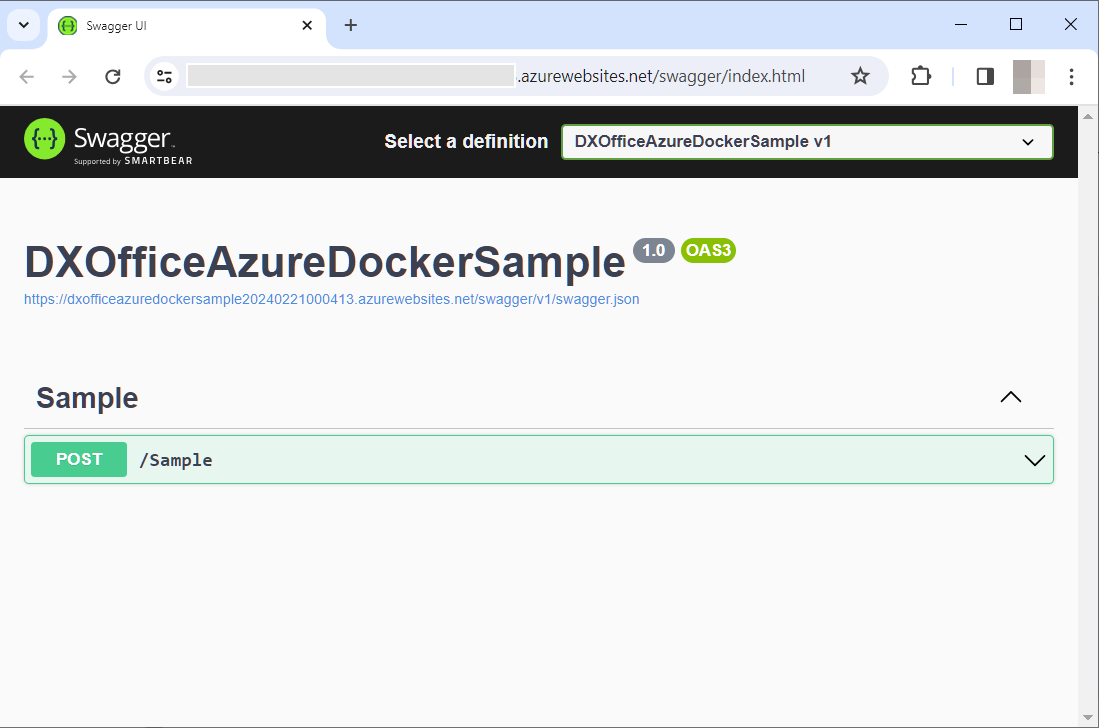
When publishing is complete, a new browser window is invoked with the URL of the published site. Append the /swagger/index.html string to the URL and refresh the browser window.
A Swagger page appears that allows you to test the published web API:
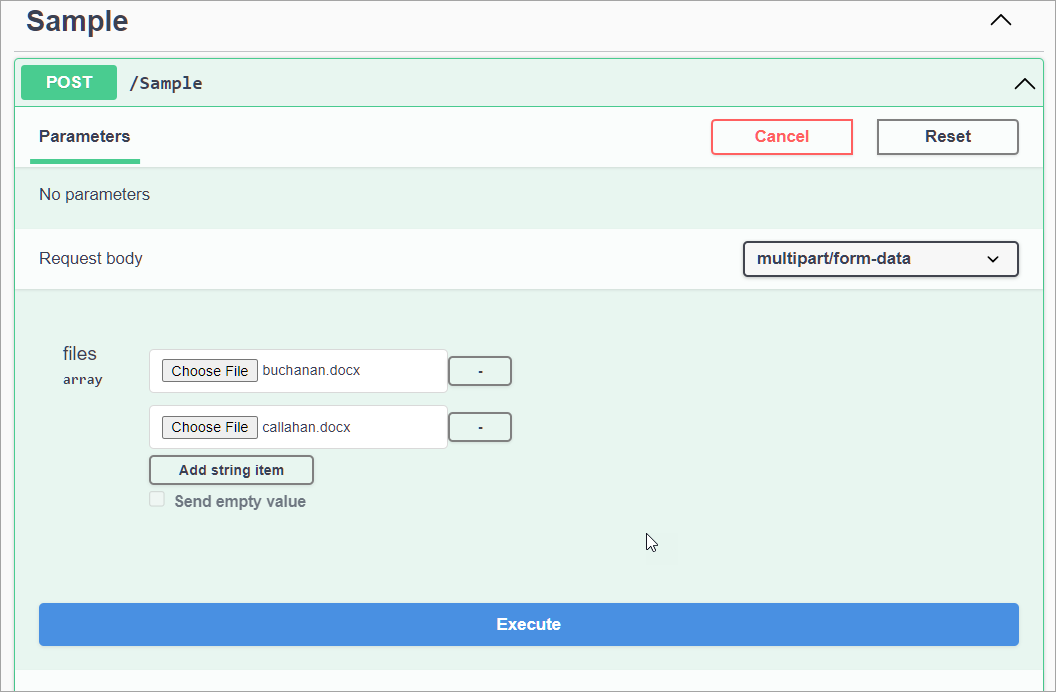
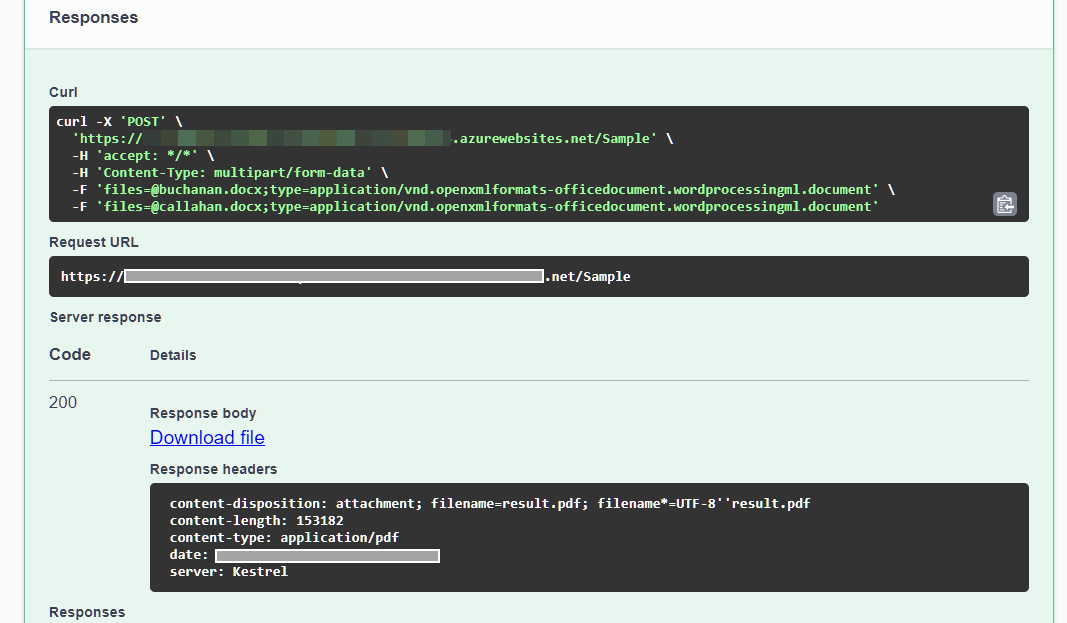
You can test the application and upload files to merge:
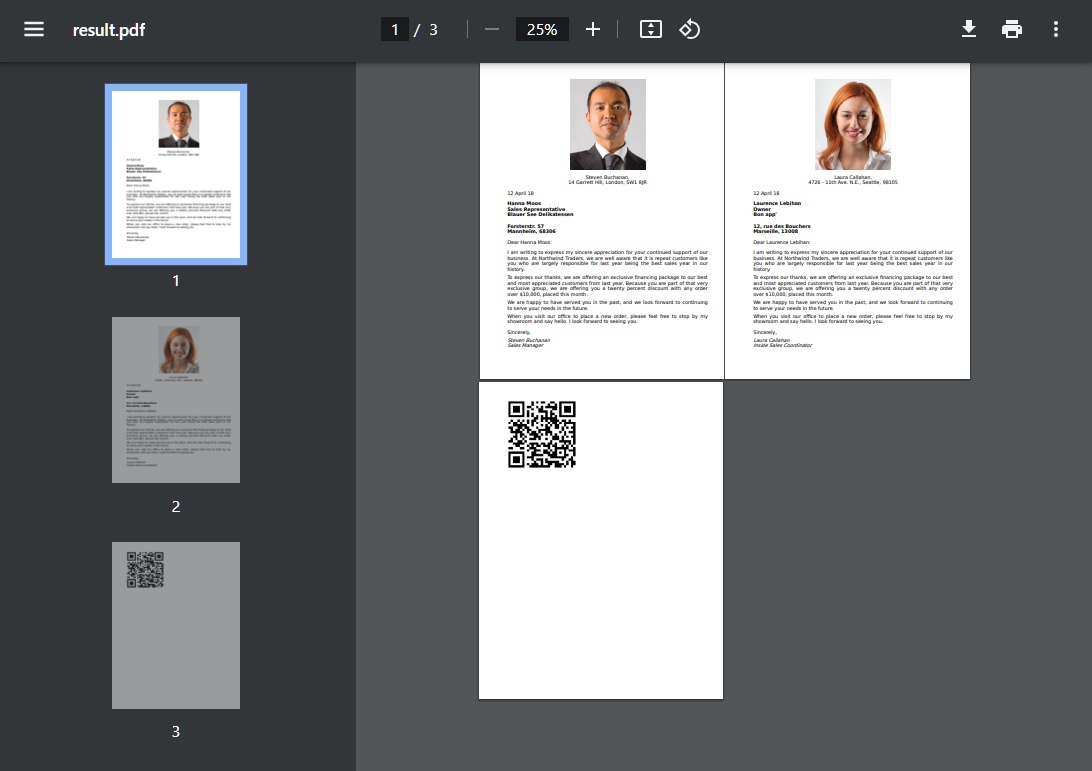
The resulting file is available for download using the Download file link:
The PDF output appears as follows: