Add Navigation Controls to Xamarin.Forms Solution
- 3 minutes to read
This topic explains how to integrate DevExpress Navigation components into a Xamarin.Forms cross-platform solution.
Important
DevExpress Navigation components are available for iOS and Android, and can be used in Xamarin.Forms solutions that use the .NET Standard code sharing strategy.
Add DevExpress Navigation components to your solution in one of the following ways:
Install the NuGet package
Visual Studio- Obtain your NuGet feed URL
Register the DevExpress NuGet feed as a package source.
Navigate to Tools | Options | NuGet Package Manager | Package Source and add the DevExpress feed to the list of package sources.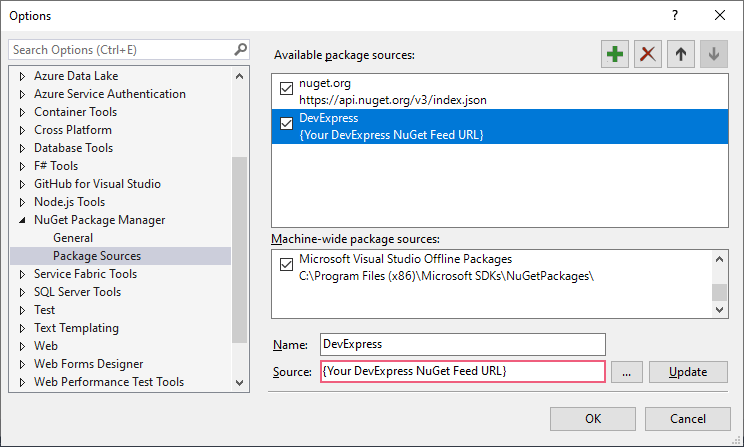
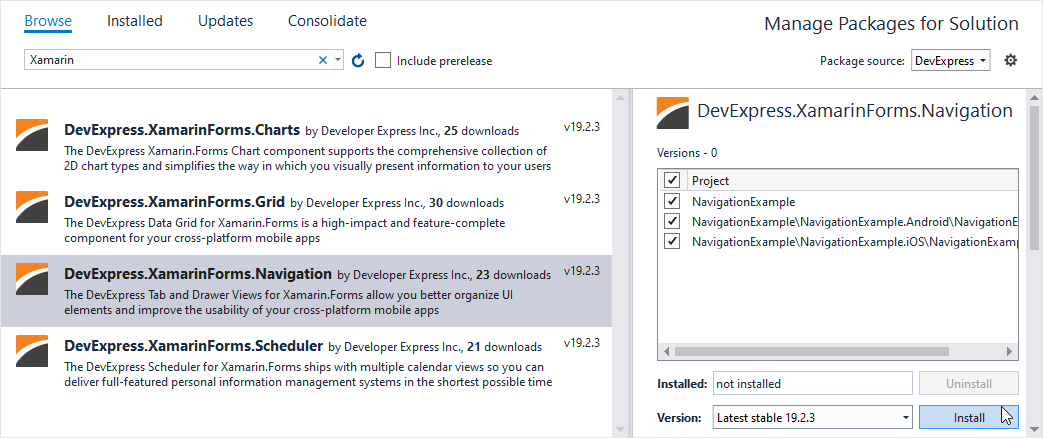
Install the DevExpress.XamarinForms.Navigation package from the DevExpress NuGet feed.
- Select Tools | NuGet Package Manager | Manage NuGet Packages for Solution… in Visual Studio’s main menu, or right-click the solution in Solution Explorer and select Manage NuGet Packages for Solution….
Search for DevExpress.XamarinForms.Navigation in the DevExpress package source, select all the solution’s projects and click Install.
Visual Studio for Mac- Obtain your NuGet feed URL
Register the DevExpress NuGet feed as a package source.
Navigate to Visual Studio | Preferences | NuGet | Sources and add the DevExpress feed to the list of sources.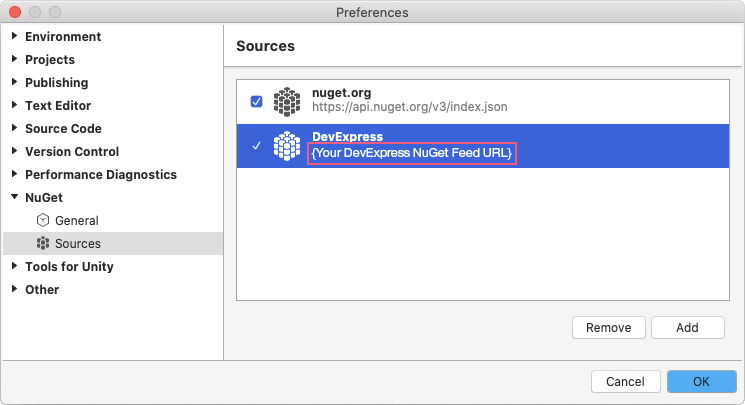
Install the DevExpress.XamarinForms.Navigation package from the DevExpress NuGet feed.
- Select Project | Manage NuGet Packages… in the main menu, or right-click the solution in Solution Pad and select Manage NuGet Packages…
In the invoked Manage NuGet Packages dialog, select DevExpress from the Source drop-down list in the top left corner, search for DevExpress.XamarinForms.Navigation and click Add Package.
Select all the solution’s projects in the invoked Select Projects dialog and click Ok.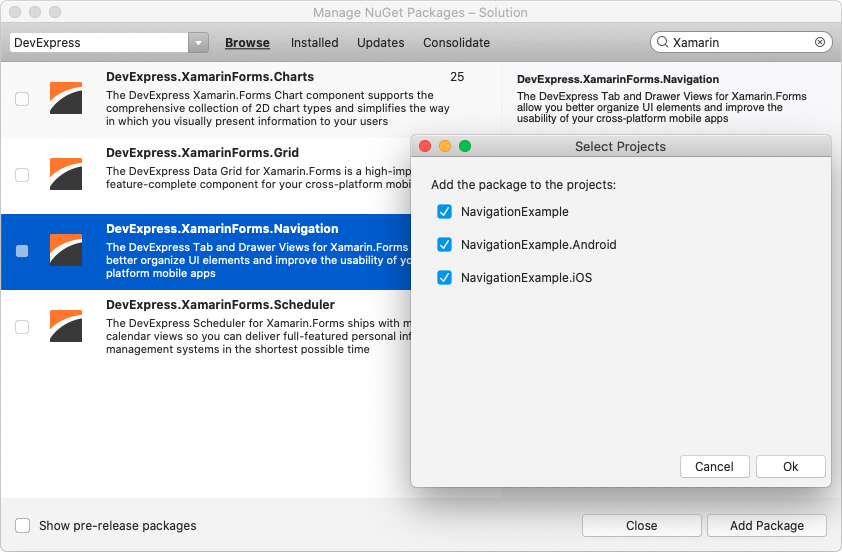
– or –
Add libraries from the downloaded bundle
- Download the Mobile UI Controls for Xamarin.Forms bundle from the Client Center.
Add the following assembly references to your Xamarin.Forms solution’s projects:
Project
Assembly
<YourAppName>
(A .NET Standard project that contains the shared code)
DevExpress.XamarinForms.Core.dll
DevExpress.XamarinForms.Navigation.dll
<YourAppName>.Android
(A project that contains Android-specific code)
DevExpress.XamarinForms.Navigation.Android.dll
DevExpress.Xamarin.Android.Navigation.dll
<YourAppName>.iOS
(A project that contains iOS-specific code)
DevExpress.XamarinForms.Navigation.iOS.dll
DevExpress.Xamarin.iOS.Navigation.dll
Note
These files are in the <DevExpress.Xamarin bundle>/Binaries directory. Ensure the downloaded <DevExpress.Xamarin> bundle was unzipped.
Add the following initialization code before the LoadApplication method call in your iOS project’s AppDelegate.cs file:
DevExpress.XamarinForms.Navigation.Navigation.Init();
Add the following namespace to an XAML markup or C# file in which you use navigation elements:
Create a navigation control instance, for example:
In XAML markup or C# code, add a TabView instance to the content page.
<ContentPage xmlns="http://xamarin.com/schemas/2014/forms" xmlns:x="http://schemas.microsoft.com/winfx/2009/xaml" xmlns:local="clr-namespace:TabView" x:Class="TabView.MainPage" xmlns:dxn="clr-namespace:DevExpress.XamarinForms.Navigation;assembly=DevExpress.XamarinForms.Navigation"> <dxn:TabView> </dxn:TabView> </ContentPage>Create a TabPage page.
<dxn:TabPage
   xmlns="http://xamarin.com/schemas/2014/forms"
   xmlns:x="http://schemas.microsoft.com/winfx/2009/xaml"
   xmlns:local="clr-namespace:TabPageExample"
   x:Class="TabPageExample.MainPage"
   xmlns:dxn="clr-namespace:DevExpress.XamarinForms.Navigation;assembly=DevExpress.XamarinForms.Navigation">

</dxn:TabPage>