DevExpress .NET Products - NuGet Packages & Licensing in Popular Continuous Integration Systems
- 11 minutes to read
Important
This help topic applies to DevExpress .NET products only. If you are using the DevExtreme product line, refer to the following article: DevExtreme - Deployment and Continuous Integration.
Notes on Licensing
DevExpress license information must be available during the build stage so it can be injected into binary artifacts. To make that information available in CI/CD environments, store your license key in a text file or an environment variable named DevExpress_License. Examples below demonstrate how you can do this.
Note that license information is sensitive and should be treated as a secret. You may want to store the key in a storage with additional security and access control capabilities (such as Azure Key Vault or AWS Secret Manager).
For information on how to obtain your License Key, review the following help topic: License Key for DevExpress .NET Products.
Important
Use the exact casing (DevExpress_License.txt, DevExpress_LicensePath, DevExpress_License) to avoid license activation issues. On most Unix-like systems, file and environment variable names are case-sensitive.
For example, a macOS development machine or Linux-based CI/CD pipeline will not activate the DevExpress license if the environment variable is named DEVEXPRESS_LICENSE or devexpress_license.
NuGet.org vs NuGet.DevExpress.com Feed
If you are using DevExpress v25.1+, you can obtain DevExpress NuGet packages from NuGet.org. Our own NuGet server remains operational, but we plan to discontinue its use in future versions. When we release v26.1, we will publish NuGet packages to NuGet.org only.
If you use NuGet.DevExpress.com, we recommend that you migrate to NuGet.org. You will need to re-reconfigure your local and build server development environments (CI/CD pipelines).
Note
If you wish to use a public NuGet.org feed, follow instructions in this help topic with the following changes:
- Skip steps related to NuGet.DevExpress.com.
- Register the required NuGet.org feed in
nuget.config. - Make certain that
nuget.configis accessible from your build server.
Azure DevOps
Azure DevOps does not support custom upstream NuGet sources. Use the NuGet.config file to configure the system.
- Obtain your NuGet feed credentials.
- Add the NuGet.config file next to the .sln file in your project.
- Add a package source with your DevExpress NuGet feed URL to the NuGet.config file.
The next steps depend on whether you use an authorization key or feed URL.
Note
We do not recommend that you store credentials in a NuGet.config file (especially if you save this file to the source control). This practice can lead to credential leakage. Consider more secure storage options described in Consuming packages from authenticated feeds and How to Protect Your Private NuGet Feed and Safely Consume the Feed From External Systems.
Feed Authorization Key
Change Nuget.config content as follows:
<?xml version="1.0" encoding="utf-8"?>
<configuration>
  <packageSources>
    <add key="nuget.org" value="https://api.nuget.org/v3/index.json" protocolVersion="3" />
    <add key="DevExpress Feed" value="https://nuget.devexpress.com/api/v3/index.json" />
  </packageSources>
</configuration>
Add a new build pipeline.
Add a new NuGet restore task to the pipeline and configure it to work with NuGet.config. You should specify the following settings:
Settings Values Command restore Feeds to use Feeds in my NuGet.config Path to NuGet.config Path to your NuGet.config file Click the New/Add button to add feed credentials.

Specify the connection settings as illustrated below. Click Save.

NuGet Feed URL
Change Nuget.config content as follows:
<?xml version="1.0" encoding="utf-8"?>
<configuration>
  <packageSources>
    <add key="nuget.org" value="https://api.nuget.org/v3/index.json" protocolVersion="3" />
    <add key="DevExpress Nuget server" value="https://nuget.devexpress.com/{Your feed authorization key}/api/v3/index.json" />
  </packageSources>
</configuration>
Add a new build pipeline.
Add a new NuGet restore task to the pipeline and configure it to work with NuGet.config. You should specify the following settings:
Settings Values Command restore Feeds to use Feeds in my NuGet.config Path to NuGet.config Path to your NuGet.config file
Specify Your .NET License Key
Your .NET License Key must be available at the project build stage (dotnet build / MSBuild). The following two storage options are available:
Note
This is the recommended option. A single file will supply license information to all projects and their associated tasks within a given pipeline. If you use a file storage, you avoid possible build server caching issues that make a trial version message persist. (The dotnet publish command always rebuilds the project unless the --no-build flag is specified.)
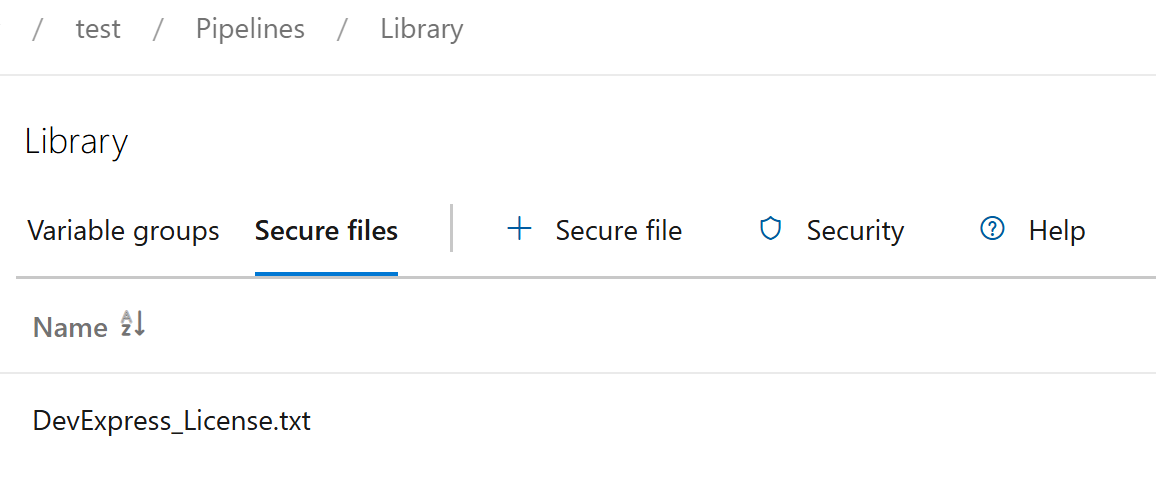
Locate your pipeline and select Pipeline | Library | Secure files. Upload DevExpress_License.txt. For additional information, see Use secure files. During pipeline execution, the file must exist at the following path.
Windows: %AppData%/DevExpress/
Linux: $HOME/.config/DevExpress/
macOS: $HOME/Library/Application Support/DevExpress/
- Secure File (YAML)
- Secure File (Docker)
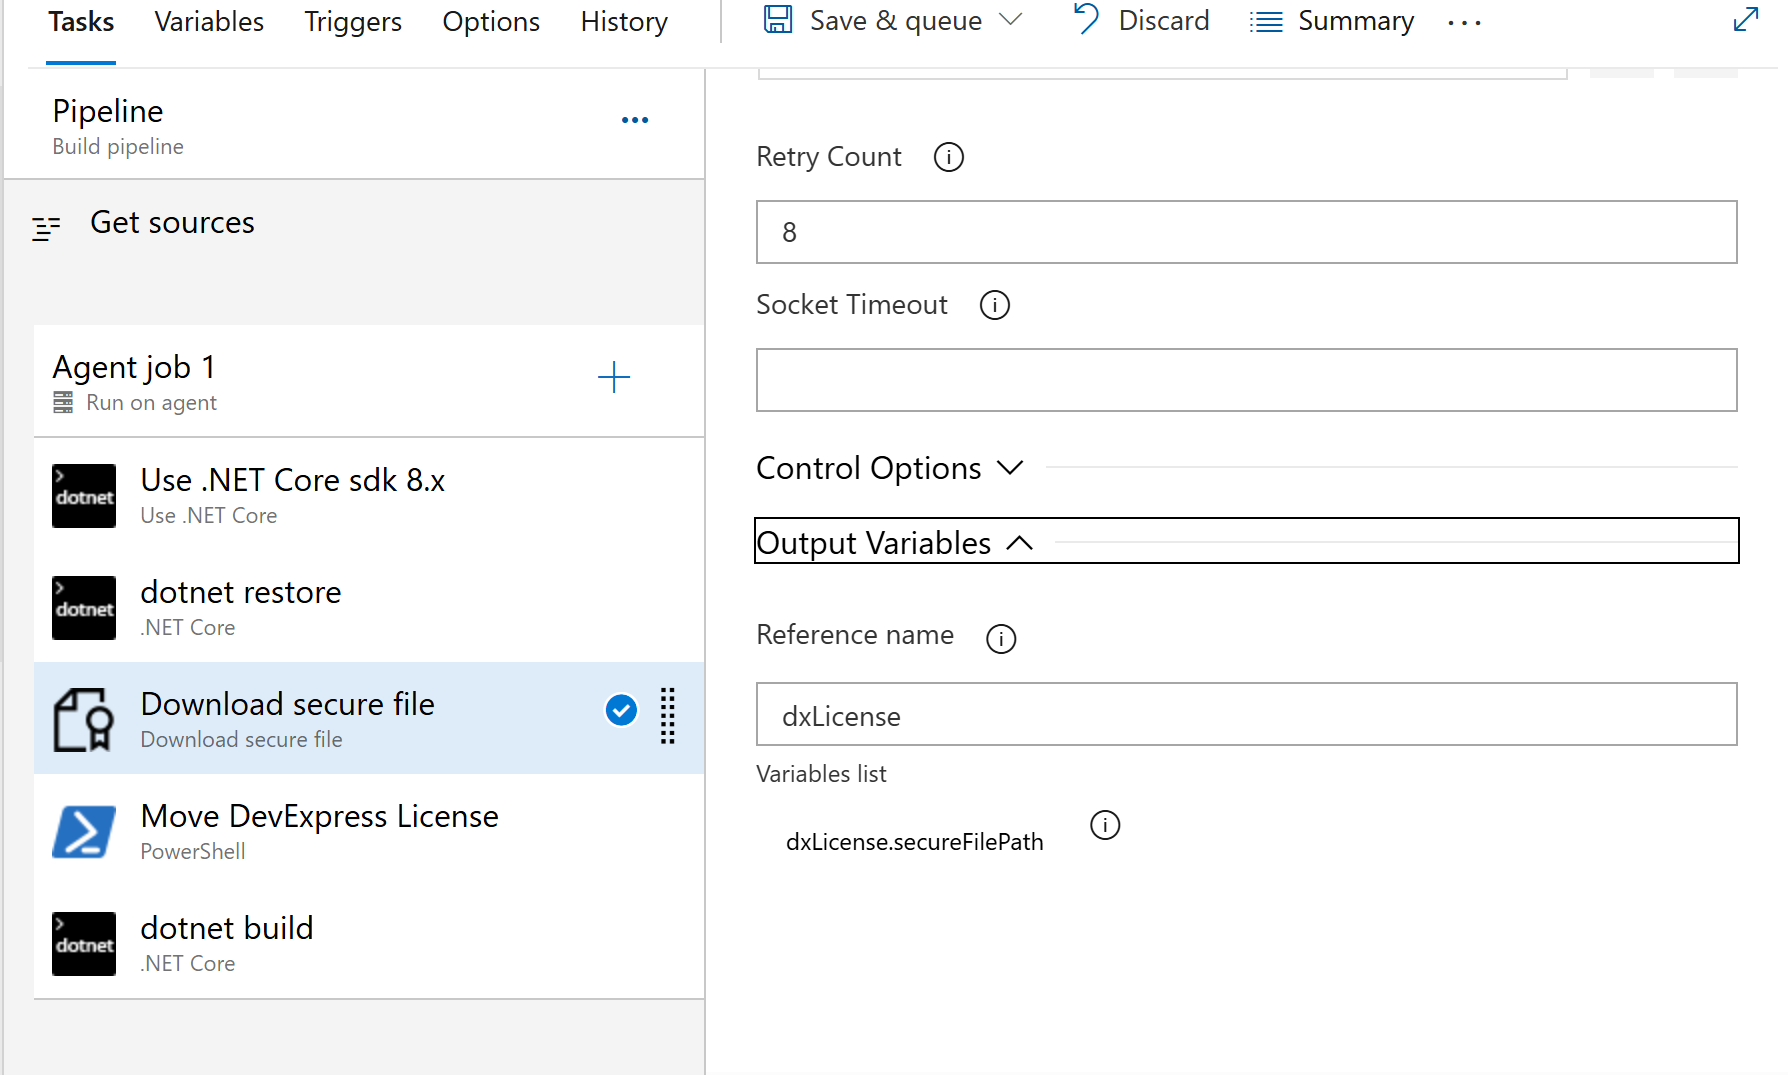
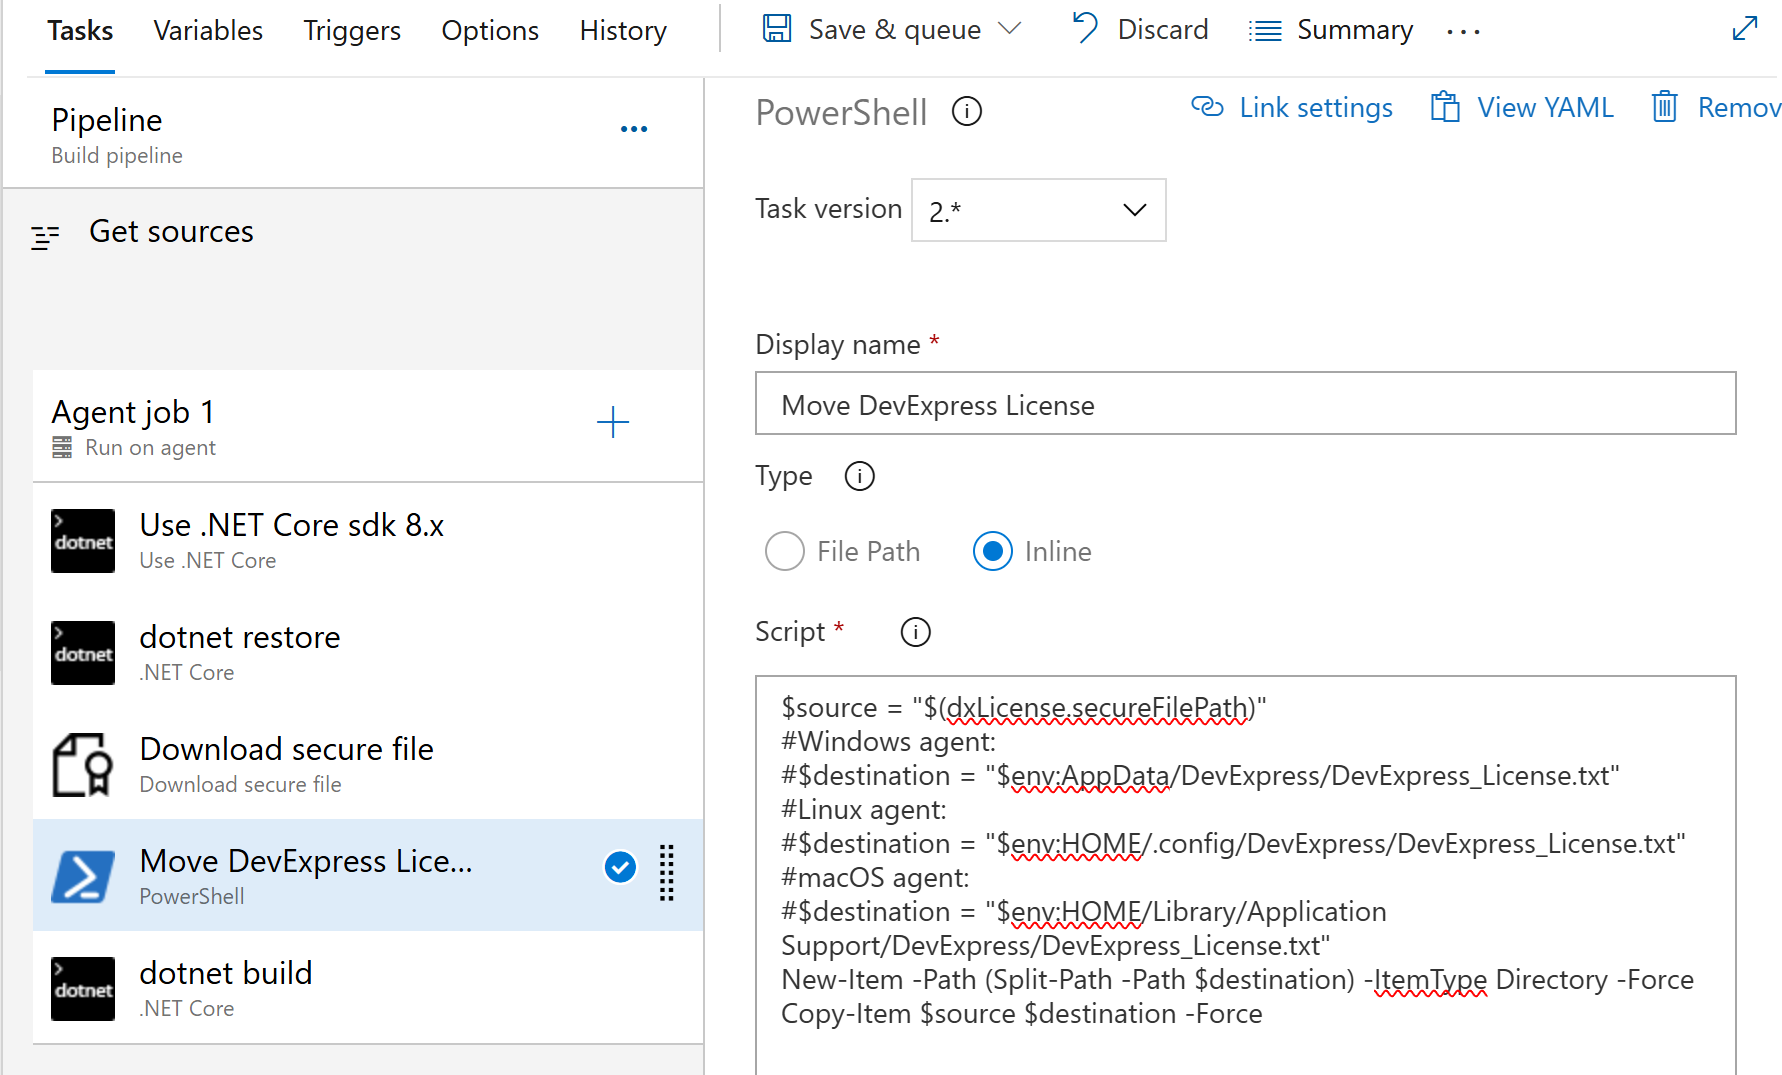
- Secure File (Classic GUI)
- Environment Variable (YAML)
- Environment Variable (Docker)
- task: DownloadSecureFile@1
  name: dxLicense
  inputs:
    secureFile: 'DevExpress_License.txt'

- task: PowerShell@2
  displayName: 'Obtain DevExpress license file'
  inputs:
    targetType: 'inline'
    pwsh: true
    script: |
      $src = '$(dxLicense.secureFilePath)'
      ## Windows runner
      # $basePath = Join-Path $env:APPDATA 'DevExpress'
      ## Linux runner
      # $basePath = Join-Path $env:HOME '.config/DevExpress'
      ## macOS runner
      # $basePath = Join-Path $HOME 'Library/Application Support/DevExpress'

      New-Item -ItemType Directory -Path $basePath -Force | Out-Null

      $licensePath = Join-Path $basePath 'DevExpress_License.txt'
      Copy-Item -LiteralPath $src -Destination $licensePath -Force

- task: VSBuild@1
  inputs:
    solution: '$(solution)'
    msbuildArgs: '/p:DeployOnBuild=true /p:WebPublishMethod=Package /p:PackageAsSingleFile=true /p:SkipInvalidConfigurations=true /p:PackageLocation="$(build.artifactStagingDirectory)"'
    platform: '$(buildPlatform)'
    configuration: '$(buildConfiguration)'
GitHub Actions
Create a secret with your DevExpress NuGet credentials for CI/CD operations. You must be the repository owner to create secrets for an environment in a personal account.
- Navigate to the main page of the repository and click Settings.

- In the Security section of the sidebar, select Secrets and variables | Actions.
- Click New repository secret in the Secrets tab.
Set your personal NuGet API key as the secret value.

Repeat the same steps to add another secrect with your personal .NET License Key.
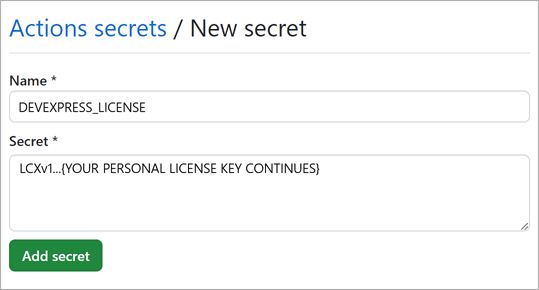
Use secret values in your GitHub Actions CLI scripts (YAML). Assign the license key to the environment variable named DevExpress_License. Use the NuGet API Key when you register the package source. Note that GitHub Actions can only read a secret if you explicitly include the secret in a workflow. Enclose the secret’s name within the quoting rules when you pass a secret in the command line. This is required to avoid special characters that may affect your shell.
jobs:
  build:
    # ...
    env:
      DevExpress_License: ${{ secrets.DevExpressPipelineVariable }}
    # ...
    steps:
      - name: Register DevExpress Source
        run: dotnet nuget add source https://nuget.devexpress.com/api/v3/index.json -p ${{ secrets.DEVEXPRESS_FEED_AUTH_KEY }} -u DevExpress -n devexpress-nuget
Refer to the following article for more information on how to use secrets in the GitHub workflow: Using secrets in a workflow.
name: .NET Core Desktop

on:
 push:
   branches: [ "main" ]
 pull_request:
   branches: [ "main" ]

jobs:

 build:

   strategy:
     matrix:
       configuration: [Debug]

   runs-on: windows-latest

   env:
     DevExpress_License: ${{ secrets.DevExpressPipelineVariable }}
     Solution_Name: your-solution-name
     Test_Project_Path: your-test-project-path
     Wap_Project_Directory: your-wap-project-directory-name
     Wap_Project_Path: your-wap-project-path

   steps:
   - name: Checkout
     uses: actions/checkout@v4
     with:
       fetch-depth: 0

   # Add DevExpress license file
   #- name: AddDevExpressLicense
   #  shell: cmd
   #  run: |
   #    set "SRC=%GITHUB_WORKSPACE%\DevExpress_License.txt"
   #    set "DEST=%APPDATA%\DevExpress"
   #    if not exist "%DEST%" mkdir "%DEST%"
   #    copy "%SRC%" "%DEST%" /Y

   # Add DevExpress license file
   - name: AddDevExpressLicense
     shell: cmd
     run: |
       set "DEST=%APPDATA%\DevExpress"
       if not exist "%DEST%" mkdir "%DEST%"
       echo "${{ secrets.DevExpressPipelineVariable }}" > %APPDATA%\DevExpress\DevExpress_License.txt

   # Install the .NET Core workload
   - name: Install .NET Core
     uses: actions/setup-dotnet@v4
     with:
       dotnet-version: 8.0.x

   # Add local NuGet source
   - name: Register DevExpress Source
       run: dotnet nuget add source https://nuget.devexpress.com/api/v3/index.json -p ${{ secrets.DEVEXPRESS_FEED_AUTH_KEY }} -u DevExpress -n devexpress-nuget
       shell: cmd

   # Restore
   - name: Restore
     run: dotnet restore ./Sample

   # Build
   - name: Build
     run: dotnet build ./Sample --disable-build-servers

   # Run app to generate image
   - name: Run
     run: dotnet run --project ./Sample/DashboardCICDExport.csproj

   # Upload PNG artifact
   - name: Upload
     uses: actions/upload-artifact@v4
     with:
       name: generated-image
       path: .\output.png
Note
.NET build keeps its infrastructure processes in memory after a project build is complete. This process cache optimizes performance for successive build operations. The example above explicitly disables caching. Such configuration prevents rare situations where DevExpress trial warnings persist even though license variable mapping is present for the build or publish task.
GitLab
Open your project CI/CD settings (Settings > CI/CD):

Add a new variable.
- Click Expand.
Click Add variable.

Specify project variables (available to all jobs in a pipeline):
Important
- Select the Masked option.
- Variables defined in this way are available globally for every pipeline and its jobs.

Use your NuGet Feed API Key when you add a package source. The variable value will be masked in
dotnet buildordotnet restorejob logs.Add another secret to store your personal .NET License Key.
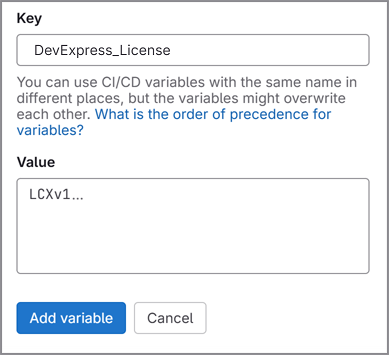
Write the secret’s value to a file:
- name: Create a file with the DevExpress license key
  shell: pwsh
  env:
    tempEnvVariable: ${{ secrets.DevExpressPiplelineVariable }}
  run: |
    ## Windows runner
    # $basePath = Join-Path $env:APPDATA 'DevExpress'
    ## Linux runner
    # $basePath = Join-Path $env:HOME '.config/DevExpress'
    ## macOS runner
    # $basePath = Join-Path $HOME 'Library/Application Support/DevExpress'

    New-Item -ItemType Directory -Path $basePath -Force | Out-Null

    $licensePath = Join-Path $basePath 'DevExpress_License.txt'
    $env:tempEnvVariable | Set-Content -Path $licensePath -Encoding UTF8
TeamCity
Create a new “Password” parameter. For instructions, see Create and Set Up Custom Parameters.
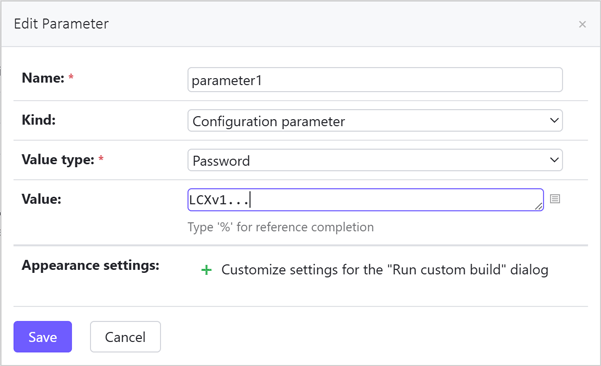
Create a new Build Step before building and publishing the project. Configure the Build Step as follows:
- Runner: PowerShell
- Script execution mode: Execute .ps1 script from external file
- Script: Use the code listed below
# TeamCity password parameter
$license = "%parameter1%"

## Windows runner
# $basePath = Join-Path $env:APPDATA 'DevExpress'
## Linux runner
# $basePath = Join-Path $env:HOME '.config/DevExpress'
## macOS runner
# $basePath = Join-Path $HOME 'Library/Application Support/DevExpress'

$licensePath  = Join-Path $basePath "DevExpress_License.txt"
New-Item -ItemType Directory -Force -Path $basePath | Out-Null
Set-Content -Path $licensePath -Value $license -Encoding UTF8
JFrog Artifactory
Create a new remote repository in Artifactory with the following settings:
Settings Values URL https://nuget.devexpress.com/ NuGet Download Context Path api/v2/package NuGet Feed Context Path api/v2 NuGet v3 Feed URL https://nuget.devexpress.com/api/v3/index.json

JFrog Artifactory creates a NuGet feed on the jFrog server.
Read the following help topics for additional information:
- JFrog Artifactory – Set Up Remote NuGet Repositories
- JFrog Artifactory – How to Configure NuGet Remote Repository as DevExpress
Nexus OSS
Create a new remote repository with the following settings.
Settings Values Format nuget Type proxy Remote Storage https://nuget.devexpress.com/{Your feed authorization key}/api/v3/index.json

Nexus OSS creates a proxy URL feed with access to the DevExpress NuGet packages.


