Create an ASP.NET MVC Dashboard Application
- 4 minutes to read
This tutorial describes how to integrate the ASP.NET MVC Dashboard extension into an ASP.NET MVC web application.
Step 1. Create an ASP.NET MVC Application
This section describes how to create an MVC application in the DevExpress Template Gallery.
In Visual Studio, create a new project and select DevExpress v22.1 Web App Template Gallery on the start page as the project template.

In the invoked gallery, go to the ASP.NET MVC category and select Web Application. Enter MvcDashboardApp as a project name and click Run Wizard.

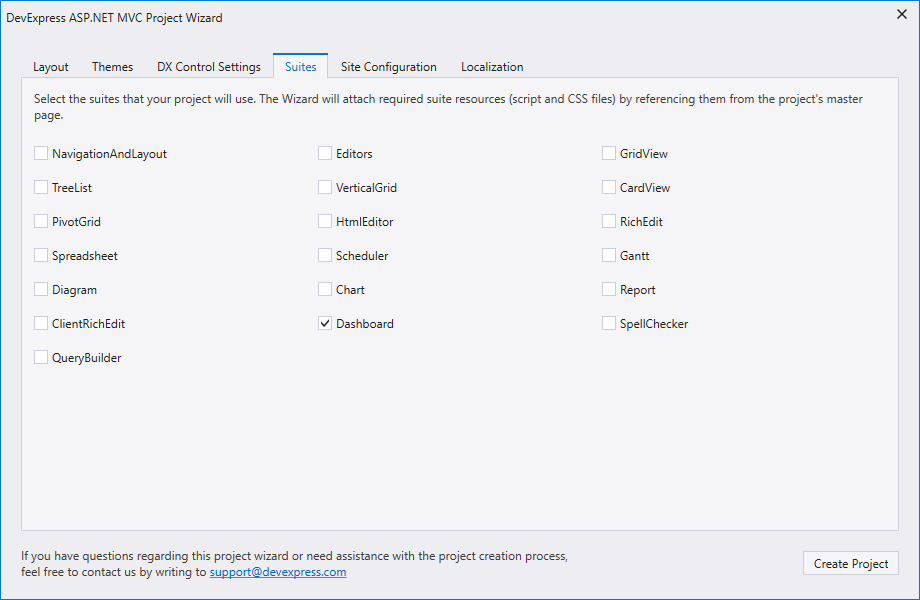
In the opened ASP.NET MVC Project Wizard, select Empty on the Layout tab.

Then, go to the Suites tab and enable only the Dashboard checkbox to attach the Web Dashboard’s stylesheets, scripts, and resources. Click Create Project.
Step 2. Add a Dashboard Extension to the MVC Application
Build the solution. Open the Views | Home | Index.cshtml (or Index.vbhtml) view, right-click the desired location in the Code Editor to display a context menu and click Insert DevExpress MVC Extension… to invoke the Insert DevExpress Extension wizard.

In the Insert DevExpress Extension wizard, go to the Visualization tab, select Dashboard and click Insert.
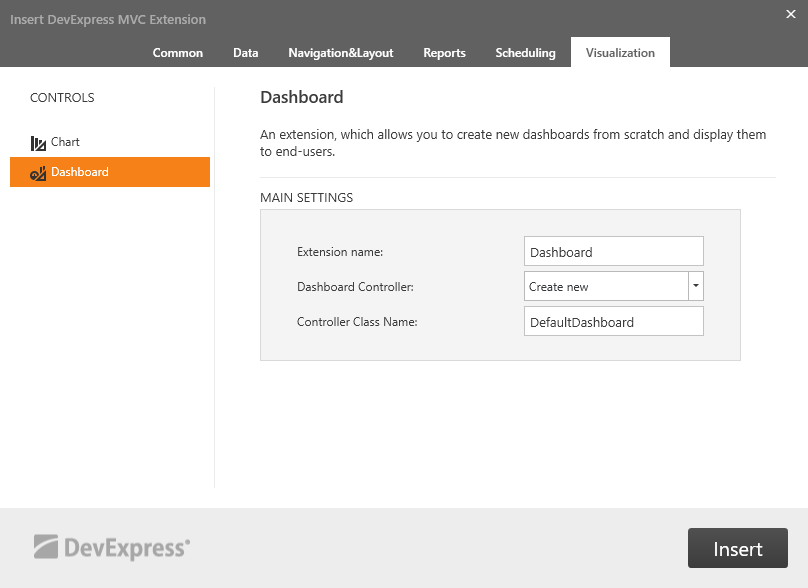
The wizard generates the extra code the Web Dashboard requires and inserts the Dashboard extension on the Index.cshtml page:
@{
    ViewBag.Title = "Home Page";
}
@Html.DevExpress().Dashboard(settings => {
    settings.Name = "Dashboard";
    settings.ControllerName = "DefaultDashboard";
}).GetHtml()
Step 3. Create Dashboard Storage
Right-click the App_Data folder and add the Dashboards folder. In the DashboardConfig.cs file located in the App_Start folder, uncomment the DashboardConfigurator.SetDashboardStorage method call and change the dashboard storage path to ~/App_Data/Dashboards.
using System.Web.Routing;
using DevExpress.DashboardWeb.Mvc;

public class DashboardConfig {
    public static void RegisterService(RouteCollection routes) {
        routes.MapDashboardRoute("api/dashboard", "DefaultDashboard");

        // Uncomment this line to save dashboards to the App_Data folder.
        DashboardConfigurator.Default.SetDashboardStorage(new DashboardFileStorage(@"~/App_Data/Dashboards"));

        // ...
    }
}
Step 4. Supply Web Dashboard with Data
Add the nwind.mdb file from the following path to the project’s App_Data folder:
C:\Users\Public\Documents\DevExpress Demos 22.1\Components\Data\nwind.mdb
Specify a connection string to this database within the project’s Web.config file:
<configuration>
  <connectionStrings>
      <add name="nwindConnection" connectionString="XpoProvider=MSAccess; Provider=Microsoft.ACE.OLEDB.12.0; Data Source=|DataDirectory|\nwind.mdb;" />
  </connectionStrings>
</configuration>
Note
Note that the connection string should contain the XpoProvider parameter that depends on the used database type. For details on how to specify connection strings for different database types, see Register Default Data Connections.
In the DashboardConfig.cs file (located in the App_Start folder), pass the ConfigFileConnectionStringsProvider instance as the DashboardConfigurator.SetConnectionStringsProvider method’s parameter to allow a user to create new data sources based on connection strings from the Web.config file:
using System.Web.Routing;
using DevExpress.DashboardWeb.Mvc;
using DevExpress.DataAccess.Web;

public class DashboardConfig {
    public static void RegisterService(RouteCollection routes) {
        routes.MapDashboardRoute("api/dashboard", "DefaultDashboard");

        // ...
        DashboardConfigurator.Default.SetConnectionStringsProvider(new ConfigFileConnectionStringsProvider());
    }
}
Step 5. Create a Dashboard
The designer application is now ready. Run the project to see the result.

Your application should look as follows:

You can now create your first dashboard in the Web Dashboard.
Step 6. Switch to Viewer Mode
In Designer mode, the control loads the extensions required to design dashboards. Users can access the Data Source Wizard , preview underlying data, and modify dashboards from storage. The requests from the dashboard backend server can be sent to third-party resources. A user can also switch the control to Viewer mode.
After you created and saved a dashboard, switch your Dashboard Designer application to ViewerOnly mode to prevent users from modifying the dashboard and its data.
In a project, open the Views | Home | Index.cshtml (or Index.vbhtml) view. Add the following code within the MvcDashboardFactory.Dashboard helper method:
@Html.DevExpress().Dashboard(settings => {
    settings.Name = "Dashboard";
    settings.ControllerName = "DefaultDashboard";
    settings.WorkingMode = DevExpress.DashboardWeb.WorkingMode.ViewerOnly;
}).GetHtml()
Warning
The working mode does not influence the server settings. Initially, the server works at the ClientTrustLevel.Full trust level. Verify the trust level and specify which actions a client can initiate on the server. See the following topic for details: Working Mode Access Rights.
Run the application. The ASP.NET MVC Dashboard extension displays the dashboard from ~/App_Data/Dashboards in Viewer mode:

Next Steps
-
Describes how to create and configure dashboards in the Web Dashboard control.
ASP.NET MVC Dashboard Extension
Contains instructions on how to integrate the DashboardExtension extension into an ASP.NET MVC application.