Changing a Watermark
- 4 minutes to read
DevExpress Reporting allows you to display text and picture watermarks on report pages. You can also specify an expression that assigns different watermarks to pages.
This tutorial includes information about the following tasks:
How to add watermarks.
How to specify watermark settings.
How to define watermark accessibility settings.
To invoke the Watermark dialog, click the Watermark  button on the toolbar.
Add a Text Watermark
To add a text watermark, open the Text Watermark tab.
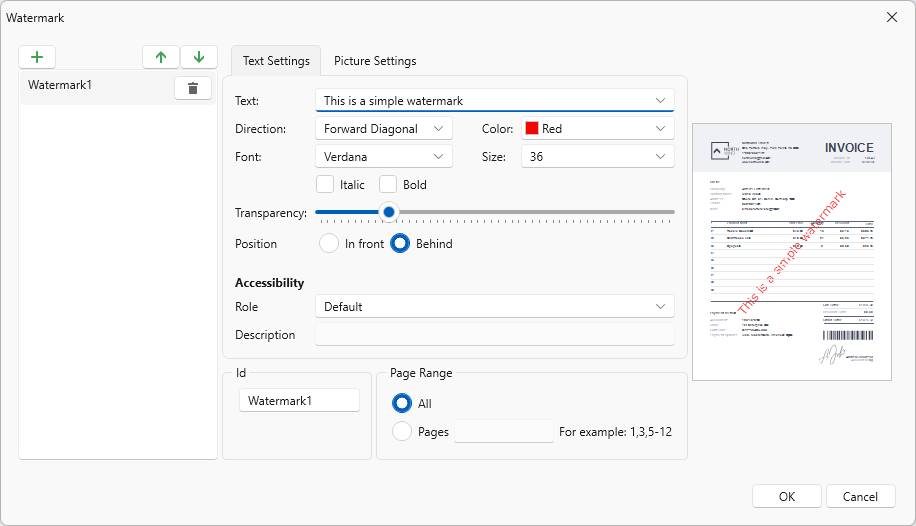
Specify the following settings:
Watermark Id
The unique identifier of a watermark used to specify the watermark in the WatermarkId property (See the Manage Watermark Collection section for details).
Font Name
The font of the watermark’s text.
Size
The size of the watermark’s text.
Unit
Specifies text measurement system.
Bold
Formats the watermark’s text as bold.
Italic
Formats the watermark’s text as italic.
Foreground Color
The foreground color of the watermark’s text.
Text
The watermark’s text.
Text Transparency
The transparency of the watermark’s text.
Text Direction
The incline of the watermark’s text.
Text Position
Specifies whether a watermark should be printed behind or in front of page content.
Page Range
The range of pages which contain a watermark.
Role
Specifies the role of a text watermark in the exported PDF document. This value is used by assistive technologies.
Description
Specifies the description of a text watermark used by assistive technologies.
Add an Image Watermark
To add a picture watermark, switch to the Picture Watermark tab. To load the image to be used as a watermark, click the ellipsis button for the Image property. In the invoked dialog, select the file containing the image that you wish to load and click Open.
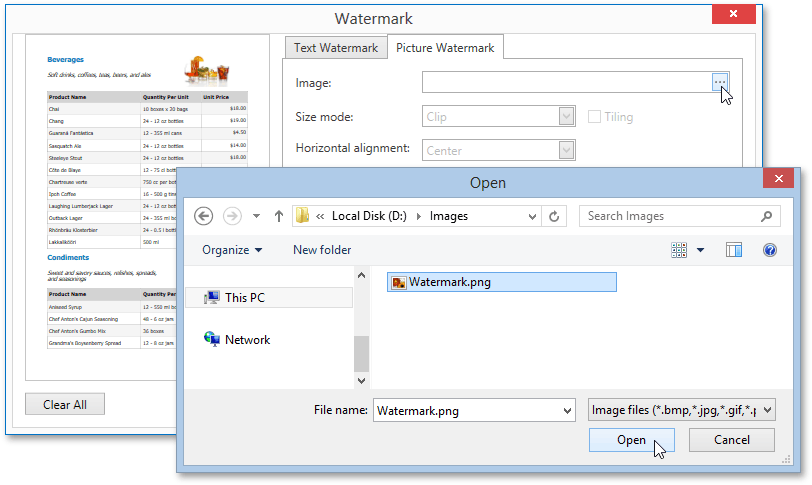
Specify the following settings:
Watermark Id
The unique identifier of a watermark used to specify the watermark in the WatermarkId property (See the Manage Watermark Collection section for details).
Image Source
Specifies the image that you wish to use as a watermark.
Image Position
Specifies whether a watermark should be printed behind or in front of page content.
Image Transparency
The transparency of the watermark’s image. The Transparency property is unavailable when you specify an SVG image.
Image View Mode
The mode in which a picture watermark is displayed.
Image Tiling
Specifies whether a picture watermark should be tiled.
Image Alignment
Specifies the horizontal or vertical alignment of the watermark.
Page Range
The range of pages which contain a watermark.
Role
Specifies the role of an image watermark in the exported PDF document. This value is used by assistive technologies.
Description
Specifies the description of an image watermark used by assistive technologies.
Supported Image Formats
A picture watermark supports the following formats:
- BMP
- JPG / JPEG / JPE / JFIF
- GIF
- TIF / TIFF
- PNG
- ICO
- DIB
- RLE
- EMF / WMF
- SVG
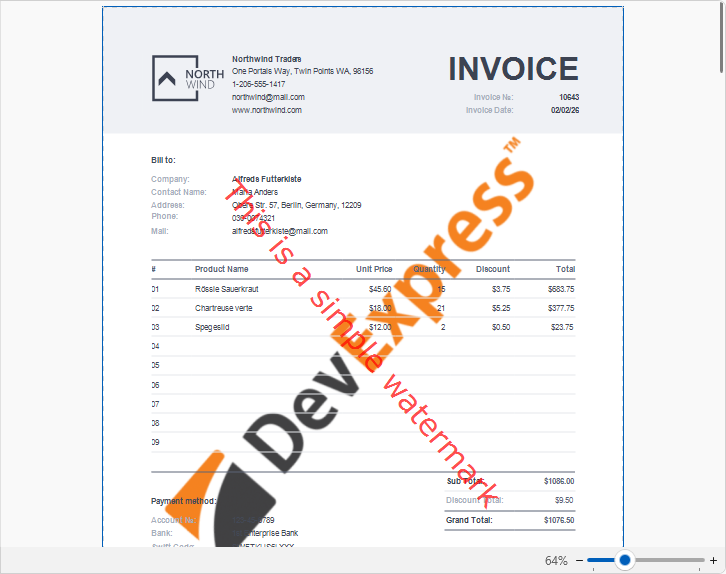
Combine Text and a Picture in One Watermark
You can display both text and a picture in one Watermark. Use the Text Position and Image Position options of the watermark to specify whether the text and picture should be displayed behind or in front of page content.
For example, create a watermark and specify its text and picture settings. Set position of the text to InFront and position of the picture to Behind:
As a result, the image is displayed behind the table, while the text is in front of the content:
Watermark Accessibility Settings
Use the following options to specify whether to include report watermarks in the logical structure of exported PDF documents:
For image watermarks that convey meaningful information, set the Role property to Figure and use the Description property to specify alternative text.
For text watermarks, set the Role property to Paragraph and use the Description property to specify alternative text.
For purely decorative watermarks, retain the default value to treat the watermark as an artifact.
Remove a Watermark
To remove watermarks from a document, click the watermarks’s “bin” icon in the Watermark dialog. Then, click OK to save changes and close the dialog.