Assign a Standard Image
- 2 minutes to read
This lesson explains how to associate an entity class with a standard image from the DevExpress.Images assembly. This image illustrates the entity class in the following sections of the UI:
- Navigation control
- Detail View
- List View
The instructions below describe how to assign images to the entity classes in the Model Editor.
Step-by-Step Instructions
In the MySolution.Module project, open the Model.DesignedDiffs.xafml file in the Model Editor.
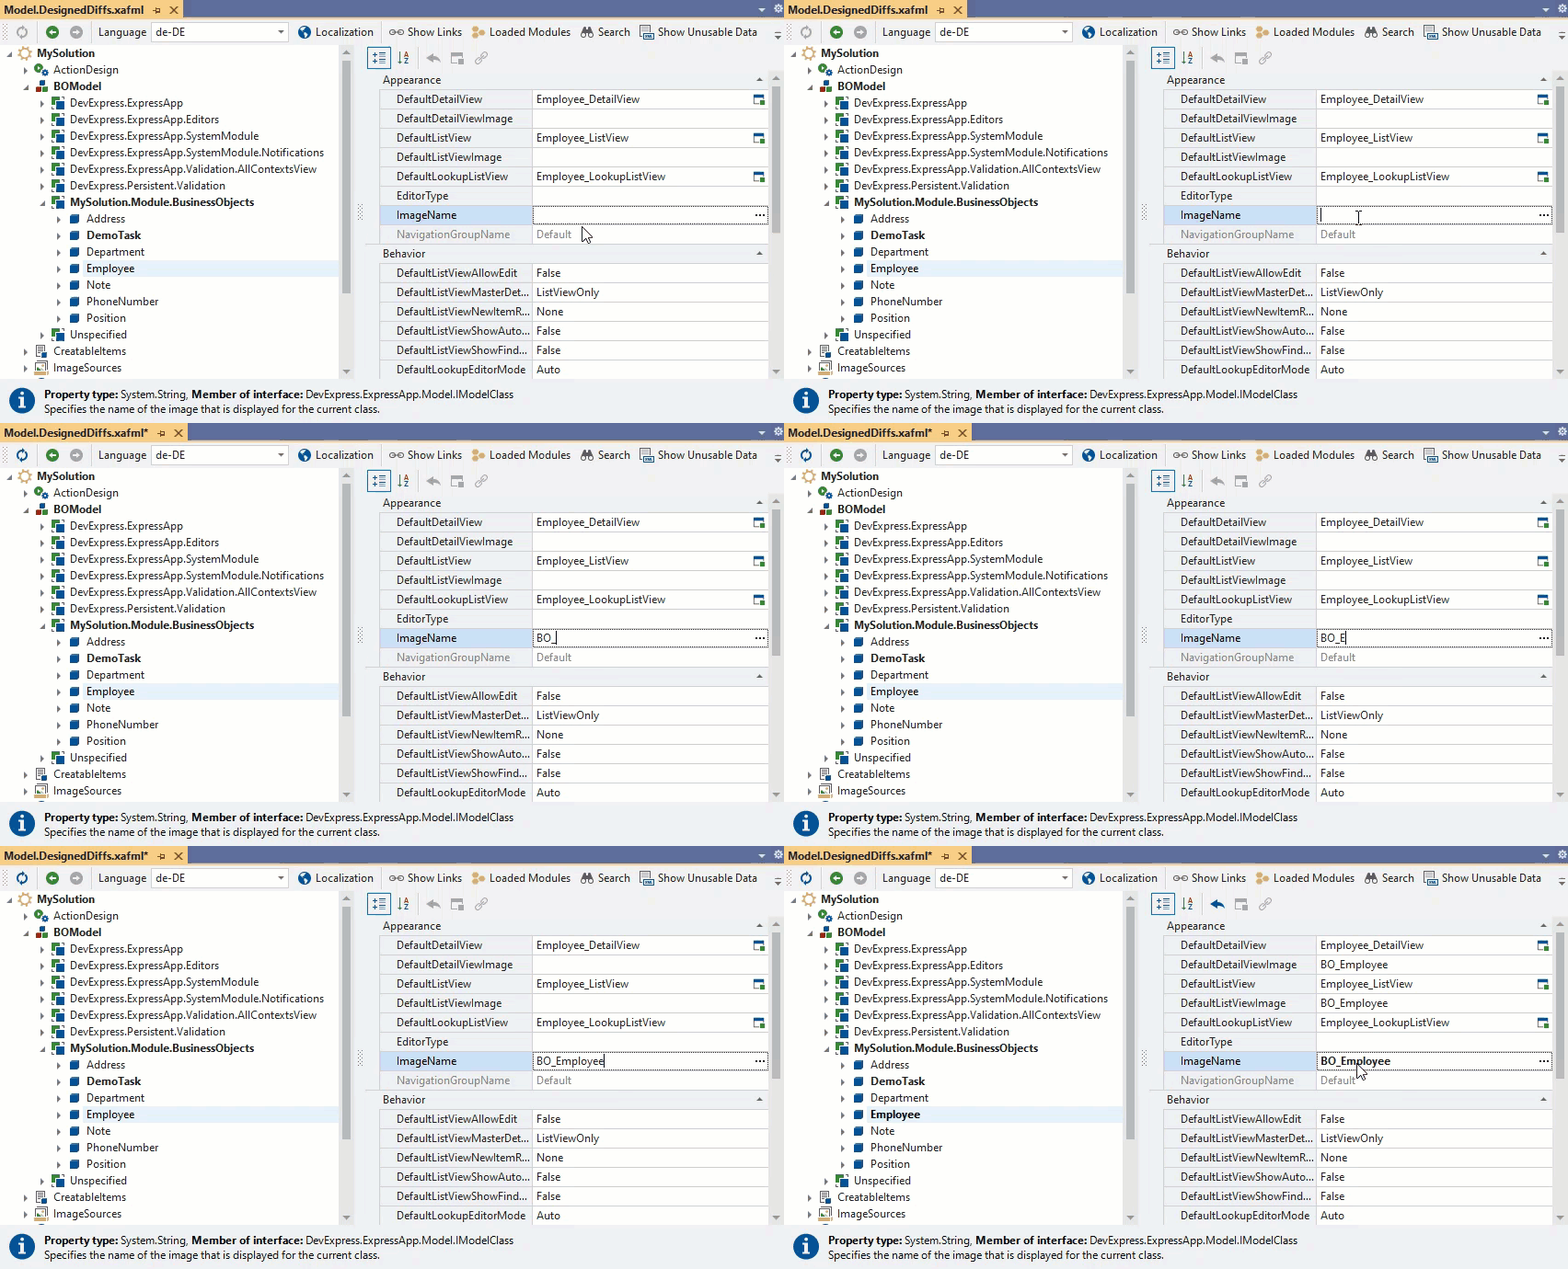
Navigate to the BOModel | MySolution.Module.BusinessObjects | Employee node. In the Appearance section of the node’s properties, locate the ImageName property and set its value to
BO_Employee.Tip
Focus the ImageName property field and click an ellipsis button that appears to the right of the property value to invoke the Image Picker dialog and browse all available images.
After you change this value, XAF automatically recalculates the values of the following properties:
Node Property Description BOModel | MySolution.Module.BusinessObjects | Employee DefaultDetailViewImage Specifies the name of the image displayed in the default Detail View of the Employeeclass.BOModel | MySolution.Module.BusinessObjects | Employee DefaultListViewImage Specifies the name of the image displayed in the default List View of the Employeeclass.NavigationItems | Items | Default | Items | Employees ImageName Specifies the name of the image displayed with the Employees item in the navigation control. 
Run the application to see the new image in the UI:
- ASP.NET Core Blazor:

- Windows Forms:

In the same manner, assign images to the following classes:
Class Image name DepartmentBO_DepartmentPositionBO_PositionDemoTaskBO_TaskPaymentBO_InvoiceAfter you apply the changes, the UI of your application should look as follows:
- ASP.NET Core Blazor:

- Windows Forms:
