Create Blazor (Server-Side) Report Viewer Application from Microsoft Template in Visual Studio
- 7 minutes to read
Tip
To create a Blazor Reporting application, use preconfigured DevExpress templates that allow you to create an application with minimal effort and maximum efficiency. For more information, review the following help topics:
Prerequisites
- Install the .NET 6.0 or later SDK.
- Install Visual Studio 2022 with the ASP.NET and web development workload.
Create a New Project
The steps below describe how to create a new Blazor project. If you want to add DevExpress Blazor components to an existing application, go to Step 2.
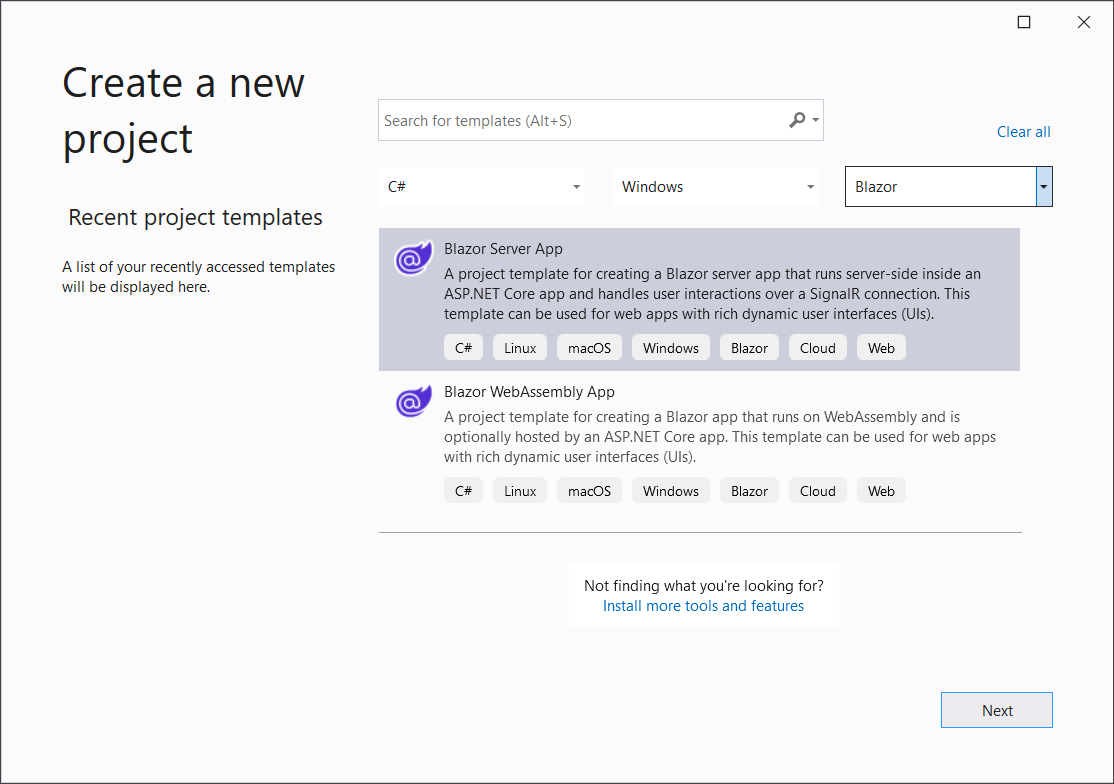
Click Create a new project on Visual Studio’s start page, select the Blazor Server App template, and click Next.
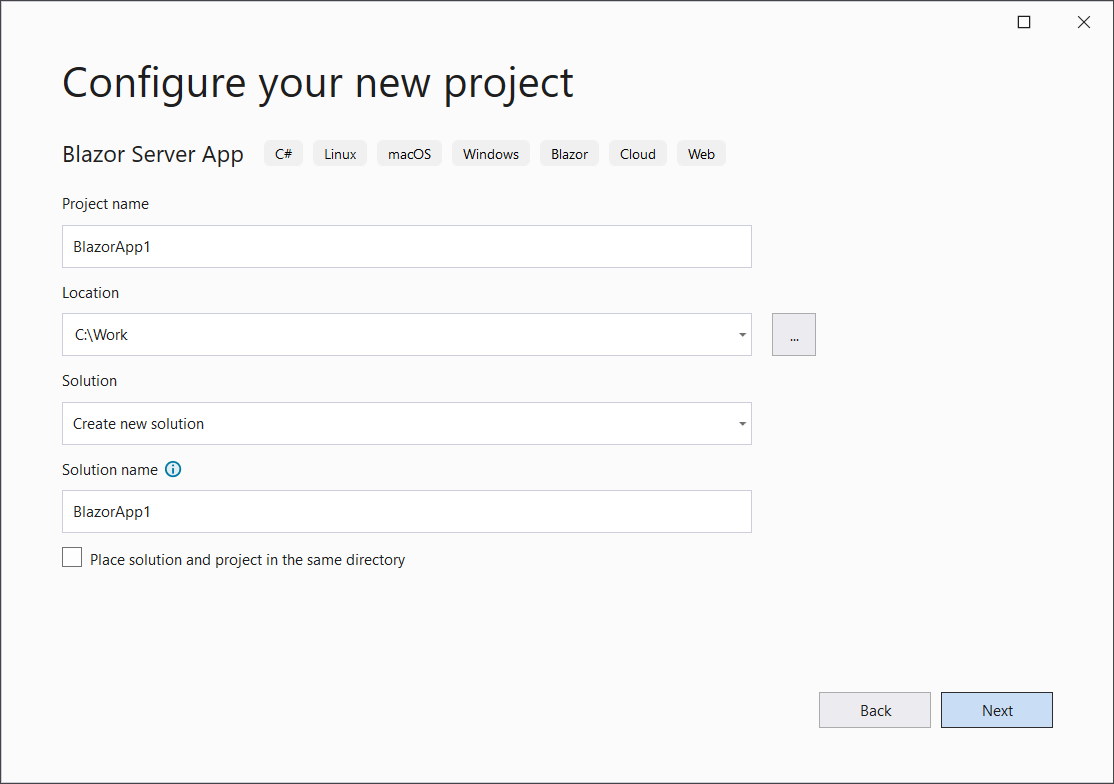
Specify the project name and location, and click Next.
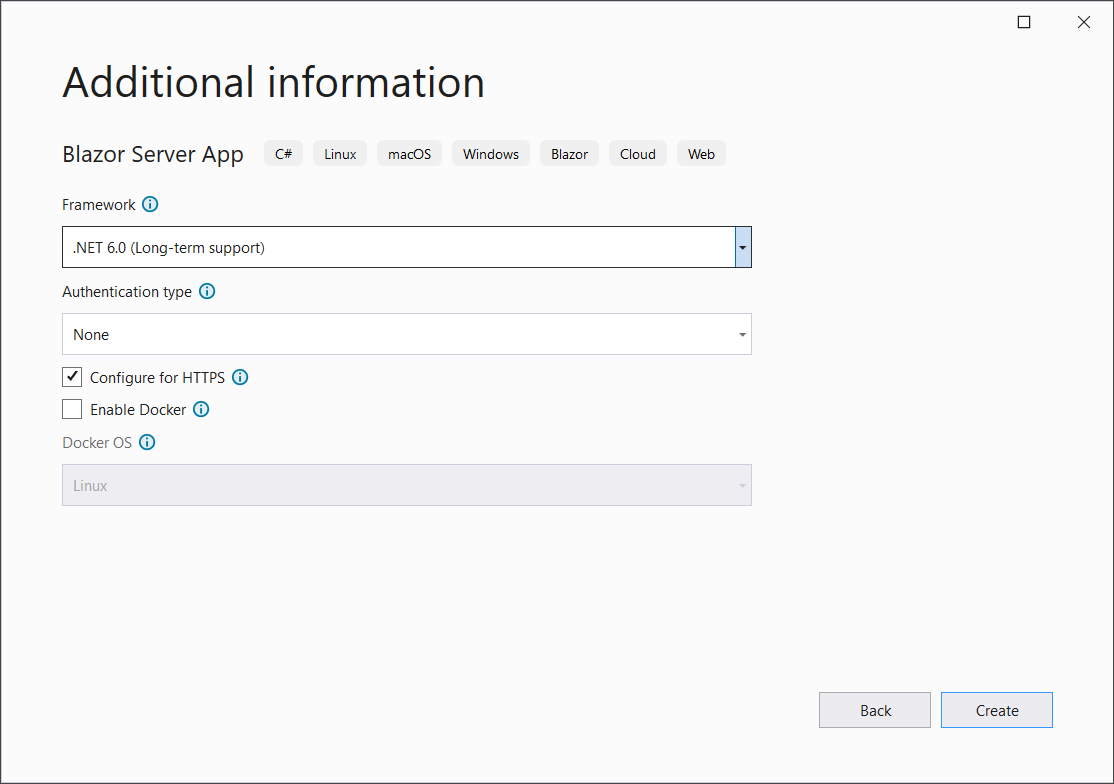
Select the desired framework and click Create.
Obtain Your NuGet Feed Credentials
Make sure your DevExpress account has access to Blazor UI Components. This product line is included in the Universal, DXperience, and ASP.NET subscriptions. Refer to the following page for more information: DevExpress Subscriptions.
Use your DevExpress credentials to log into nuget.devexpress.com.
Obtain your NuGet feed credentials and copy them to the clipboard.
You can find the same URL on the Download Manager page.
Install the DevExpress Blazor NuGet Packages
In Visual Studio, select Tools → NuGet Package Manager → Package Manager Settings.

Navigate to NuGet Package Manager → Package Sources. Click the plus sign at the top right corner to add a new NuGet package source. Use the following package settings:
Name:
DevExpressSource: DevExpress NuGet Gallery (
https://nuget.devexpress.com/api) if you use the feed key to authenticate. Otherwise, use the NuGet Feed URL (https://nuget.devexpress.com/{your feed authorization key}/api).
Click OK.

Note
Make sure the
nuget.orgpackage source is also enabled.Select Tools → NuGet Package Manager → Manage NuGet Packages for Solution.
If you registered the DevExpress NuGet feed with an authorization key, the login form is displayed when you invoke the NuGet Package Manager window for the first time. Enter your credentials as follows:
- User name:
DevExpress Password: your authorization key

In the invoked dialog, open the Browse tab, and install the
DevExpress.BlazorandDevExpress.Blazor.Reporting.ViewerNuGet packages.
- User name:
Build the project.
Refer to the following topic for more information: Install NuGet Packages in Visual Studio, VS Code, and Rider.
Register DevExpress Resources
Register the DevExpress.Blazor namespace in the _Imports.razor file:
@using DevExpress.BlazorCall the UseWebRoot and UseStaticWebAssets(IWebHostBuilder) methods in the Program.cs file to enable the application to load client-side resources:
using Microsoft.AspNetCore.Components;
using Microsoft.AspNetCore.Components.Web;

var builder = WebApplication.CreateBuilder(args);

// Add services to the container.
builder.Services.AddRazorPages();
builder.Services.AddServerSideBlazor();
// ...
builder.WebHost.UseWebRoot("wwwroot");
builder.WebHost.UseStaticWebAssets();
// ...
var app = builder.Build();
// ...
Register the services required for Blazor Reporting, and specify endpoint routing. For this, call the following methods in the Program.cs file:
- AddDevExpressBlazor
AddDevExpressServerSideBlazorReportViewer
The Program.cs file has the following content:
using Microsoft.AspNetCore.Components;
using Microsoft.AspNetCore.Components.Web;
// ...

var builder = WebApplication.CreateBuilder(args);

// Add services to the container.
builder.Services.AddRazorPages();
builder.Services.AddServerSideBlazor();
// ...
builder.Services.AddDevExpressBlazor();
builder.Services.AddDevExpressServerSideBlazorReportViewer();
// If you use Bootstrap 5, specify the Bootstrap version explicitly
builder.Services.Configure<DevExpress.Blazor.Configuration.GlobalOptions>(options => {
    options.BootstrapVersion = DevExpress.Blazor.BootstrapVersion.v5;
            });

builder.WebHost.UseWebRoot("wwwroot");
builder.WebHost.UseStaticWebAssets();

var app = builder.Build();

// Configure the HTTP request pipeline.
if (!app.Environment.IsDevelopment())
{
    app.UseExceptionHandler("/Error");
}

app.UseStaticFiles();

app.UseRouting();

app.MapBlazorHub();
app.MapFallbackToPage("/_Host");

app.Run();
Apply a theme. You add theme links to the layout file –
Pages/_Layout.cshtml(Server, .NET6),Pages/_Host.cshtml(Server, .NET7), orwwwroot/index.html(WebAssembly and Hybrid). Alternatively, add theme links to the Viewer.razor page:<link href="_content/DevExpress.Blazor.Themes/blazing-berry.bs5.css" rel="stylesheet" /> <link rel="stylesheet" href="_content/DevExpress.Blazor.Reporting.Viewer/css/dx-blazor-reporting-components.bs5.css">For more information on how to apply a DevExpress theme to a project created from a Microsoft template, review the following help topic: Microsoft Templates (DevExpress Installation) .
Add Viewer to the Page
Create a new file (Viewer.razor) in the Pages folder with the following content to generate a page with the Report Viewer component:
@page "/Viewer"

@using DevExpress.Blazor.Reporting

<h3>Viewer</h3>

<DxReportViewer @ref="reportViewer">
</DxReportViewer>

@code {
    DxReportViewer? reportViewer;
}
Add a navigation link to the Shared\NavMenu.razor page:
    <div class="nav-item px-3">
        <NavLink class="nav-link" href="viewer">
            <span class="oi oi-list-rich" aria-hidden="true"></span> Report Viewer
        </NavLink>
    </div>
Run the Project
Type the following command in the command prompt in the application folder to run the application:
dotnet watch runWhen the browser opens the application, navigate to the Viewer page:

Load a Report
You can create a report class in the application and pass an instance of this class to the viewer. As an alternative, use the XtraReport.FromFile method to load a report from a file in REPX format, and pass a report instance to the viewer.
Create a New Report
You should have Devexpress v24.1 installed so that you can find the DevExpress v24.1 Report template in Visual Studio. Otherwise, navigate to the Load a Report form a File section.
- In Visual Studio, create a new Reports folder.
- Press Ctrl+Shift+A or select PROJECT | Add New Item… in the main menu.
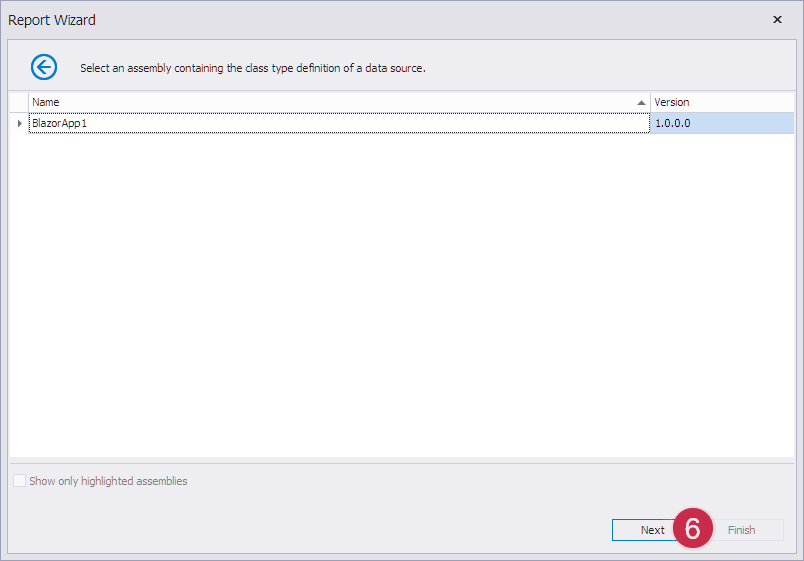
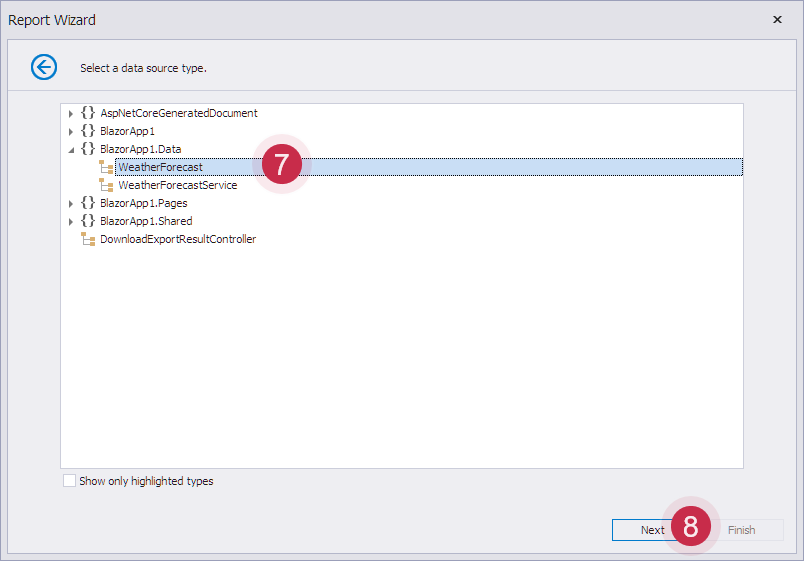
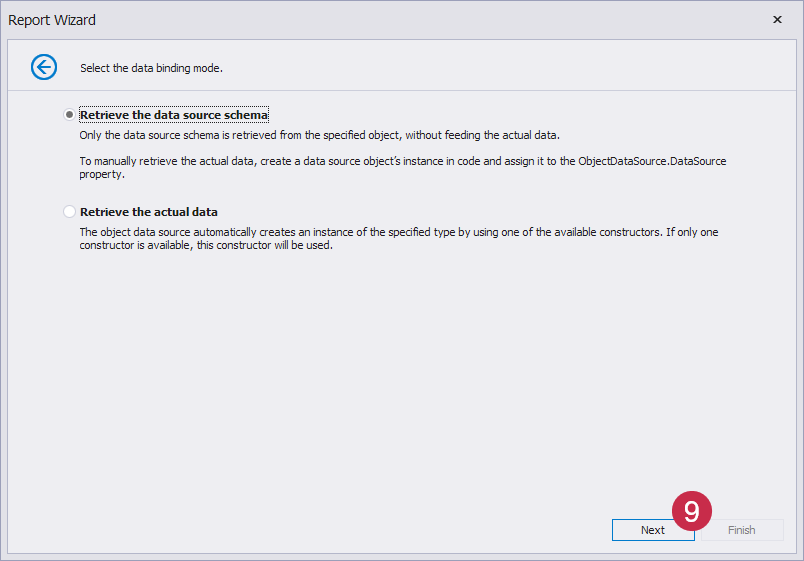
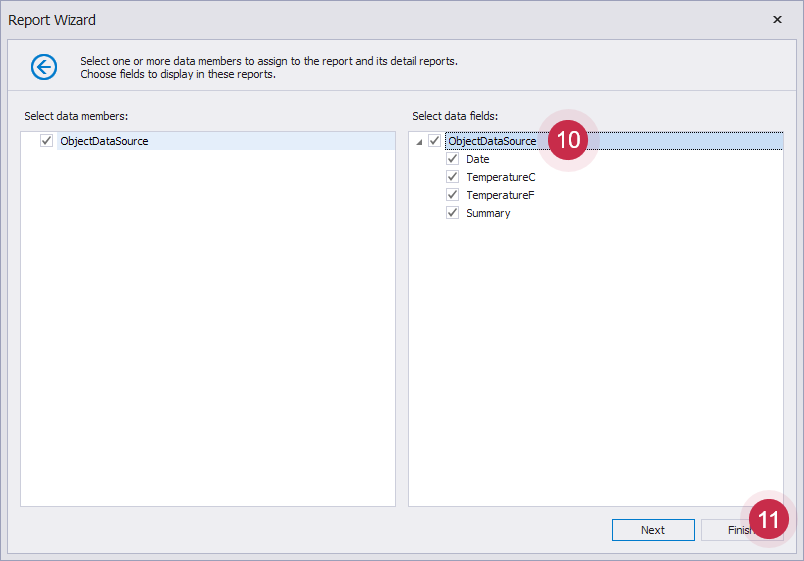
Select the DevExpress Report item and proceed to the Report Wizard to create the TestReport.cs file.
Show Visual Guide


When you finish the Report Wizard, the TestReport.cs file is added to the project. The Visual Studio Report Designer opens the newly created report. Select the cell bound to the Date data source field, click the smart tag glyph at the top right corner of the control, and select the Format String editor to change the field format to
d, MMMM yyyy: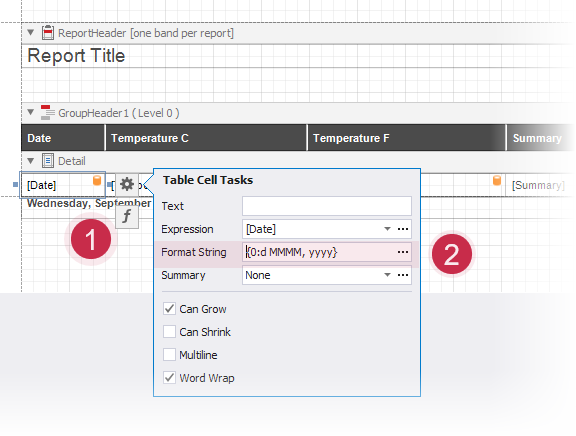
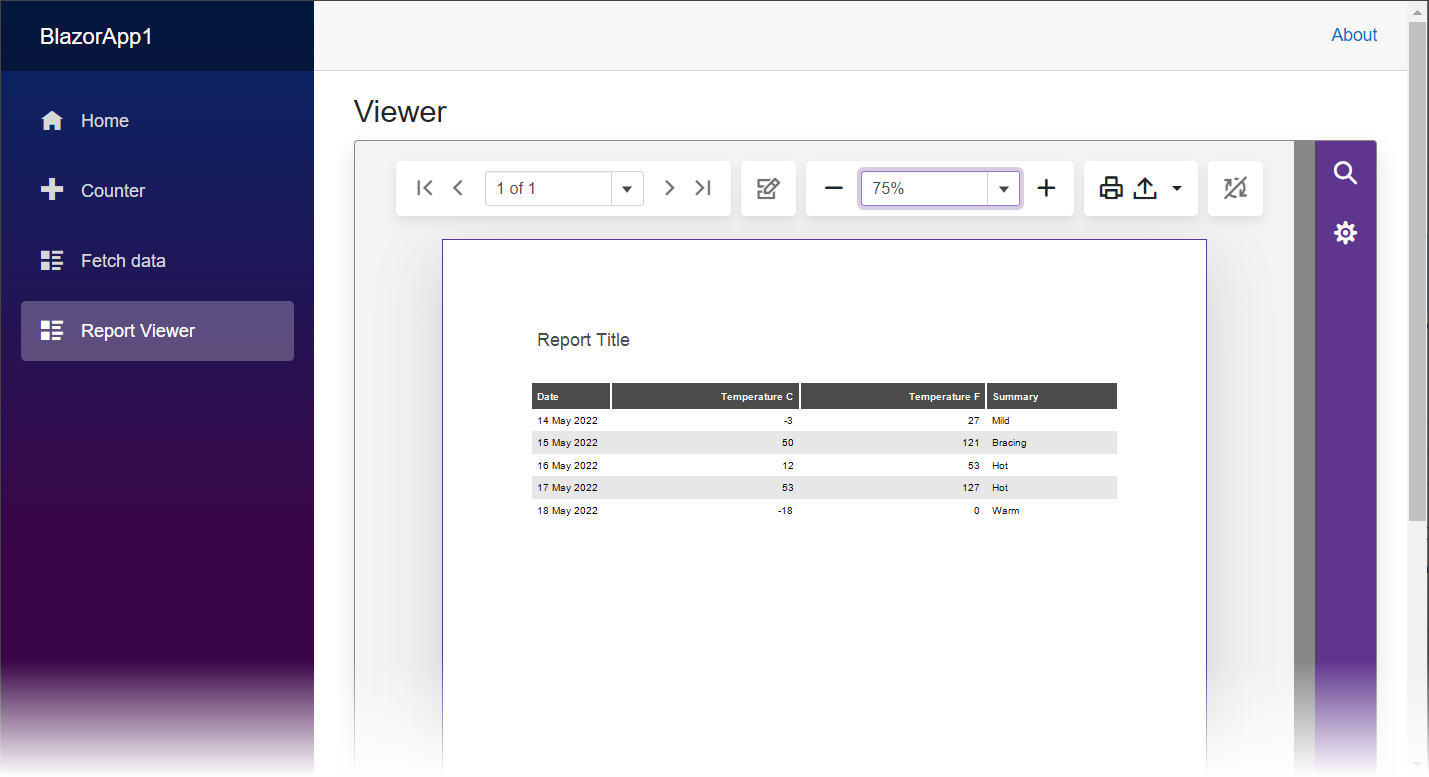
Initialize the data source, specify the report that the Report Viewer displays, and assign the data source to the report. The Viewer.razor page content is shown below.
@page "/viewer"

@using DevExpress.Blazor.Reporting
@using DevExpress.XtraReports.UI;

@using BlazorApp1.Data
@inject WeatherForecastService ForecastService

<h3>Viewer</h3>

<link href="_content/DevExpress.Blazor.Themes/blazing-berry.bs5.css" rel="stylesheet" />
<link rel="stylesheet" href="_content/DevExpress.Blazor.Reporting.Viewer/css/dx-blazor-reporting-components.bs5.css">

<DxReportViewer @ref="reportViewer" Report="@Report">
</DxReportViewer>

@code {
    DxReportViewer reportViewer { get; set; }
    XtraReport Report { get; set; }
    private WeatherForecast[] forecasts;


    protected override async Task OnInitializedAsync() {
        WeatherForecast[] forecasts = await ForecastService.GetForecastAsync(DateTime.Now);
        Report = new TestReport();
        Report.DataSource = forecasts;
    }
}
Run the project and see the result. The Report Viewer displays a tabular report with data from the WeatherForecastService data source:
Load a Report from a File
You can use a REPX file obtained from our demo application or created in DevExpress Report Designer elsewhere.
The ProductListReport.repx report layout file in this example is obtained from the XtraReports For WinForms MainDemo - Products List demo module. You should run the demo module, switch to the Designer, and save the report to a file. Create the Reports folder in the project and copy the
ProductListReport.repxfile to the Reports folder.In this example we use the sample Northwind database. Copy the nwind.db database to the project’s Data folder and add the connection string entry to the appsettings.json file:
{
    // ...
    "connectionStrings": {
        "NWindConnectionString": "XpoProvider=SQLite;Data Source=Data\\nwind.db"
    }
}
Open the NuGet Package Manager and install the System.Data.SQLite.Core package.
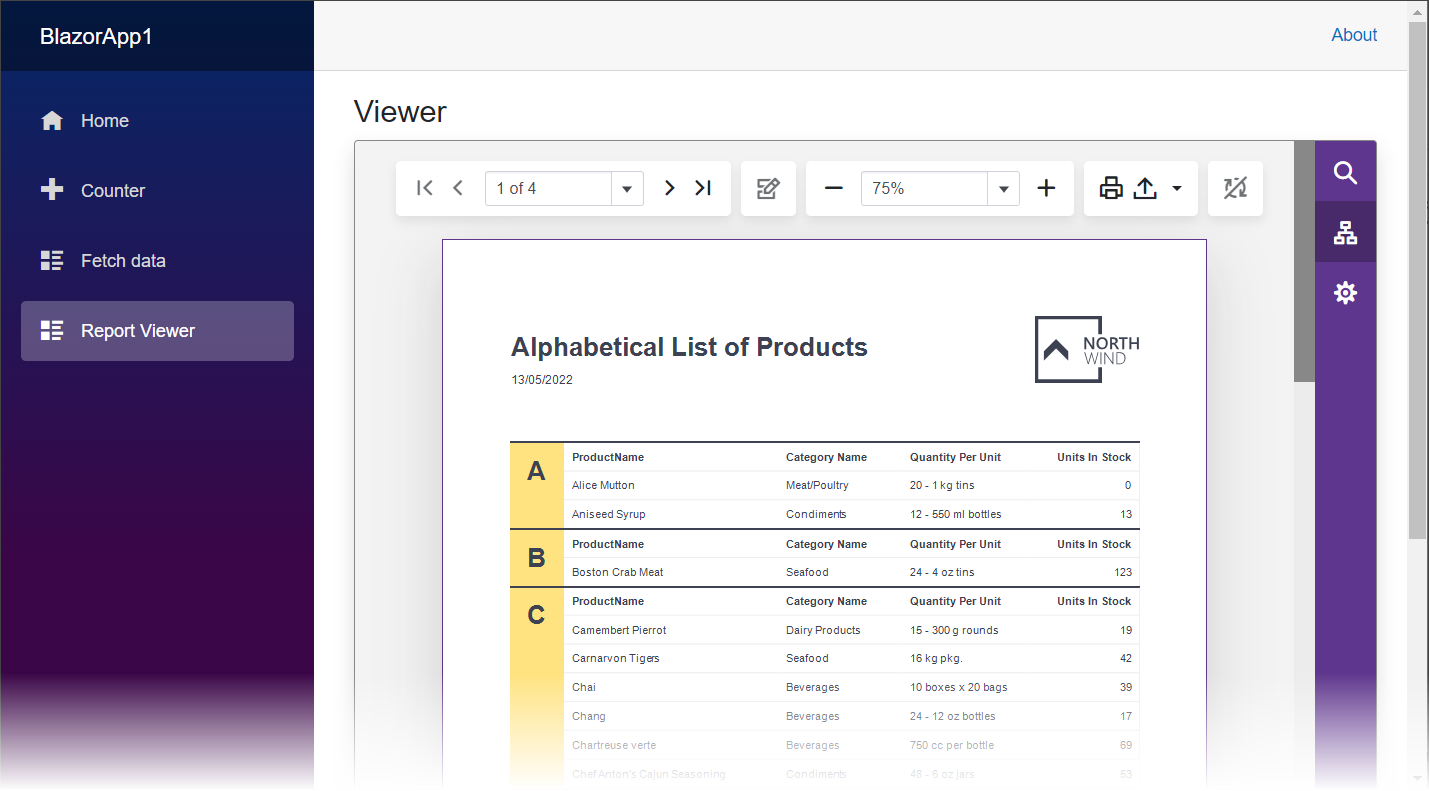
Add the code to the Viewer.razor page that loads a report from a file and assigns the report instance to the DxReportViewer.Report property. The resulting Viewer.razor file has the following content:
@page "/Viewer"

@using DevExpress.Blazor.Reporting
@using DevExpress.XtraReports.UI

<h3>Viewer</h3>
<link href="_content/DevExpress.Blazor.Themes/blazing-berry.bs5.css" rel="stylesheet" />
<link rel="stylesheet" href="_content/DevExpress.Blazor.Reporting.Viewer/css/dx-blazor-reporting-components.bs5.css">

<DxReportViewer @ref="reportViewer" Report="@Report">
</DxReportViewer>

@code {
    DxReportViewer? reportViewer { get; set; }
    XtraReport Report { get{
        return XtraReport.FromFile(Path.Combine(Directory.GetCurrentDirectory(),
         @"Reports\ProductListReport.repx"));
        }
    }
}
Run the project. The application page appears as follows:
Next Steps
Use the technique described in the following help topic to load existing reports with greater control over data connections and report parameters: How to Load a Report and Restore the Data Connection.