How to: Use Notifications with the Scheduler Event
- 2 minutes to read
This topic demonstrates how to use the Notifications and Scheduler Modules together with the Event class from the business class library. You can use the same technique with a custom Event descendant.
Note
If you prefer to watch a video rather than walk through these step-by-step instructions, visit the corresponding tutorial on the DevExpress YouTube Channel: DevExpress XAF: Notifications.
Although the video demonstrates an older XAF version, the scenario remains the same.
To enable notifications, add the Notifications module to your application as described in the following topic: How to Add the Notifications Module (.NET).
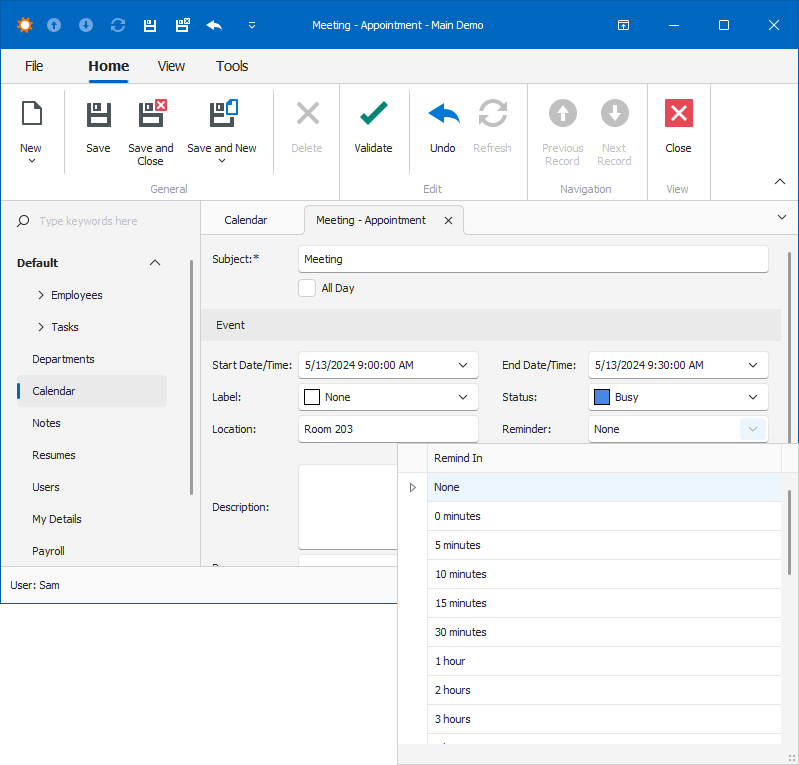
The Event business class has the Reminder property. It is hidden to preserve the Event Detail View layouts in existing applications. Adjust the Event_DetailView layout to make this property visible. For more information, refer to the following topic: View Items Layout Customization.
If you use a custom Event descendant, you should make the Reminder property visible in the descendant’s Detail View too.
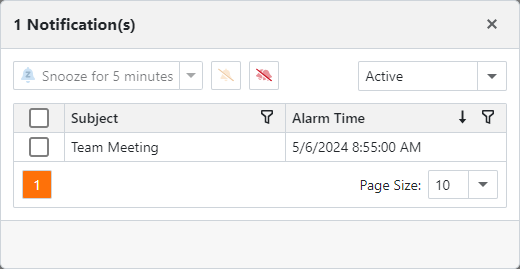
With notifications enabled, users can set reminders for each Event so that XAF displays a pop-up window before an event starts. You can specify the time between the reminder and the event’s Start Date/Time in the Reminder property of the Event class.
- ASP.NET Core Blazor

- Windows Forms
Tip
If the Reminder property is set to “0 minutes”, the Notifications window appears at the event’s start time.
Run the application and create a new Event in the past (the Start Date/Time should be earlier than the current time). Select “5 minutes” in the Reminder drop-down. Save the event and the Reminder window will be shown in less than 10 seconds.
- ASP.NET Core Blazor
- Windows Forms
