How to: Use Custom Themes in ASP.NET Web Forms Applications
- 5 minutes to read
By default, an ASP.NET Web Forms XAF application uses themes from the ASPxThemes Assembly. You can use custom assemblies as well. This topic details approaches to customizing default themes. To learn more about these themes, see the Appearance Customization - Theming topic in the ASP.NET Web Forms controls documentation. To learn the basics behind the appearance of ASP.NET Web Forms sites in XAF applications, refer to the ASP.NET Web Forms Application Appearance topic.
Add Assemblies with Custom Themes
You can add a custom theme in addition to the themes that are supplied with the DevExpress.Web.ASPxThemes.25.1.dll assembly. For this purpose, do the following.
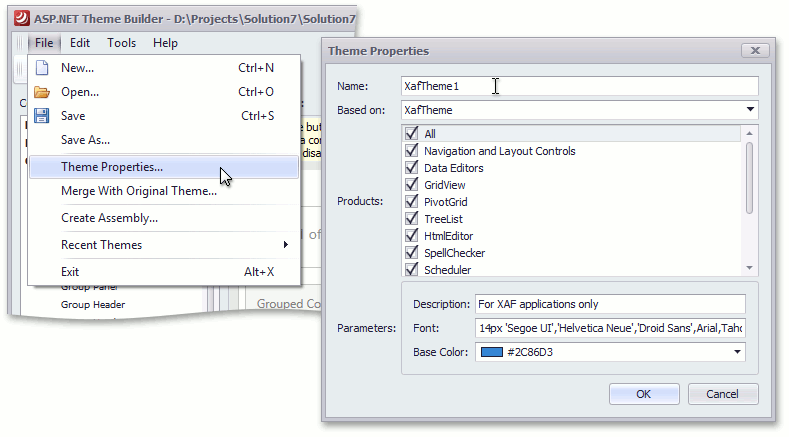
Invoke ASP.NET Web Forms Theme Builder as described in the Launching the Theme Builder topic, and create a new theme. For ASP.NET Web Forms applications with the New Web UI, it is recommended to create themes based on the XafTheme theme. Customize the newly created theme and save changes.
Note
Ensure that the name of the newly created theme is unique for your project; otherwise change it in the Theme Properties… dialog.
Currently, the Theme Builder tool does not support editing XAF-specific css files. So, it is necessary to modify css files manually.
- After theme customization is finished, use Theme Builder to create an assembly with this theme. See the Generating a Custom Theme Assembly topic for details.
- Reference this assembly in your web application project.
Open the application’s Web.config configuration file, set the customThemeAssemblies attribute to the target assembly with a custom theme, and set themeName to the name of this theme in the theme element of the devExpress section.
<devExpress> <!-- ... --> <themes enableThemesAssembly="true" customThemeAssemblies="ThemeAssembly1" theme="XafTheme1" /> </devExpress>- Rebuild the solution.
See the Using a Custom Theme Assembly topic for additional information.
Override Skin Files from Built-in Themes
You can override skin files from themes located in a theme assembly. For this purpose, do the following.
- Deploy skins from required themes to the App_Themes folder in your project. To do this, use the ASP.NET Web Forms Theme Deployer tool.
- Replace required skin files with custom ones.
Choose the default theme using the standard ASP.NET Web Forms approach – by specifying the pages element in the application’s Web.config configuration file.
<configuration>
  <system.web>
    <pages theme="XafTheme1" />
    <!-- ... -->
  </system.web>
<!-- ... -->
</configuration>
Leave the enableThemesAssembly attribute of the themes element set to true.
<configuration>
  <devExpress>
    <!-- ... -->
    <themes enableThemesAssembly="true" />
  </devExpress>
<!-- ... -->
</configuration>
In applications with the Classic Web UI, themes, deployed to the App_Themes folder, will be added to the ChooseTheme Action as items, and will be available at runtime.
Override Built-in Themes
You can customize built-in themes. Follow the steps below to use them at runtime.
- Deploy the required themes to the App_Themes folder in your project. To do this, use the ASP.NET Web Forms Theme Deployer. They can be already customized, otherwise customize them directly in the project.
Set enableThemesAssembly to false and theme to an empty string in the themes element of the Web.config file.
<configuration>
  <devExpress>
    <!-- ... -->
    <themes enableThemesAssembly="false"  theme=""/>
  </devExpress>
<!-- ... -->
</configuration>
Choose the default theme using the standard ASP.NET Web Forms approach – by specifying the theme attribute of the pages element in the application’s Web.config configuration file.
<configuration>
  <system.web>
    <pages theme="XafTheme1" />
    <!-- ... -->
  </system.web>
<!-- ... -->
</configuration>
In applications with the Classic Web UI, themes, deployed to the App_Themes folder, will be added to the ChooseTheme Action as items, and will be available at runtime.
Register Additional CSS Files
If you need additional CSS files of a particular theme to be used on a page, register these files using the RegisterThemeAssemblyController. For this purpose, open the Global.asax.cs (Global.asax.vb) file and invoke the RegisterThemeAssemblyController‘s static RegisterCss method from the Session_Start method. Pass the required style path as the method’s path argument.
using DevExpress.ExpressApp.Web.SystemModule;
//...
public class Global : System.Web.HttpApplication {
    // ...
    protected void Session_Start(object sender, EventArgs e) {
        // ...
        WebApplication.Instance.SwitchToNewStyle();
        RegisterThemeAssemblyController.RegisterCss(
            "App_Themes/MyThemeAssembly/Xaf/MyExtraCustomStyles.css");
        webApplication.Setup();
        webApplication.Start();
    }
}
Switch Between Themes for New and Classic Web UI
If you want to switch between themes for New and Classic Web UI according to the template chosen on the application start it is necessary to create a custom theme manager. The theme manager allows you to switch between themes depending on the device type or any other parameter. Note, that the standard ASP.NET Web Forms way to set a theme in an application configuration file is not appropriate for this scenario.
Create an assembly with themes that use templates for the Classic and New web UI, as described in the Add Assemblies with Custom Themes section, and create a custom theme manager, which implements the ICurrentThemeManager interface. The code snippet below demonstrates an example of its implementation.
using DevExpress.ExpressApp.Web;
using DevExpress.ExpressApp.Web.Templates;
using DevExpress.ExpressApp.Utils;
//...
public class CustomThemeManager : ICurrentThemeManager {
    public string GetCurrentTheme() {
        if (WebApplicationStyleManager.IsNewStyle)
            return "NewStyleXafTheme";
        else
            return new SettingsStorageOnCookies().LoadOption("", "Theme");
    }
    public void SetCurrentTheme(string themeName) {
        new SettingsStorageOnCookies().SaveOption("", "Theme", themeName);
    }
}
Open the Global.asax.cs (Global.asax.vb) file, located in the application project, and add the following code to the Application_Start method to use the custom theme manager.