Customize the View Items Layout
- 2 minutes to read
This lesson explains how to customize the default editor layout in a Detail View. For this purpose, the Contact Detail View will be used.
Step-by-Step Instructions
- In the MySolution.Module project, open the Model.DesignedDiffs.xafml file in the Model Editor.
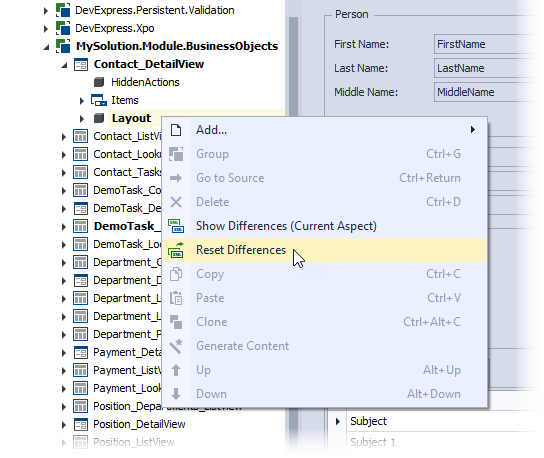
- Navigate to the Views | MySolution.Module.BusinessObjects | Contact_DetailView | Layout node.
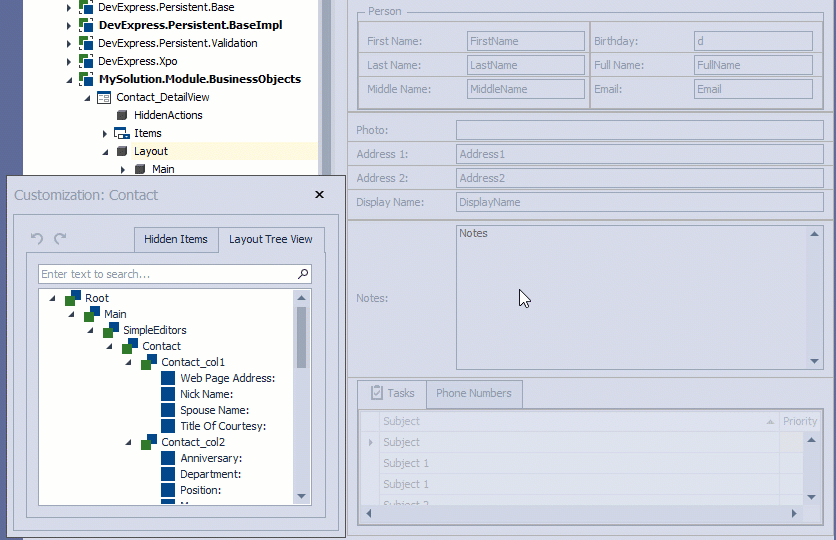
The Model Editor displays a design surface that imitates the Contact Detail View. To change the editor layout, right-click the View’s empty space and choose Customize Layout.

In the design surface, drag editors to other positions and save the changes.
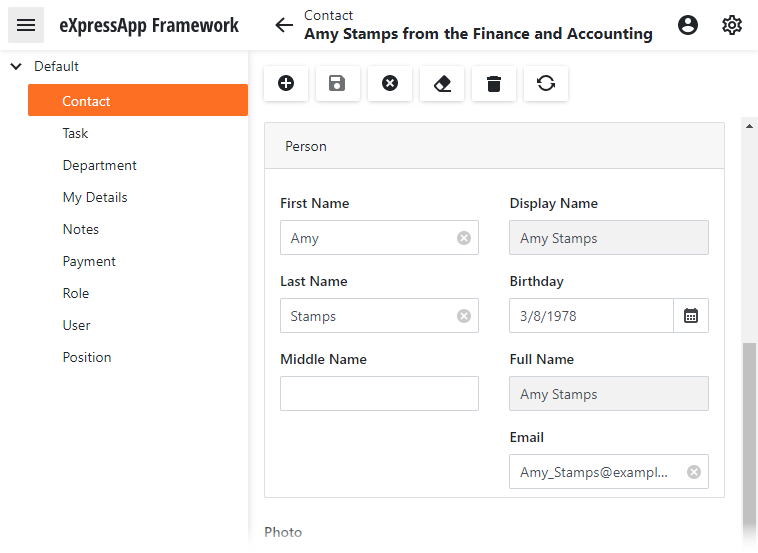
Run the application. In the Contact Detail View, the editors are arranged as defined.
Detailed Explanation
Customization Form
When you select “Customize Layout” in step 3, the Customization form is invoked. You can use it as follows:
Remove Items
Drag an item from the Detail View to the Customization Form to remove the item
Add Items
Drag the item from the Customization Form to the Detail View to add it.
Reorder Items
You can reorder and regroup layout items in the Layout Tree View. Click the Layout Tree View tab on the Customization Form to view the layout tree for View Items. You can right click a tree item and invoke a context menu. This menu allows you to hide the Customization Form, reset the layout, create a tabbed group, etc.

For more information about the Customization form, the Layout Tree View tab, and its context menu, refer to the Default Runtime Customization topic.
Reset Changes
Right-click Contact_DetailView | Layout and choose Reset Differences to reset changes.