Modules
- 2 minutes to read
XAF modules are very similar to standard Class Library projects. The difference is that each module project contains a class that inherits ModuleBase. The presence of such a class allows the XAF core code to distinguish modules from regular .NET assemblies. XAF-specific classes declared within modules are collected automatically (using reflection) and utilized in automatic UI generation. For instance, if you declare a Controller descendant within a module, an XAF application will create it in each Frame. This allows you to implement custom code to be executed when the Controller is activated (see Controllers).
You are not limited to three modules per solution. Generally, you may implement one custom feature per module. You can also reuse custom modules in other XAF applications. To create a new module, follow the steps below.
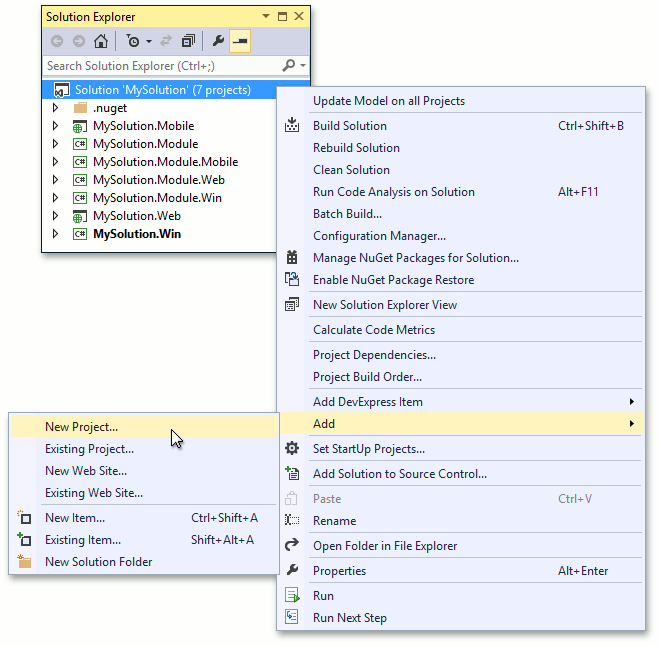
Right-click the application solution root node and select Add | New Project… in the invoked context menu.
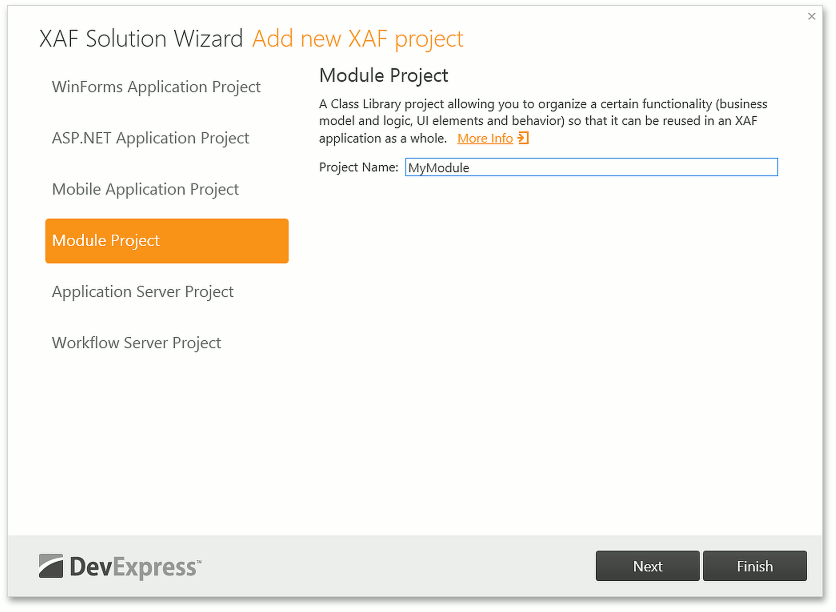
- In the Add New Project dialog, select the DevExpress v18.2 XAF Solution Wizard template. Specify the new module name and click OK.
Choose the Module Project in the Solution Wizard and press Finish.
- Add a reference to the newly added module to the existing module or application project as it is described in the Ways to Register a Module topic.
You can also convert an existing Class Library into a module by defining a ModuleBase class descendant in it. For this, take the Module.cs (Module.vb) file from an existing module as a prototype. Rename the class and set a correct namespace.
Important
Inheritance from modules is not recommended. The ModuleBase class descendants should be sealed (NotInheritable in VB).