Solution Wizard
- 5 minutes to read
XAF ships with the Solution Wizard, which allows you to quickly create a new application in a few simple steps. All you need to do is choose the target platform (desktop, web or both), data model type (Entity Framework Code First, Entity Framework Model First or eXpressPersistent Objects (XPO)), Security System settings, and Extra Modules to include in your application. The wizard will automatically generate a solution according to the specified settings.
Note
You can find the Solution Wizard video tutorial on the DevExpress YouTube Channel: DevExpress XAF: Solution Wizard.
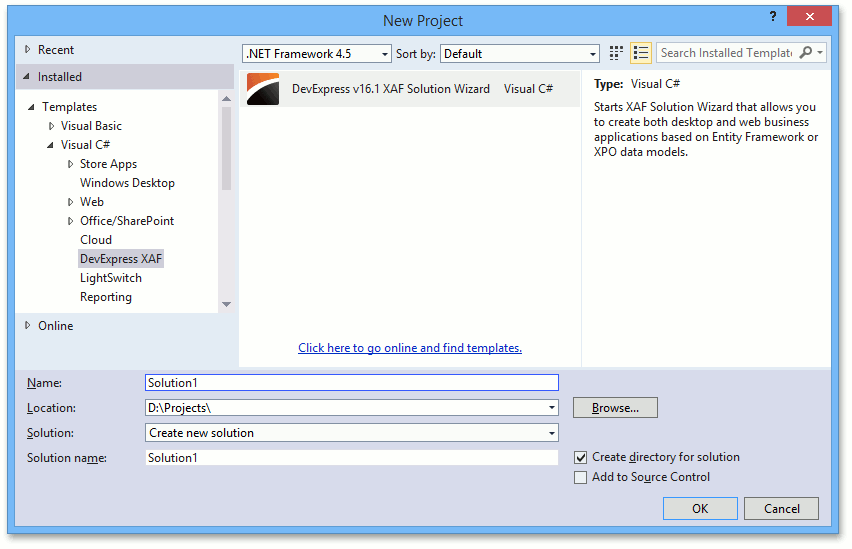
The Solution Wizard is available using the File | New | Project… command in the Visual Studio main menu and using the Add | New Project… context menu command in the Solution Explorer. The C# template is located in the Visual C# | DevExpress XAF category. VB.NET — in the Visual Basic | DevExpress XAF category.
Tip
You can also run the Solution Wizard from the DevExpress Template Gallery. To find the wizard, choose XAF in the Platform combo box.
Step 1 – Choose the Target Platforms
In this step, you can select Windows, Web, Mobile (maintenance mode) or multiple applications at once.
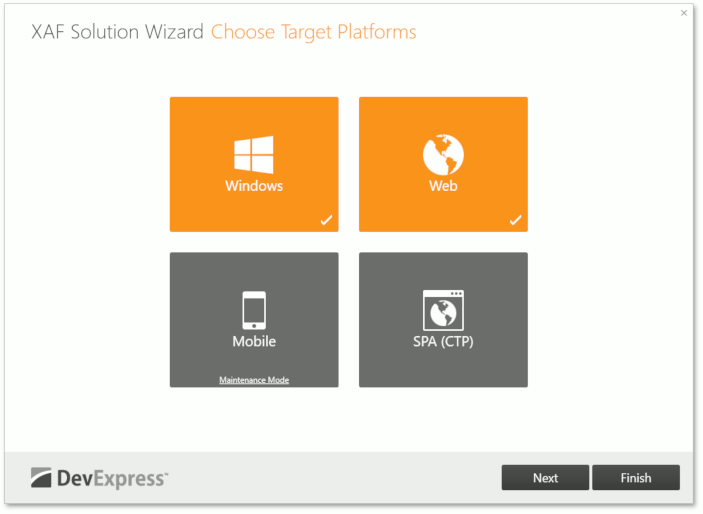
The wizard will add the required platform-specific application and module projects.
Step 2 – Choose the ORM
In this step, you can choose your data model type – Entity Framework Code First, Entity Framework Model First, or eXpress Persistent Objects (XPO).
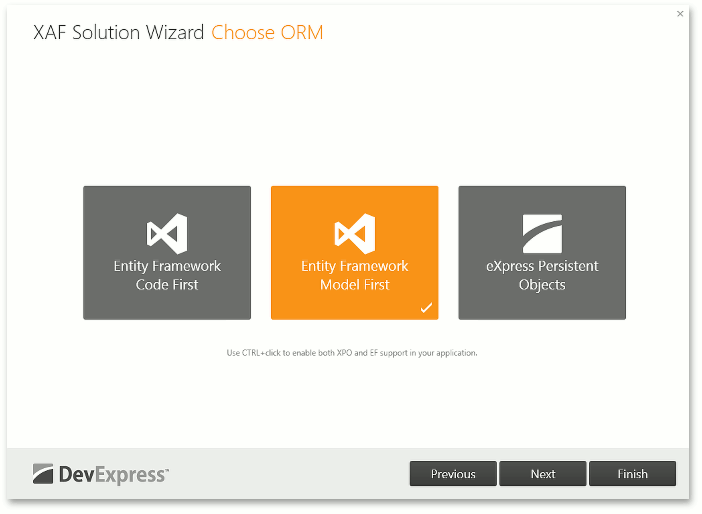
The wizard will add code that registers an appropriate Object Space Provider (see XafApplication.ObjectSpaceProvider). If you selected EF Model First, the wizard will also add a visual data model to the BusinessObjects folder of the platform-agnostic module. If you choose Entity Framework Code First, the wizard will generate the DbContext class code.
Tip
You can also choose both EF and XPO (Entity Framework Code First plus eXpress Persistent Objects, or Entity Framework Model First plus eXpress Persistent Objects) using CTRL+click. In this instance, the wizard will generate a solution similar to the one in the How to: Use Both Entity Framework and XPO in a Single Application example.
Step 3 – Enable the Security System and Choose the Authentication Type
In this step, you can enable the Security System, select the authentication type and default permission policy.
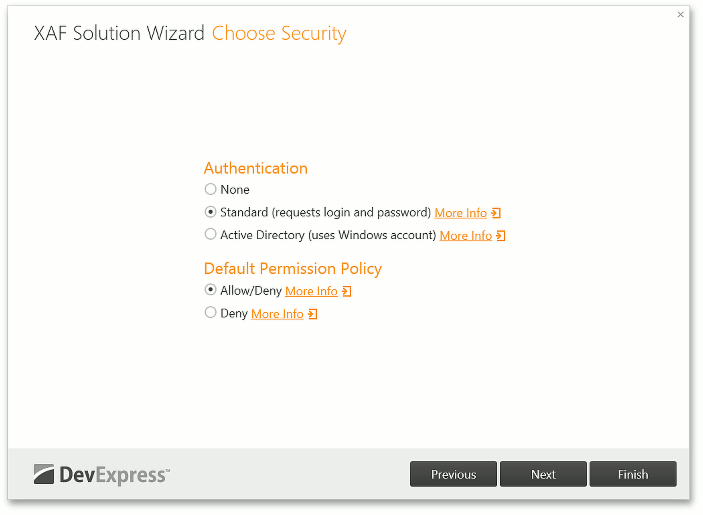
If you selected eXpress Persistent Objects in the previous step, you can also choose the client-side security mode or set up the middle-tier security.
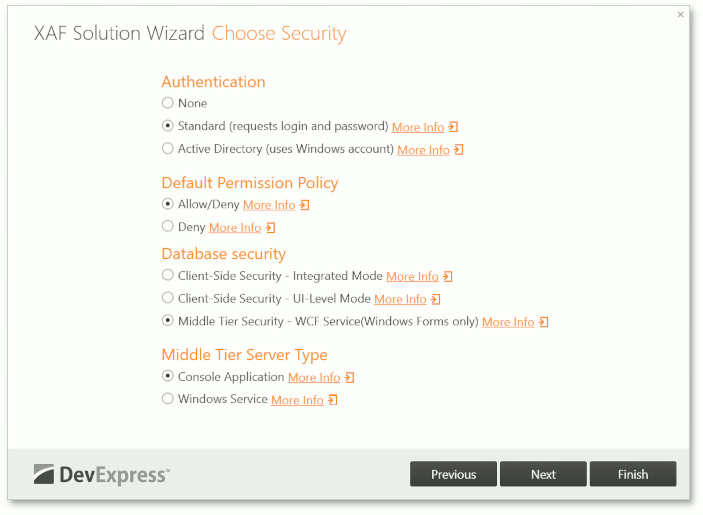
The wizard will add code that configures the Security System and populates the data model with the entities required to persist Security System data (users, roles and permissions). If you choose Standard authentication, it will also add code that creates the “Admin” user with an empty password to the Updater.cs (Updater.vb) file. If you choose Active Directory authentication, a similar code will be added, but the user name will be taken from your current Windows account.
With the Security System enabled, the wizard also adds the code demonstrated in the How to: Store the Application Model Differences in the Database topic. This code configures the Database Model Difference Storage in both WinForms and ASP.NET modules.
Step 4 – Choose Extra Modules
In this last step, you can choose the XAF extra modules to include.

The wizard will register the selected modules and add the entities required by these modules to the data model.
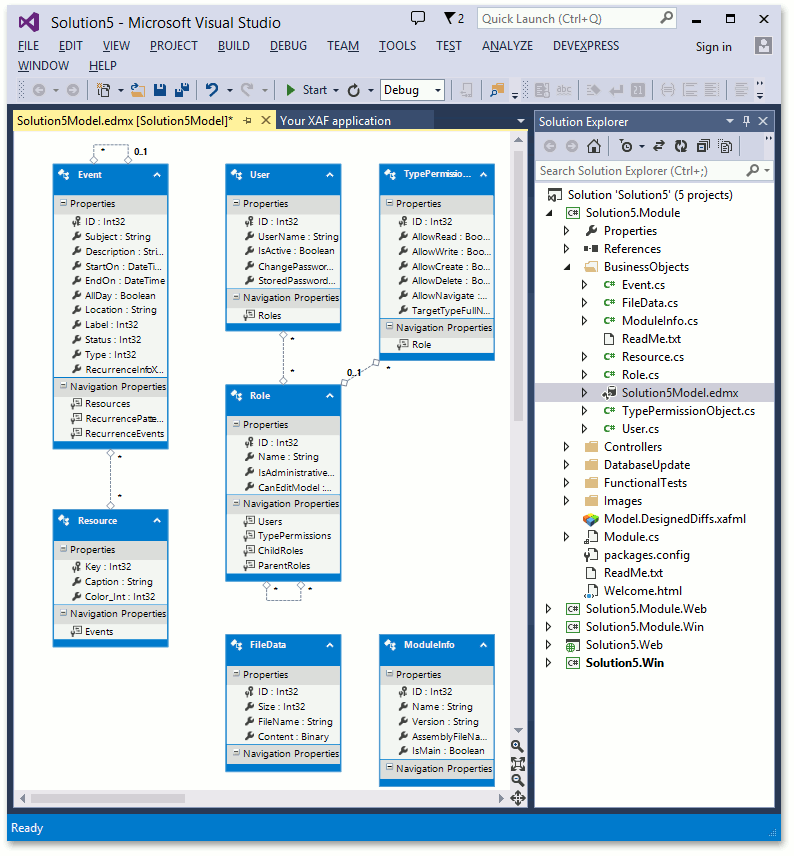
Result
The following image demonstrates the generated solution. The data model is populated with entities required by the Security System and the selected extra modules.
Note
The wizard attempts to detect your installed SQL server and changes the connection string accordingly. Supported servers are Microsoft SQL Server (including the Express and LocalDB editions). To use another database system (PostgreSQL, MySQL, Oracle, SQLite, Firebird, etc.), change the ConnectionString argument in the App.config and Web.config files of the WinForms/ASP.NET application projects. Refer to the Connect an XAF Application to a Database Provider topic for details about connecting to different database systems.
Add a Project to Existing XAF Solution
You can also run the Solution Wizard for an existing solution to crate additional XAF projects. Right-click the solution in the Solution Explorer, choose Add | New Project… and select DevExpress v18.2 XAF Solution Wizard. The image below shows the Wizard’s start page in this case.
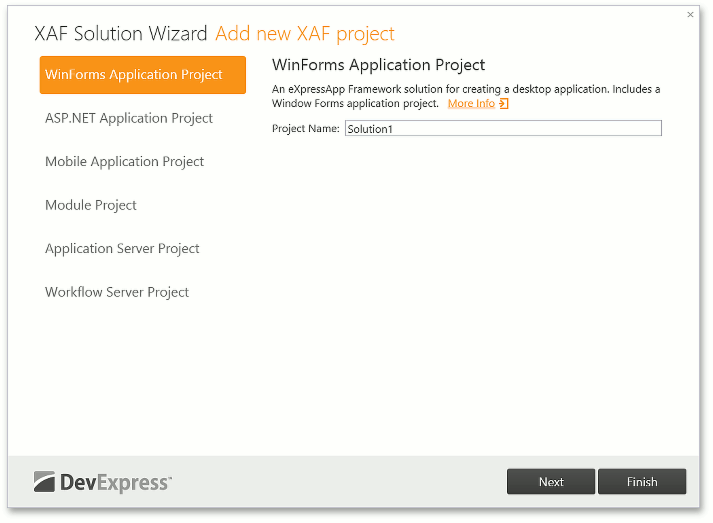
The table below lists the available projects and their descriptions.
Template Name | Description | See Also |
|---|---|---|
WinForm Application Project | An XAF project for creating a desktop application. | |
ASP.NET Application Project | An XAF project for creating a web application. | |
Mobile Application Project | An XAF project for creating a mobile application. | - |
Module Project | A class library project for creating a custom XAF module. | |
Application Server Project | A project for creating a Middle Tier server for XAF applications. | |
Workflow Server Project | A project for creating a Workflow server for workflow-enabled XAF applications. |