Customize the Application UI and Behavior
- 6 minutes to read
In XAF, the business model defines the database structure and UI appearance. Changes to your persistent classes affect the UI. For example, if you add a new property to a business class, a new editor is added to the list and detail forms.
You can use the auto-generated UI or customize it according to your business requirements and scenarios. This topic describes how to customize your application’s appearance and behavior.
Customize the Application UI Metadata
Use Attributes in Code
Built-in attributes allow you to edit the Application Model, create controls, and customize the business model’s look and behavior (the validation, visibility, formatting of fields, etc.) in the Business Model‘s code. With this declarative approach, you can add only one line of code without using a designer or creating a Controller.
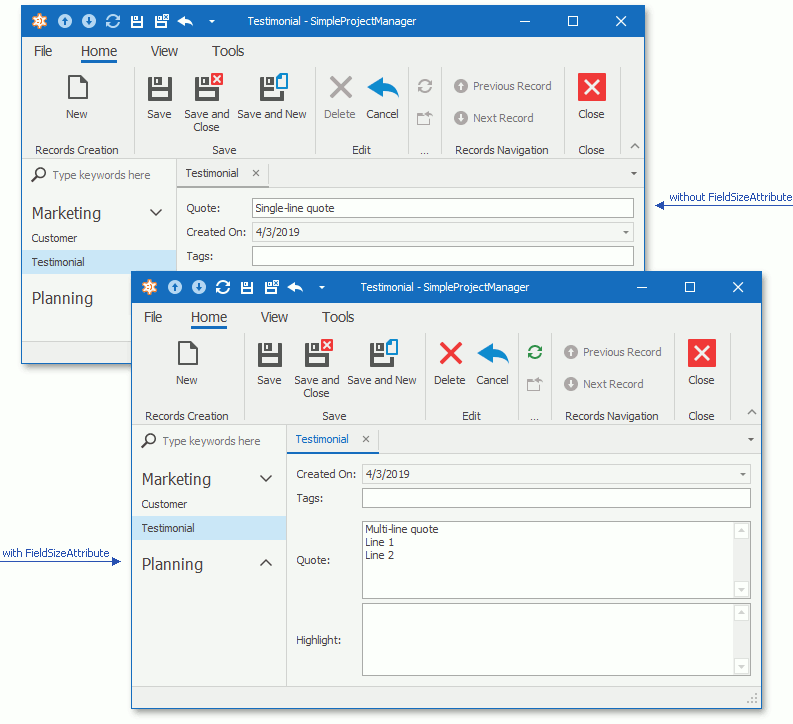
Apply the FieldSizeAttribute to the Testimonial‘s Quote string property and pass Unlimited as the attribute’s parameter to replace the single-line editor with a multi-line editor.
public class Testimonial
{
    // ...
    [FieldSize(FieldSizeAttribute.Unlimited)]
    public string Quote { get; set; }
    // ...
}
Run the WinForms or ASP.NET application and open the Testimonial Detail View. The following image illustrates the standard and customized UI:
Note
The SimpleProjectManager demo projects provide more examples of how to use this approach. This demo is installed in %PUBLIC%\Documents\DevExpress Demos 18.2\Components\eXpressApp Framework\SimpleProjectManager\CS\SimpleProjectManager.Module\BusinessObjects\.
Note that this approach adds a dependency to the XAF assemblies to your data access layer (DAL).
Use the Model Designer
If you do not want to define the application’s UI structure and behavior in your business model code, edit the application metadata (XAF - Application Model). Each project stores the metadata and its customizations as XML markup in *.xafml files. These files form the Application Model’s layered structure. You can open XAFML files in the Model Editor designer, text or XML editor.
Follow the steps below to change the Customer business object’s image and enable images in the navigation control via the Model Editor:
- In the Solution Explorer, right-click the SimpleProjectManager.Module project and select Open Model Editor in the context menu or double-click the file with the XAFML extension.
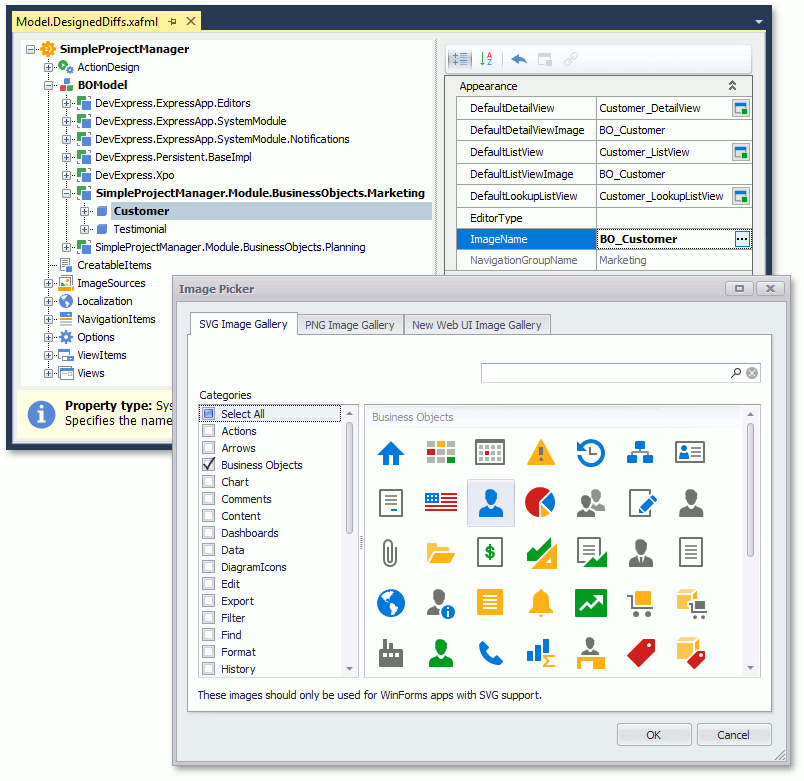
In the Model Editor, navigate to the BOModel | Customer node in the tree and set the ImageName property to BO_Customer.
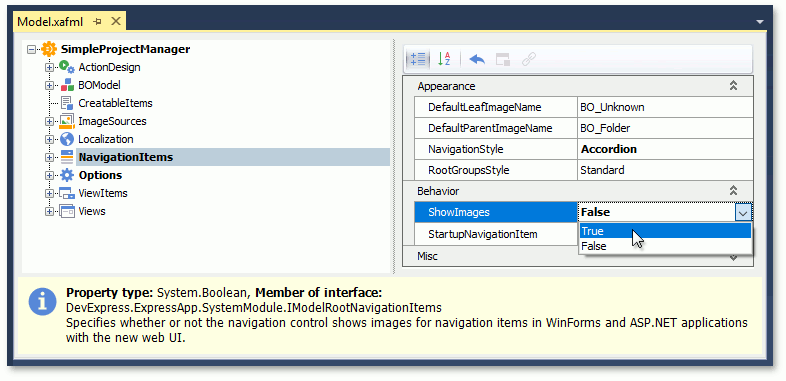
Open the XAFML file for the SimpleProjectManager.Win project, navigate to the NavigationItems node and set the ShowImages property to true.
Repeat the previous step for the SimpleProjectManager.Web project.
Click Save All in the Visual Studio toolbar to save your changes.
The image below illustrates the result - the navigation control displays the BO_Customer icon for Customer and default icons for other navigation items and groups.
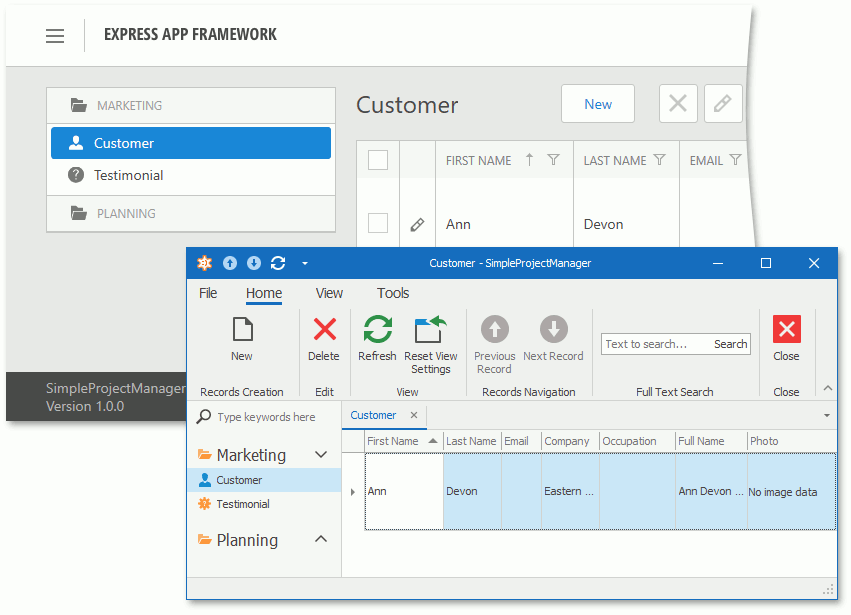
For the WinForms and ASP.NET applications, the ShowImages option’s default value (false) is defined in their XAFML files. Settings from the application projects override platform-agnostic settings. In the example above, this option was changed for both applications on the application level.
Note
Refer to the XAFML files in the %PUBLIC%\Documents\DevExpress Demos 18.2\Components\eXpressApp Framework\SimpleProjectManager folder to see more customization examples.
Define Custom Logic and UI Elements
The Model Editor and built-in attributes allow you to change the options of UI element and control. Other customizations can be implemented only in code. For example, you can use the Controllers and Actions mechanism to replace the application’s default UI parts or implement custom business logic.
A Controller is a component that you can use to change the application flow, customize UI elements, and implement custom end-user interaction. Controllers can also include Actions. Actions are displayed in the UI as interactive elements (buttons, menu items, etc.) and execute custom business logic.
Follow the steps below to implement a SimpleAction that allows a user to mark the selected Project Tasks as completed and sets the EndDate property to the current date and time:
- In the Solution Explorer, right-click the SimpleProjectManager.Module\Controllers folder and select Add | Class… in the context menu. Set the class name to ProjectTaskController.
Replace the created class code with the following:
using System;
using DevExpress.Data.Filtering;
using DevExpress.ExpressApp;
using DevExpress.ExpressApp.Actions;
using SimpleProjectManager.Module.BusinessObjects.Planning;

namespace SimpleProjectManager.Module.Controllers {
    public class ProjectTaskController : ViewController {
        public ProjectTaskController() {
            TargetObjectType = typeof(ProjectTask);
            TargetViewType = ViewType.Any;
            SimpleAction markCompletedAction = new SimpleAction(
                this, "MarkCompleted",
                DevExpress.Persistent.Base.PredefinedCategory.RecordEdit){
                    TargetObjectsCriteria =
                    (CriteriaOperator.Parse("Status != ?",ProjectTaskStatus.Completed)).ToString(),
                    ConfirmationMessage =
                            "Are you sure you want to mark the selected task(s) as 'Completed'?",
                    ImageName = "State_Task_Completed"
                };
            markCompletedAction.Execute += (s, e) => {
                foreach(ProjectTask task in e.SelectedObjects) {
                    task.EndDate = DateTime.Now;
                    task.Status = ProjectTaskStatus.Completed;
                    View.ObjectSpace.SetModified(task);
                }
                View.ObjectSpace.CommitChanges();
                View.ObjectSpace.Refresh();
            };
        }
    }
}
Property | Value | Description |
|---|---|---|
ProjectTask | The Controller activates when the application displays an object of the specified type or a list of these objects. | |
Any | The Controller activates when the application displays a list or detail data form. | |
Status is not Completed | The Controller activates when an object focused on a list form or displayed in a detail, fits the condition. |
In the code above, the Object Space‘s IObjectSpace.CommitChanges method commits changes to the database. An Object Space entity is an ORM-independent implementation of the Repository and Unit Of Work design patterns. Object Space allows you to query or modify data in the transaction. Refer to the Create, Read, Update and Delete Data article for information about other Object Space methods.
The image below shows the MarkCompleted Action in the WinForms and ASP.NET applications.
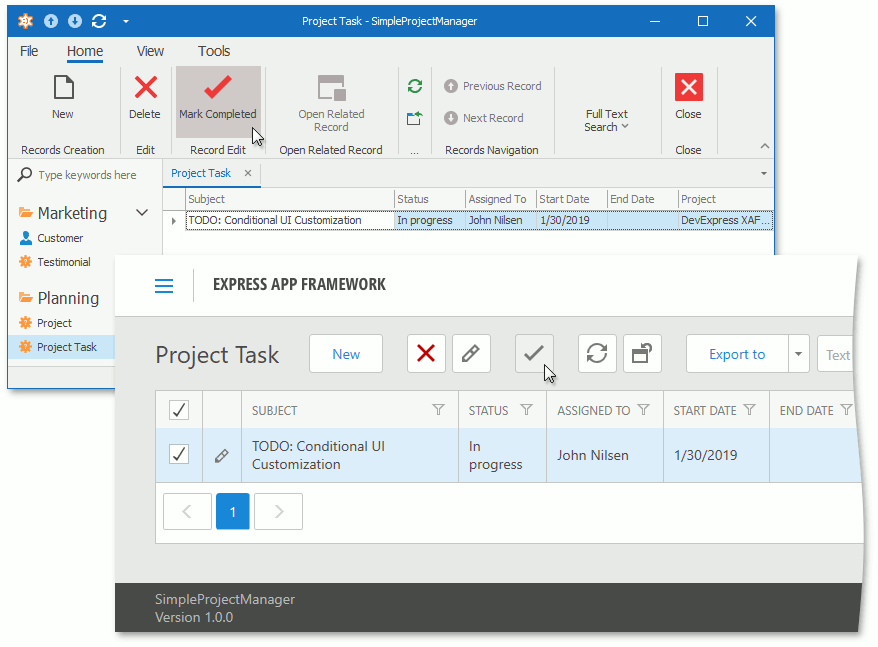
The MarkCompleted Action iterates the selected objects and modifies their properties. After that, it commits changes to the database and refreshes the screen.
Alternatively, you can …
- use the View Controller template from the Template Gallery to create a Controller. In this instance, you can add an Action in the designer instead of writing code. Refer to the Add a Simple Action topic for more information on this approach.
- implement the generic ObjectViewController<ViewType, ObjectType> Controller instead of the ViewController. For the ObjectViewController, you can specify the View’s and object’s type this Controller should be activated for in the generic ViewType and ObjectType parameters.
- use the ActionAttribute to create an action directly from a business class method. Refer to the Add a Simple Action using an Attribute topic for more information on this approach.
Next topic: Reuse Implemented Functionality