Change Style of Navigation Items
In this lesson, you will learn how to change the style of navigation items in a WinForms XAF application. By default, a 32x32 icon with a label below is displayed for each item. This style is inconvenient when you have many navigation items. To save screen space and avoid scrolling, a 16x16 icon with a label to the right can be displayed for each item instead.
Invoke the Model Editor by double-clicking the Model.DesignedDiffs.xafml file located in the MySolution.Module project. Navigate to the NavigationItems | Items | Default node. This node specifies settings for the Default navigation group that encloses navigation items created in the previous lessons (Contact, Task, Department, etc.). In the grid to the right, set the ChildItemsDisplayStyle property to List (the default is LargeIcons).
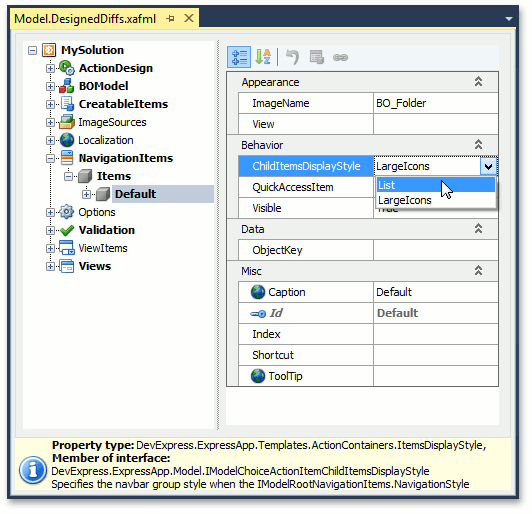
For details, see the IModelChoiceActionItemChildItemsDisplayStyle.ChildItemsDisplayStyle property and ItemsDisplayStyle enumeration description.
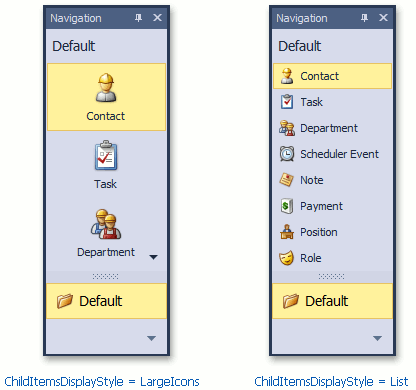
Run the WinForms application. You will see that small icons are now used for navigation items in the Default navigation group. The image below illustrates the changes.
Note
You can also change the style of the entire navigation control. Run the Model Editor and modify the IModelRootNavigationItems.NavigationStyle property of the NavigationItems node for this purpose.
Next Lesson: Attach Files to Objects