How to: Generate XPO Business Classes for Existing Data Tables
- 6 minutes to read
From the Tutorial and other documentation sources, you learned how to create business classes for your XAF applications. If you have business classes in your application, you have database tables in the application’s database. However, the reality is that most programmers are not building new applications from scratch, but maintaining existing databases. In this instance, they can use the XPO Data Model Wizard that generates a business model declaration for the specified legacy database. Follow the steps below to generate business classes for your existing database that you are going to use in your XAF application.
If you prefer to watch a video rather than walk through these step-by-step instructions, you can access a corresponding tutorial in our YouTube Channel: XAF: Create an Application Based on the Existing Database.
Generate an XPO Data Model
- Create a new XAF solution using the DevExpress v19.2 XAF Solution Wizard template.
- Right-click the BusinessObjects folder located in the module project. Choose Add | New Item. In the invoked Add New Item dialog, choose the DevExpress ORM Data Model Wizard template located in the DevExpress category. Set the new item’s name to MySolutionDataModel.xpo and click Add. You will see that the MySolutionDataModel.xpo item is added and the wizard dialog is invoked.
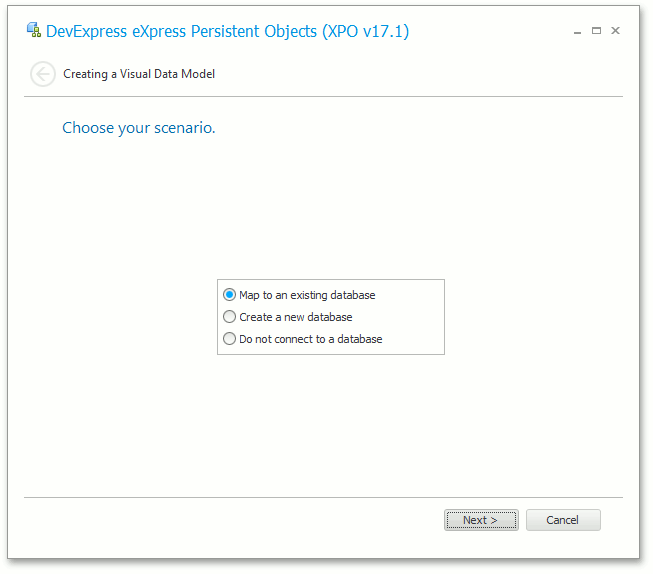
In the invoked wizard dialog, choose Map to an existing database and click Next.
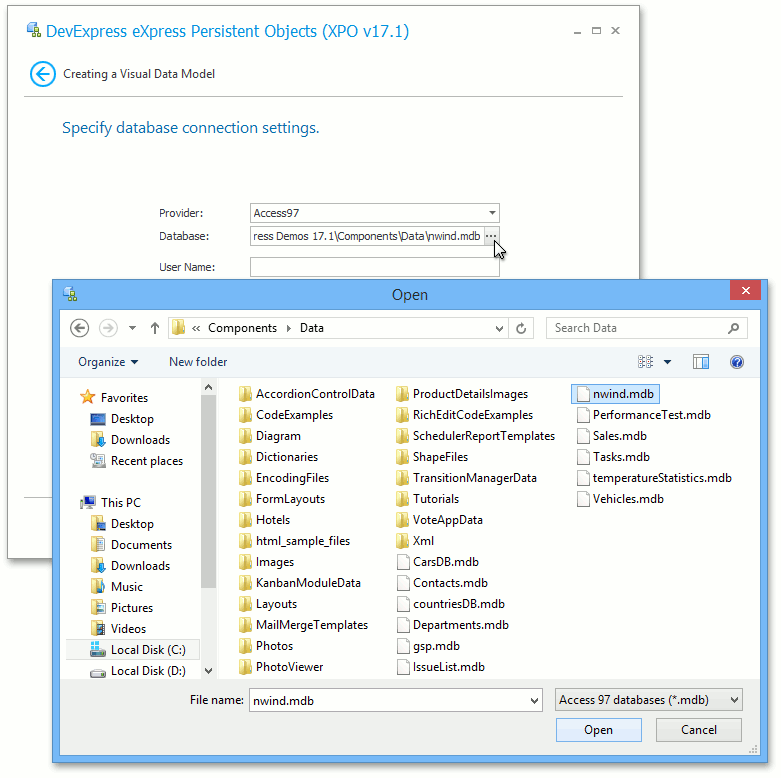
Specify connection settings to the database containing the target data. Multiple database systems (MS SQL Server, DB2, MySql, Firebird, etc) are supported by the wizard. Use the Provider combo box to select the required database type. Note that the corresponding database provider assembly must be registered in the Global Assembly Cache (GAC) on your machine or the wizard will fail. In this example, we will use the “Northwind Traders” demo database. This database is shipped with DXperience and installed in %PUBLIC%\Documents\DevExpress Demos 19.2 \Components\Data\nwind.mdb, by default.
Click Next after connection settings have been specified.
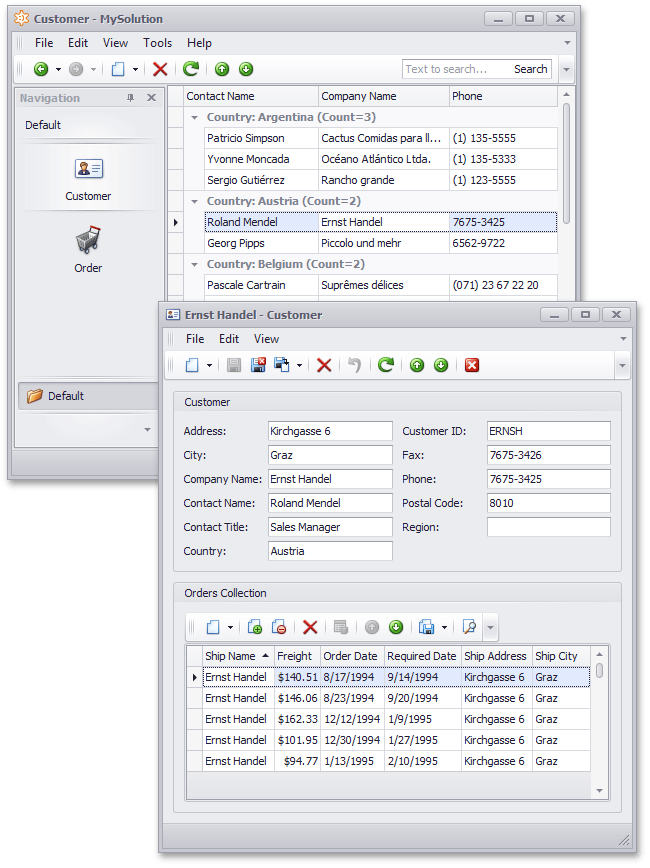
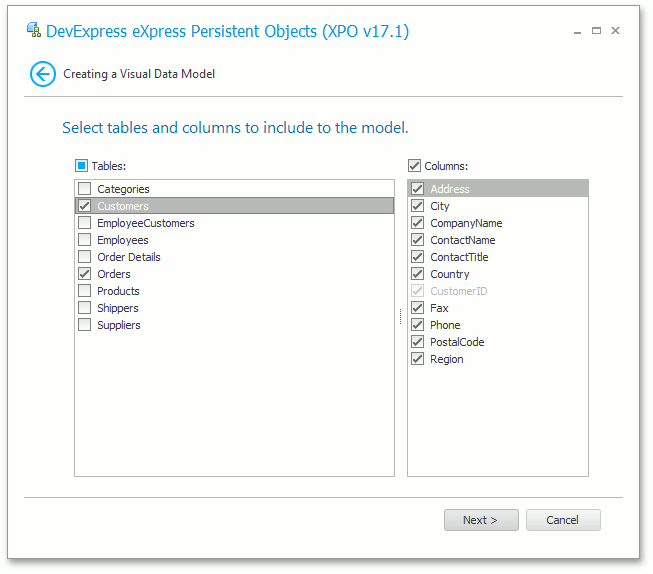
In the next step, the wizard displays a list of tables that can be mapped to persistent classes. Select a table(s) to be mapped to a persistent object(s) and for each table select columns that will be mapped to the persistent object’s properties. For unchecked columns, persistent properties will not be generated. For instance, select the Customers and Orders tables.
Click Next to close the wizard. The generated data model will be shown in the XPO Data Model designer.
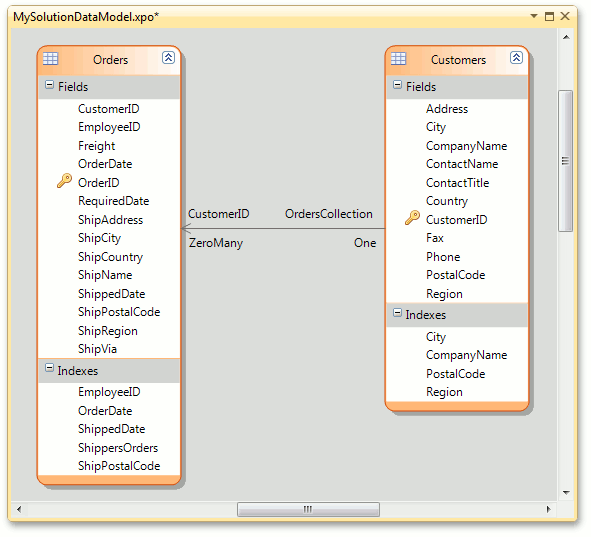
If you want to customize the generated data model, refer to the How to: Create a Business Model in the XPO Data Model Designer topic. The names of persistent classes and their properties match the names of selected tables and their columns. In the current sample, the table names are in plural form. So, you may want to change class names (Customers to Customer and Orders to Order). To rename a class or its property, select it in the designer and change the Name in the Properties window. The classes and properties with modified names will still be mapped to corresponding tables and columns, as the PersistentAttribute is automatically added to the designer-generated code.
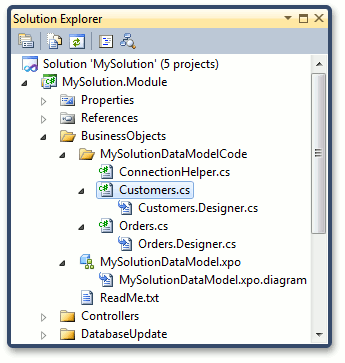
In the Visual Studio toolbar, click save. The generated code files will appear in the Solution Explorer, in the BusinessObjects\MySolutionDataModelCode folder.
Note
If you do not like to deal with the designer and prefer to do everything in code, create a separate code file and copy the generated classes into it. Then, remove files that are added by the designer.
Add XAF-Specific Attributes in Code
Open the Customer.cs (Customer.vb) file. Decorate the Customer class with the DefaultClassOptionsAttribute and ImageNameAttribute attributes. As the result, the Customer object will be added to the Navigation System and an icon from the built-in library will be associated with this object.
using DevExpress.Persistent.Base; // ... [DefaultClassOptions, ImageName("BO_Contact")] public partial class Customer{ public Customer(Session session) : base(session) { } public Customer() : base(Session.DefaultSession) { } public override void AfterConstruction() { base.AfterConstruction(); } }Open the Order.cs (Order.vb) file. Decorate the Order class with the DefaultClassOptions and ImageName attributes.
You can add more custom code to the auto-generated classes (e.g., override base class methods). Do not change code located in files with the designer suffix - they contain designer-generated code and should not be modified manually. The generated classes are declared as partial. Designed and custom class parts are located in different files.
Note
It is recommended that you specify the default property for each generated class via the System.ComponentModel.DefaultProperty attribute. Default property is treated as a human-readable identifier in an XAF application UI.
Important
You cannot apply attributes to properties in the partial class’ code. Instead, use the designer (see the next section).
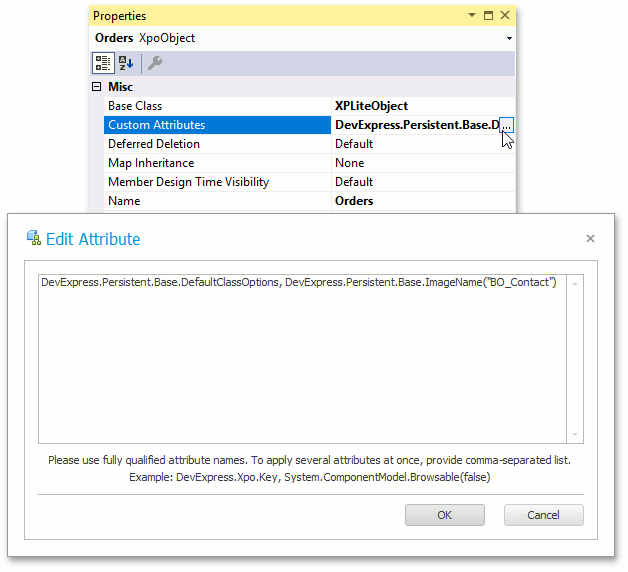
Add XAF-Specific Attributes in the Designer
Alternatively, you can use the designer to apply attributes. Focus the requires class or field and specify the Custom Attributes setting in the Properties window.
Specify the Connection String
An empty XAF application is generated with a default connection string: Data Source=.\SQLEXPRESS;Initial Catalog=MyApplication;Integrated Security=SSPI;Pooling=false. You should change it, so that the application uses the required database. Change the connection string in the application configuration file. You can copy the valid connection string from the auto-created BusinessObjects\MySolutionDataModelCode\ConnectionHelper.cs (ConnectionHelper.vb) file.
Run the Application
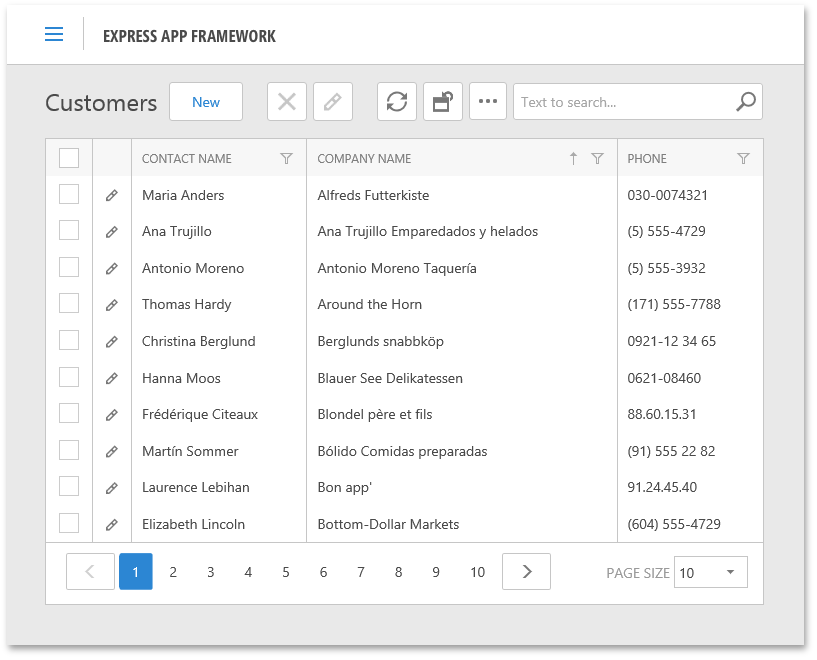
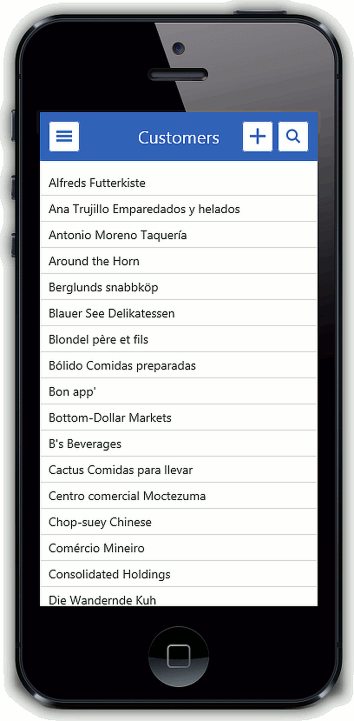
Now you can run the WinForms, ASP.NET and Mobile applications to see the result. These applications are completely based on the business model generated for the legacy database.