How to: Create a Business Model in the XPO Data Model Designer
- 6 minutes to read
This topic provides step-by-step instructions on how to use the XPO Data Model Designer in XAF applications. We will create a simple business model consisting of two objects - Employee and Task. These objects will be linked with a one-to-many relationship. Then you will add XAF-specific attributes in code, and the application will be ready to use.
Note
This designer can also be used to generate a data model for a legacy database (see How to: Generate XPO Business Classes for Existing Data Tables).
If you prefer to watch a video rather than walk through these step-by-step instructions, you can find the corresponding tutorial on the DevExpress YouTube Channel: XAF: Start from Building a Data Model using the XPO Data Model Designer.
Create an XPO Data Model
- Create a new XAF solution using the DevExpress v19.1 XAF Solution Wizard template.
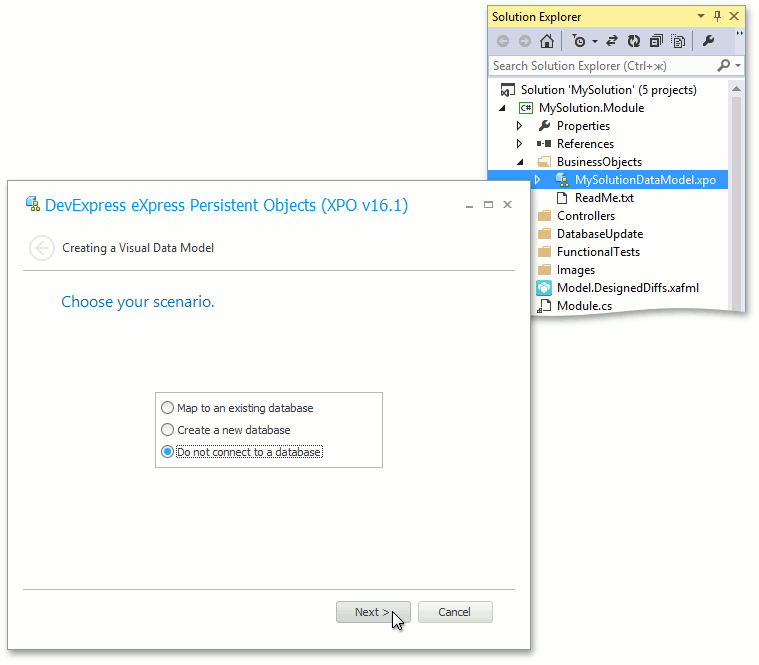
- Right-click the BusinessObjects folder located in the module project and choose Add | New Item. In the invoked Add New Item dialog, select the DevExpress ORM Data Model Wizard template located in the DevExpress category. Set the new item’s name to MySolutionDataModel.xpo and click Add. You will see that the MySolutionDataModel.xpo item is added, and the wizard dialog is invoked.
In the invoked dialog, select Do not connect to a database and click Next, to skip the creation of a database connection using the XPO Data Model Wizard. The database connection is managed by XAF in your solution.
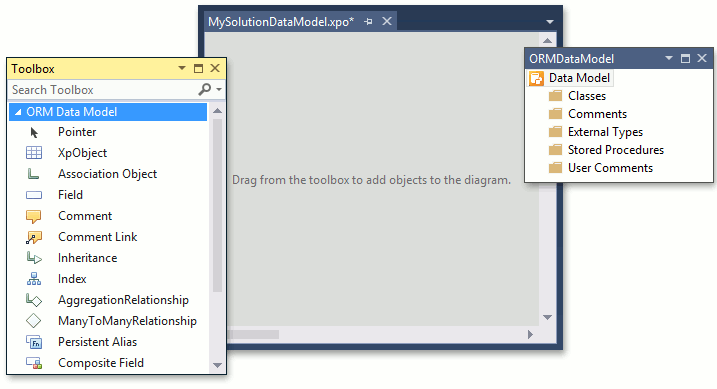
As a result, an empty data model will be shown in the designer.
Design the Employee Object
To add a new business class, drag the XpObject item from the toolbox to the designer’s surface.
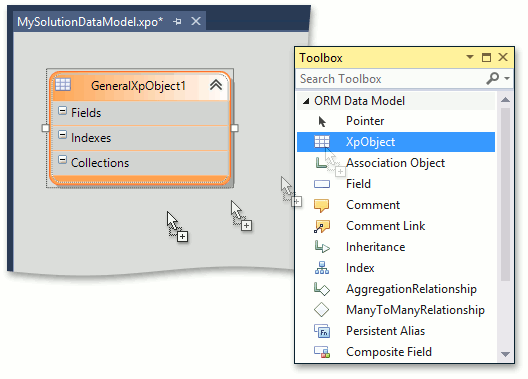
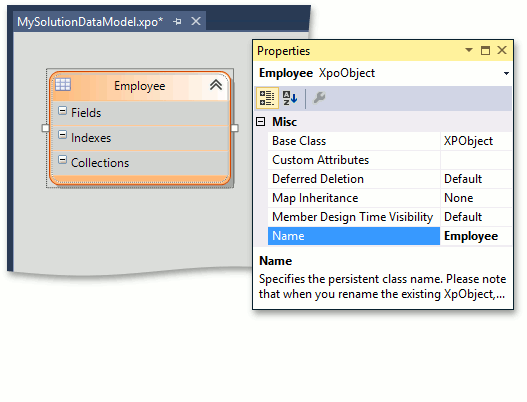
Focus the newly added object. In the Properties window, set the object’s Name to Employee.
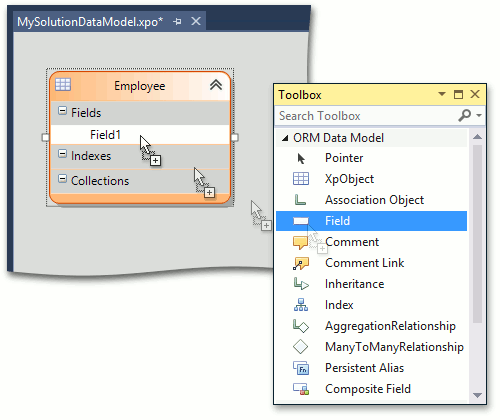
To add a new persistent property, drag the Field item from the Toolbox to the Employee object.
Focus the newly added field. In the Properties window, set the field’s Name to FirstName.
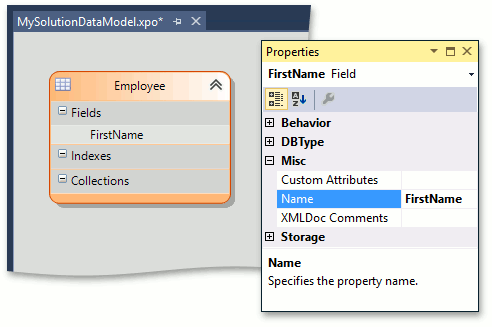
Note that the Column Type is String by default.
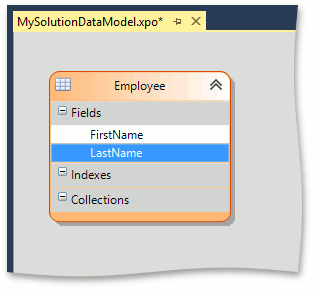
Repeat the two previous steps to add the LastName property.
Now add a field of a type other than string. Add the Birthday field, and set its Column Type to DateTime.

Next, you will see how to add a calculated field. Drag the Persistent Alias item from the Toolbox to the Employee object.
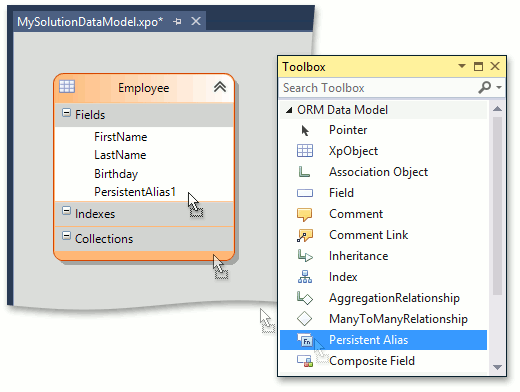
Focus the newly added persistent alias. In the Properties window, set Name to FullName. Then, click the ellipsis button located to the right of the Expression setting. In the invoked Expression editor dialog, specify the [FirstName] + ‘ ‘ + [LastName] expression and click OK.

Note
You can inherit the Employee class from the DevExpress.Persistent.BaseImpl.Person class, instead of creating it from scratch. The XPO Data Model Designer supports the use of persistent classes from external assemblies as base classes and property types. To add business classes from the Business Class Library (or your own class library), do the following.
- Right-click the free space on the design surface. In the invoked context menu, choose Add Assembly.
- Select the assembly that contains business classes and click Open. You can choose the DevExpress.Persistent.BaseImpl.v19.1.dll assembly that ships with XAF, located in the %PROGRAMFILES(x86)%\DevExpress 19.1\Components\Bin\Framework path, or your custom assembly.
- In the Select Types dialog, choose the persistent classes to import from the assembly and click OK.
These actions will import classes in read-only mode. Only persistent fields are displayed for these classes, and reference property types correspond to the underlying database types. However, you will be able to use the added classes as ancestors, and inherit new persistent classes from them in the Designer. To specify inheritance, select the Inheritance item in the Toolbox and draw a line from a descendant to a base class. Additionally, you will be able to use these classes as property types.
Design the Task Object
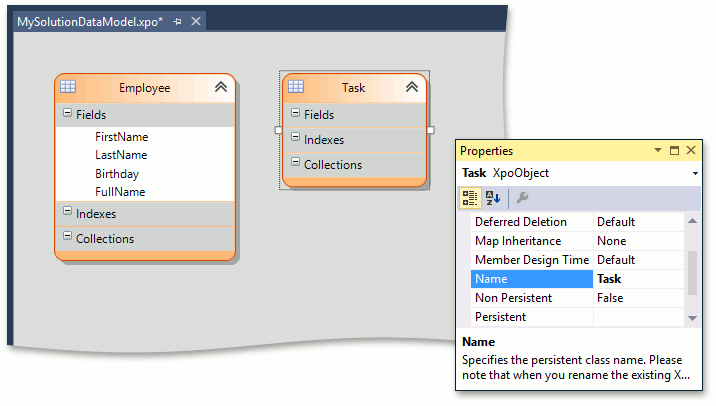
To add another business class, drag the XpObject item from the toolbox to the designer’s surface. Focus the newly added object. In the Properties window, set the object’s Name to Task.
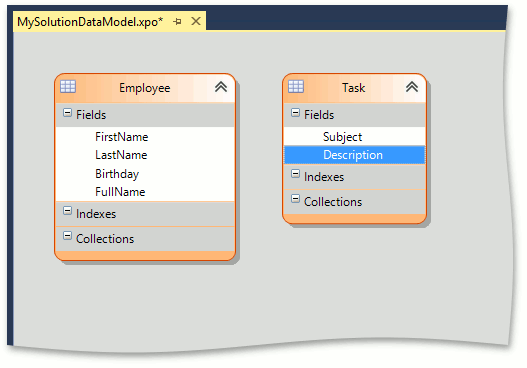
Add the Subject and Description persistent properties of the string type using the approach described in the Design the Employee Object section.
Next, see how to apply attributes to persistent properties. Focus the Description field. In the Properties window, expand the DBType category, and set Size to Unlimited.
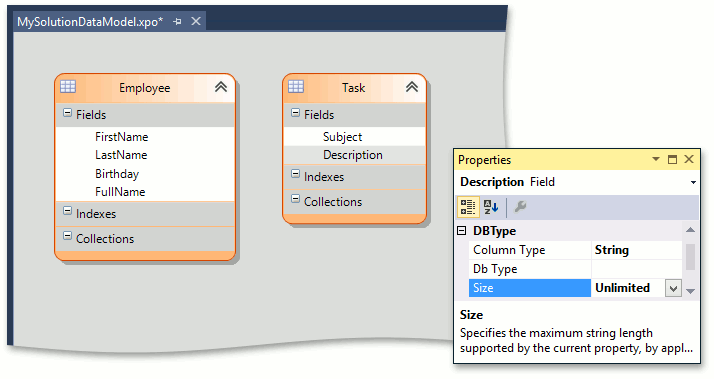
As a result, the SizeAttribute will be applied to the Description property in the underlying code. The attribute’s parameter will be set to SizeAttribute.Unlimited.
Add a One-to-Many Association
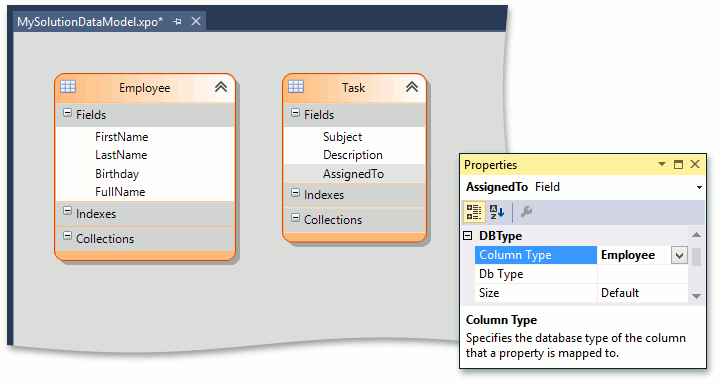
Add the AssignedTo persistent property of the Employee type to the Task class. This property will represent the “one” part of the one-to-many association.
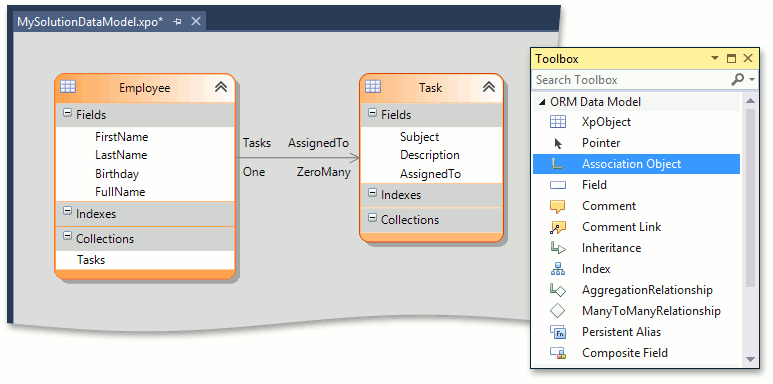
In the Toolbox, focus the Association Object item. Draw a line from Employee to Task, to create the association.
Note
Alternatively, you can use the XpObject‘s title bar context menu to create an association. For details, refer to the Association section of the Data Model Designer topic.
- Save the changes and close the designer.
Add XAF-Specific Attributes in Code
In the Solution Explorer, expand the BusinessObjects\MySolutionDataModelCode folder. This folder contains the code generated by the designer. Open the Employee.cs (Employee.vb) file. Decorate the Employee class with the DefaultClassOptionsAttribute and ImageNameAttribute attributes to the Employee object. As a result, the Employee object will be added to the Navigation System, and an icon from the built-in library will be associated with this object.
using DevExpress.Persistent.Base; // ... [DefaultClassOptions, ImageName("BO_Employee")] public partial class Employee { public Employee(Session session) : base(session) { } public Employee() : base(Session.DefaultSession) { } public override void AfterConstruction() { base.AfterConstruction(); } }Open the Task.cs (Task.vb) file. Decorate the Task class with the DefaultClassOptions and ImageName attributes.
Note
You can add more custom code to the auto-generated classes (e.g., add Action methods or override base class methods). Do not change the code located in files with the designer suffix - they contain designer-generated code, and should not be modified manually. The classes generated are declared as partial. Designed and custom class parts are located in different files.
Important
You cannot apply attributes to properties in the partial class’ code. Instead, use the designer (see the next section).
Add XAF-Specific Attributes in the Designer
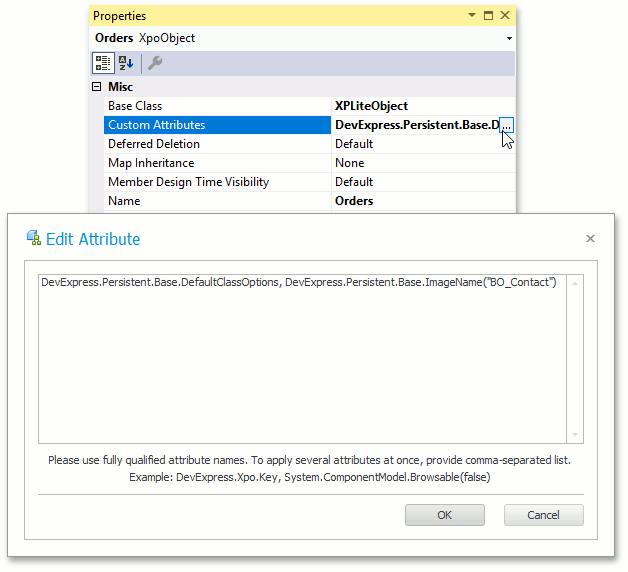
Alternatively, you can use the designer to apply attributes. Focus the requires class or field and specify the Custom Attributes setting in the Properties window.
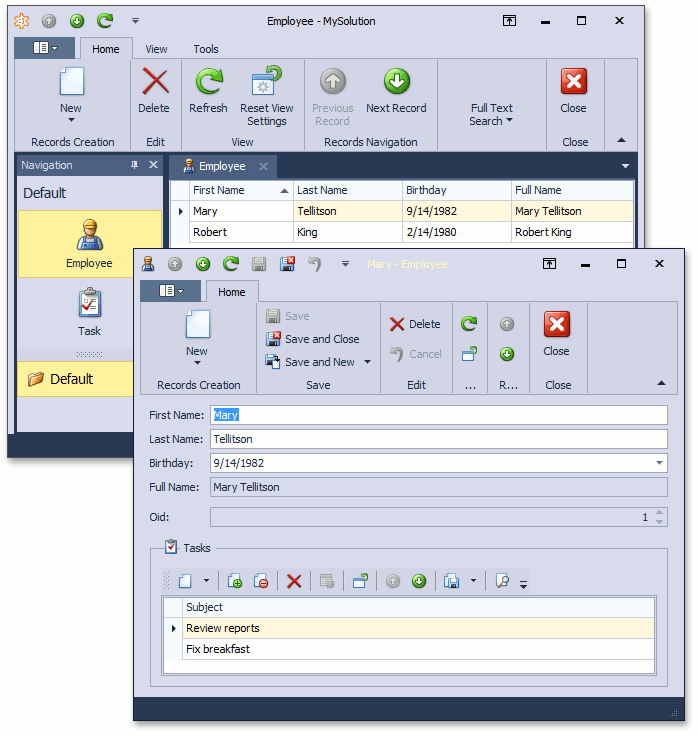
Run the Application
Now you can run the Windows Forms and ASP.NET applications to see the result. These applications are completely based on the business model specified in the XPO Data Model Designer.
Windows Forms
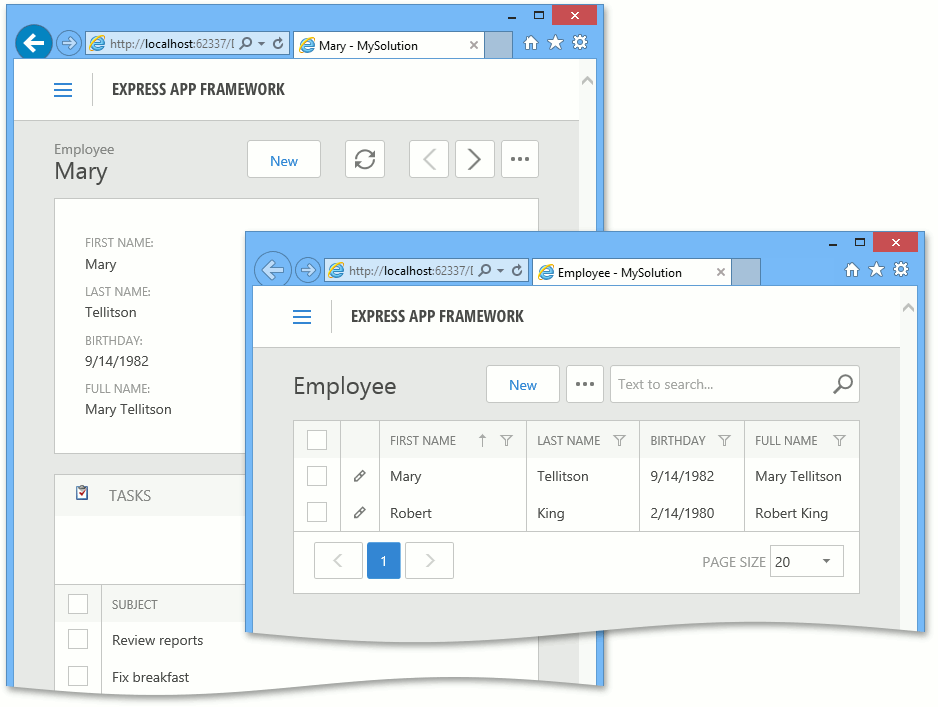
ASP.NET
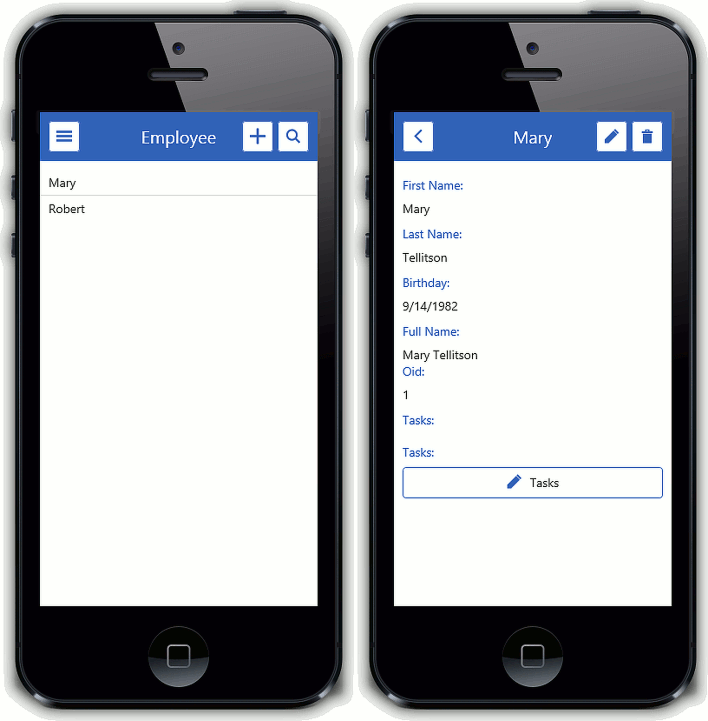
Mobile