How to: Use the Entity Framework 6 Model First in XAF
- 3 minutes to read
This topic demonstrates how to use the Model First entity model and a DbContext entity container in an XAF application.
Note
Blazor applications do not support the EF 6 business model.
1. Add the Entity Data Model
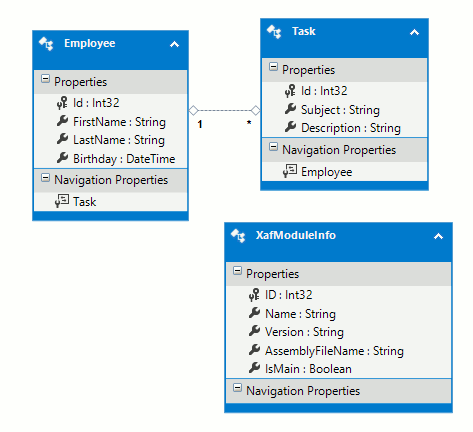
In the Solution Explorer, right-click the MySolution.Module\BusinessObjects folder and create a model as described in the Create Model section of the Model First topic. Specify MySolutionModel as the new file’s name. Design a data model that includes the Employee and Task entities, and generate a database from this model. The image below demonstrates the model that will be used in this example.
Note
- In this topic, the Entity Framework Designer is not described in detail. For information on using the Entity Framework Designer, refer to the following MSDN article: Model First.
- You can use the Generate from database feature of the Entity Data Model Wizard to reverse engineer an existing database instead of designing a data model manually.
2. Apply Attributes to Entity Classes
XAF automatically collects entities declared in modules, and adds them to the Application Model when the DevExpress.ExpressApp.EF.v20.2.dll assembly is referenced. In the Model Editor, you can see List and Detail View nodes created for the Employee and Task objects. You can create navigation items to access these objects in the UI (see Add an Item to the Navigation Control).
Note
Currently, the metadata information on EF classes and their properties is not propagated to the Model Editor at design time. As a result, tools like Filter Builder cannot display object structure. The workaround is provided in the EF - Display data model properties in the design time Model Editor ticket. We will consider supporting this scenario in future XAF versions.
However, you may want to customize the UI in code by applying XAF built-in attributes such as DefaultClassOptionsAttribute or ImageNameAttribute. In order to apply attributes to designed entity classes, you must first declare the partial Employee and Task classes that will supplement the designer-generated declarations. Once you have declared these classes, you can apply the required attributes.
using DevExpress.ExpressApp.DC;
using DevExpress.Persistent.Base;
using System;
using System.ComponentModel;
using System.ComponentModel.DataAnnotations;

namespace MySolution.Module.BusinessObjects {

    [MetadataType(typeof(EmployeeMetadata))]
    [DefaultClassOptions, ImageName("BO_Employee")]
    public partial class Employee { }
    public class EmployeeMetadata {
        [Browsable(false)]
        public Int32 Id { get; set; }
    }

    [MetadataType(typeof(TaskMetadata))]
    [DefaultClassOptions, ImageName("BO_Task")]
    public partial class Task { }
    public class TaskMetadata {
        [Browsable(false)]
        public Int32 Id { get; set; }

        [FieldSize(FieldSizeAttribute.Unlimited)]
        public String Description { get; set; }
    }
}
To apply attributes to the Employee and Task object properties (e.g., apply the Browsable(false) attribute to the Id properties to hide the key values in the UI), utilize the approach demonstrated in the How to: Apply Attributes to Entity Properties when Using Model First topic.
3. Run the Application
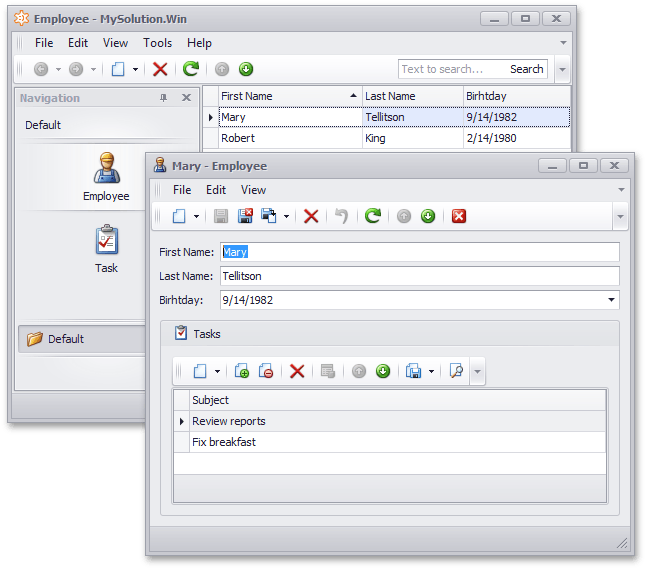
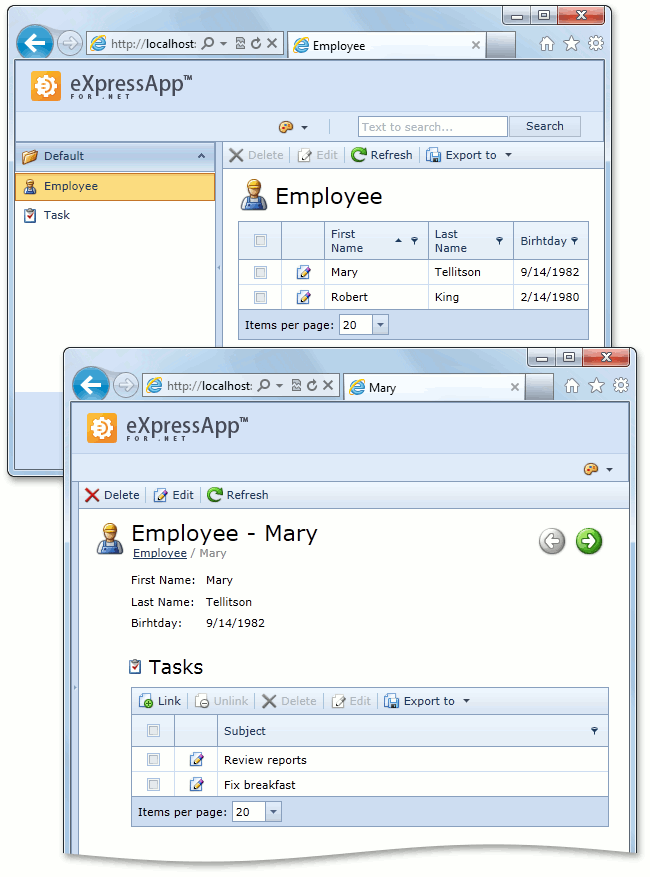
You can now run both WinForms and ASP.NET applications. The UI for each platform is automatically generated for your data model.
WinForms:
ASP.NET:
Note
To learn how to fill the database with predefined data, refer to the How to: Supply Initial Data for the Entity Framework 6 Data Model topic.