Choose the WinForms UI Type
- 2 minutes to read
In this lesson, you will learn how to change the UI Type of the WinForms application. By default, the Solution Wizard enables the Multiple Document Interface (MDI). You can change this setting via the Model Editor, or in code. For example, you can select Single Document Interface (SDI) for your application.
Follow the steps below to change the UI Type of your WinForms application using the Model Editor:
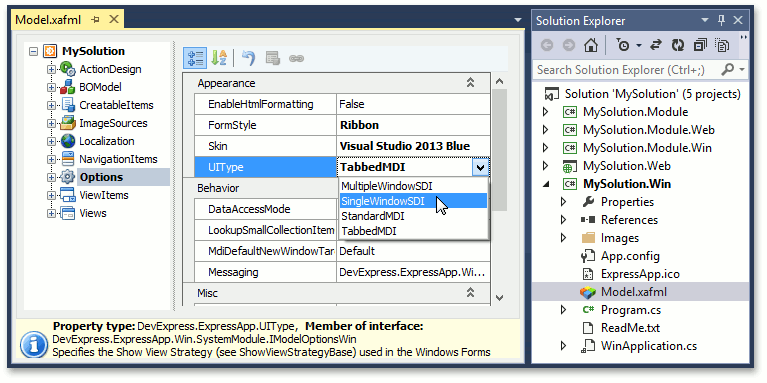
Invoke the Model Editor by double-clicking the Model.xafml file from the MySolution.Win project. Navigate to the Options node. This node allows you to edit different UI settings of the application. In the UIType property’s dropdown list, select the desired option, for example, SingleWindowSDI.
Run the WinForms application. Ensure that the SDI is enabled, as illustrated in the image below.
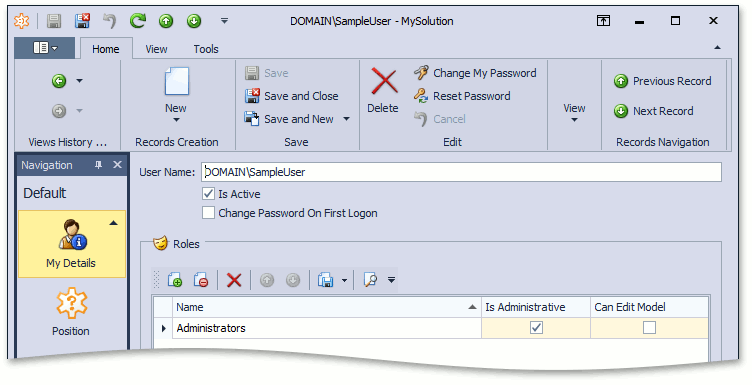
In SDI mode, each invoked View appears within a single window that replaces the previous one.
Note
If you have selected MDI, you can customize its behavior in the Model Editor using the Options node’s MdiDefaultNewWindowTarget property.
To learn how to change the UI Type in code, refer to the WinApplication.ShowViewStrategy topic If you change the UI Type in code, changes made to the UIType property value in the Model Editor‘s Options node will be ignored.
In the Main Demo, a separate WinForms project is created to demonstrate the MDI. The MainDemo application is installed in %PUBLIC%\Documents\DevExpress Demos 20.2\Components.NET Core Desktop Libraries\eXpressApp Framework\MainDemo by default. The ASP.NET Web Forms version is available online at https://demos.devexpress.com/XAF/MainDemo.
Next Lesson: Toggle the WinForms Ribbon Interface