List View Edit Modes
- 6 minutes to read
The default method of editing object properties in WinForms XAF applications is to choose an object from the List View, invoke the Detail View in a separate window, edit properties and save an object. In ASP.NET Web Forms XAF applications, when you click an object in a List View, a corresponding Detail View is first opened in View mode. Then, you can use the SwitchToEditMode action to switch the Detail View to the Edit mode. However, the default functionality can be extended. For instance, properties displayed in a List View can be edited in place, as in a spreadsheet editor. This topic describes additional functionality available to XAF ASP.NET Web Forms and WinForms applications, and explains how it can be enabled.
Common Functionality Available in WinForms and ASP.NET Web Forms Applications
In-place Editing
The following image illustrates an editable List View in WinForms and ASP.NET Web Forms applications.
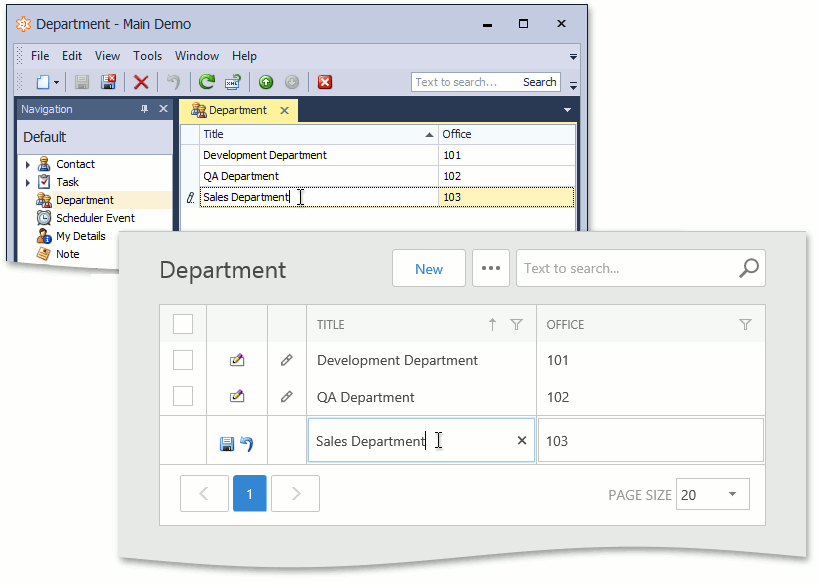
In a WinForms XAF application, an existing object can be edited by selecting a row and clicking the property cell, and a new object can be added by clicking the new item row. In an ASP.NET Web Forms XAF application, an existing object can be edited and a new object can be created by clicking the Edit ( ) and New (
 ) buttons located in a row. To enable this functionality, perform the following steps.
- Invoke the Model Editor, expand the Views and navigate to the child node corresponding to the appropriate List View.
- To enable in-place editing in the selected List View, set the IModelView.AllowEdit property to True.
- To allow end-users to create new objects directly in the List View, set the IModelView.AllowNew property to True and the IModelListViewNewItemRow.NewItemRowPosition property to Top or Bottom. The new item row will be displayed at the top or at the bottom of the List View, respectively.
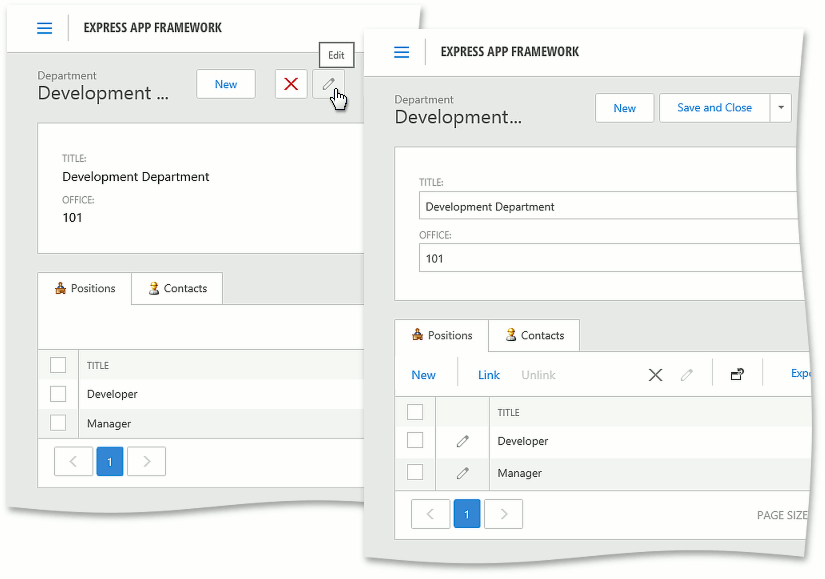
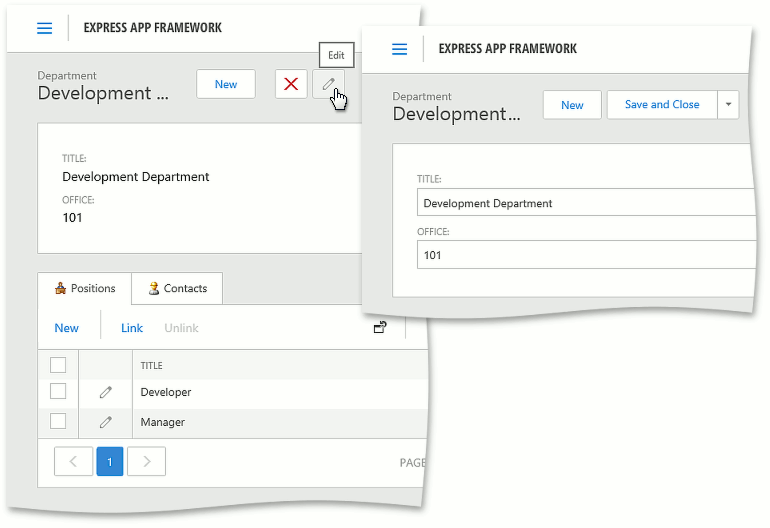
Split Layout (The MasterDetailMode Property)
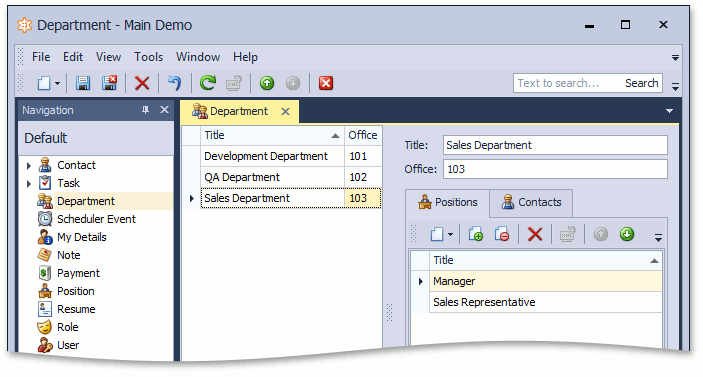
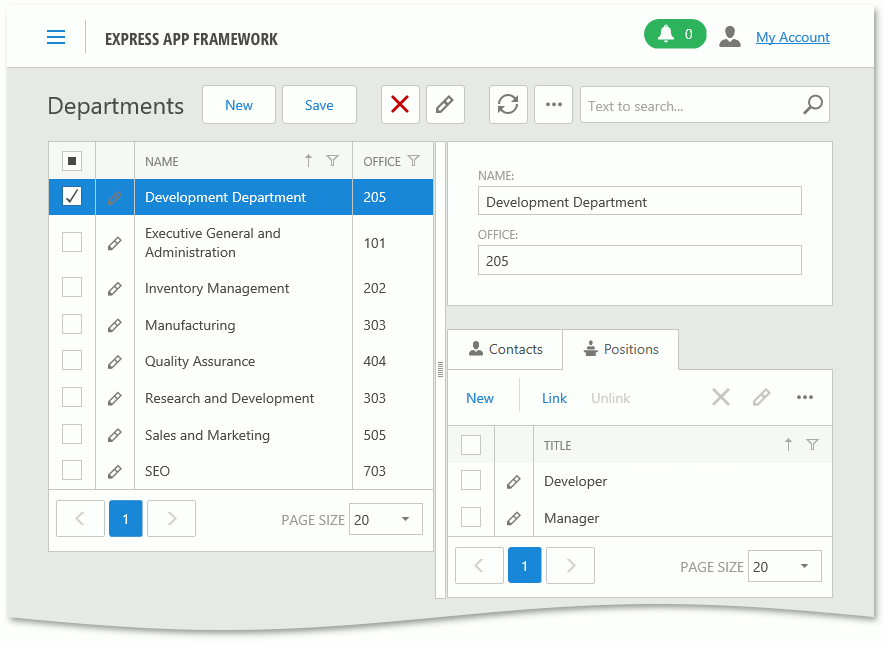
When the split layout is activated, the Detail View is displayed together with the List View in the same window. The detail View displays the currently selected object properties. The Detail View content changes dynamically, depending on the current object focused in the List View. The following images illustrate the split layout.
WinForms
ASP.NET Web Forms
To enable the split layout for a specific List View, perform the following steps.
- Invoke the Model Editor, expand the Views and navigate to the child node corresponding to the desired List View.
- Set the IModelListView.MasterDetailMode property to ListViewAndDetailView.
- The Detail View can be displayed either to the right or below the List View. Navigate to the SplitLayout child node, and set the IModelSplitLayout.Direction property to either Horizontal or to Vertical.
Note
An object can have several Detail Views available. The IModelListView.MasterDetailView property allows you to specify the Detail View that will represent the object currently selected in the List View. If this property value is empty, the IModelListView.DetailView value is used. If both MasterDetailView and DetailView properties are unspecified, then the IModelClass.DefaultDetailView value specified for the current object type is used.
WinForms Specific Functionality
Commit Changes Automatically
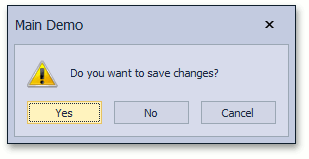
The WinForms application default behavior is to display the confirmation dialog if an end-user focuses another element in the window after editing a cell (either using the in-place editor or using the Detail View).
The changes made in an editable List View can be saved automatically, without confirmation, when selecting another object in the View or focusing another element in the window. Use the ModificationsController.ModificationsHandlingMode and ModificationsController.ModificationsCheckingMode properties to change the desired behavior for editable List Views.
ASP.NET Web Forms Specific Functionality
In-place Editing Customization (The InlineEditMode Property)
In addition to the standard Edit Action, ASP.NET Web Forms XAF applications have a special InlineEdit Action. Although this Action belongs to the standard RecordEdit category, it is not displayed on the main toolbar. Instead, it is displayed in a List Editor’s context menu and processed by the List Editor internally. To customize the in-place edit mode in an ASP.NET Web Forms application, use the IModelListViewWeb.InlineEditMode property of a Views | <ListView> node.
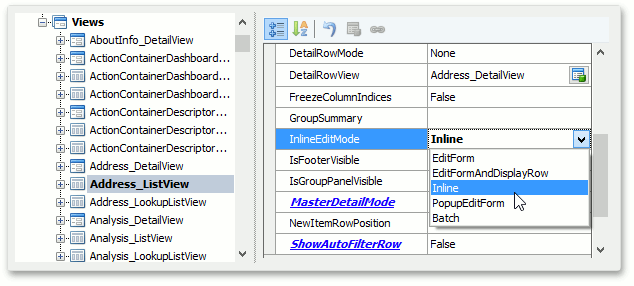
This property is considered by the ASPxGridListEditor when the IModelView.AllowEdit property is set to True. The following table explains and illustrates possible values of the InlineEditMode property.
| InlineEditMode Value | Description | Screenshot |
|---|---|---|
| EditForm | Cell values are edited with the Edit Form. The data row whose values are currently being edited is not displayed. |  |
| EditFormAndDisplayRow | Cell values are edited with the Edit Form. The data row whose values are currently being edited is displayed above the Edit Form. | 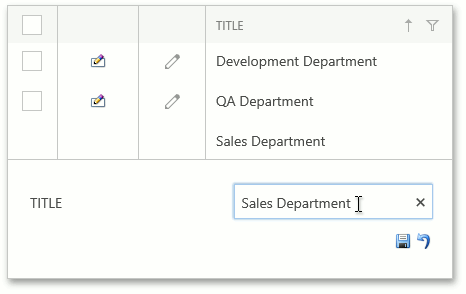 |
| Inline | Cell values are edited within the Inline Edit Row. | 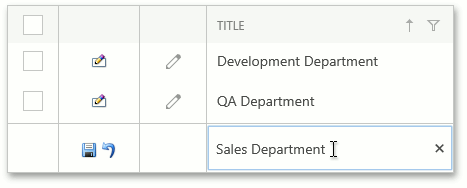 |
| PopupEditForm | Cell values are edited with the Popup Edit Form. | 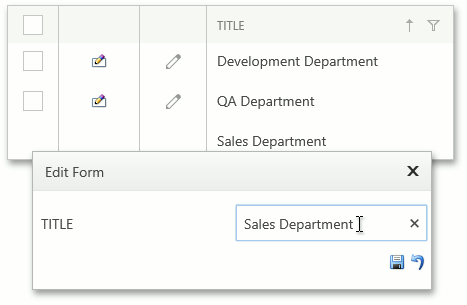 |
| Batch | Enables the Batch Edit Mode. The data rows whose values are currently being edited are saved only on clicking the Save changes button. Unlike other modes, in this mode you can edit multiple rows and then click Save changes to save all modified objects at once. | 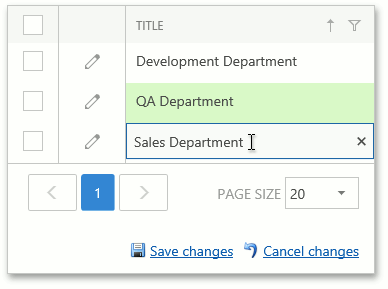 |
Batch Edit Mode Specificities
- The Detail View is not invoked when you click a row.
- The following data types cannot be edited: type, images, criteria, file attachments.
- In Batch edit mode, the grid control uses only built-in column types and does not create Property Editors. If you want to customize cell editors, modify ASPxGridView column properties. Customization of Property Editors does not affect cell editors.
- Objects the List View displays should have a non-composite key.
- You cannot enable the Batch edit mode for List Views with UseASPxGridViewDataSpecificColumns set to false.
- Initial property values for new objects are passed to the client when the grid control is created. This grid control does not update these values when you use the New command item to create a new object.
- If a Lookup List View displays a large number of objects, set its Data Access Mode to Server. In this case, the View loads objects in small portions on demand (see On-Demand Item Loading (Callback Mode)).
- If you want to enable ShowAutoFilterRow for a List View with a reference property column, set Data Access Mode of the corresponding Lookup List View to Server.
- ImmediatePostData affects current row properties only.
- If you handle client-side events, note that XAF implements the following callbacks:
- when you start editing a reference property, the BatchEditStartEditing event handler sends a callback to get a data source for this property;
- when you finish editing a reference property decorated with ImmediatePostDataAttribute, the BatchEditEndEditing event handler sends a callback to update dependent property values.
Collection Properties Edit Modes
The eXpress Application Framework provides two edit modes for collection properties in an ASP.NET Web Forms application.
By default, collection properties are always displayed in a Detail View, but can only be modified when the Detail View is in edit mode.
Collection properties are not displayed in Edit mode. Instead, they are displayed and can be modified in View mode.
The mode can be specified globally using the WebApplication.CollectionsEditMode property (see How to: Hide Collection Properties in an Edit Mode Detail View for an ASP.NET Web Forms Application). To change the mode for an individual List View, use the IModelDetailViewWeb.CollectionsEditMode property in the Model Editor.