Xcopy Deployment of an ASP.NET Application
- 6 minutes to read
In this lesson, you will learn how to deploy an ASP.NET Web Forms XAF application using the Xcopy Deployment method. This method is named after the xcopy command-line utility, which copies files from one location to another. With this method, you copy the application files from the Developer Workstation to the Web Server.
Instead of the xcopy utility, you can use Windows Explorer or other file manager to copy files. However, in certain cases, a command-line utility can be more convenient than graphical user interface (GUI) tools. To learn more about the xcopy command capabilities, refer to the xcopy document.
Perform the following steps at the Developer Workstation to prepare the ASP.NET application for Xcopy deployment.
Open the MySolution solution in Visual Studio. In the Solution Explorer, expand the MySolution.Web\References folder. Select assemblies whose names start with “DevExpress”. If you use Entity Framework, third-party controls or modules, select their assemblies as well. In the Properties window, set the CopyLocal property to True.
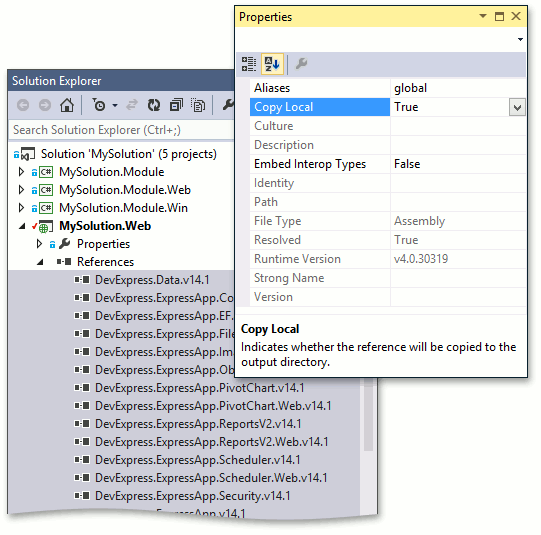
Repeat this step for all module projects that are referenced in the application project (e.g. MySolution.Module and MySolution.Module.Web).
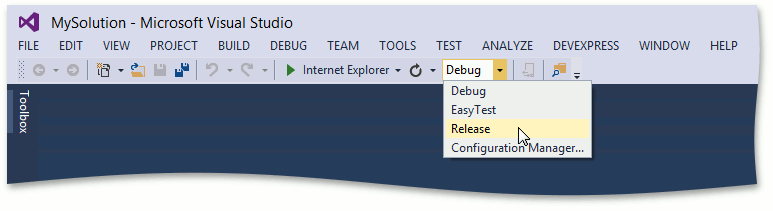
Change the Active Solution Configuration from Debug to Release.
Open the MySolution.Web\Web.config file. In the system.web section, set the compilation’s debug option to false.
<system.web> <!-- ... --> <compilation debug="false"> <!-- ... --> </system.web>- Build and run the ASP.NET application.
- Check that the application performs correctly and close it.
Ensure that the MySolution\MySolution.Web folder contains application files.
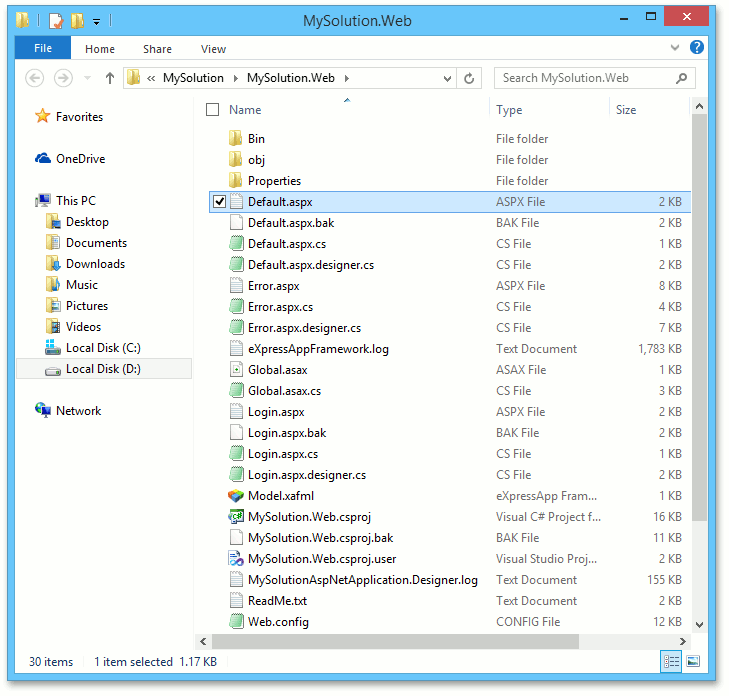
- If the MySolution\MySolution.Web\Bin folder contains PDB files, remove them.
Now the ASP.NET application is ready for Xcopy deployment.
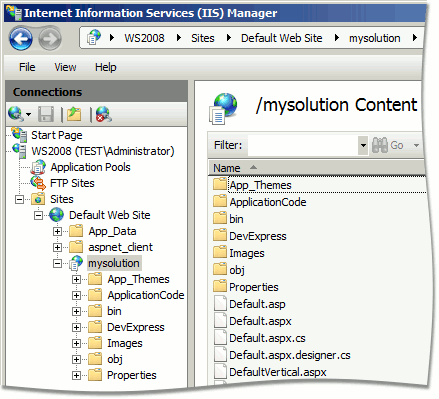
Create an application folder on the Web Server (for instance, C:\Sites\MySolution). Copy the MySolution\MySolution.Web folder contents from the Developer Workstation to the newly created folder. Use the Internet Information Services (IIS) Manager to create the mysolution virtual application folder linked to the c:\Sites\MySolution folder in the server file system. The IIS Manager is accessible from the server Start Menu | Administrative Tools.
As an ASP.NET application project has references to several module projects (e.g. MySolution.Module.Web and MySolution.Module), then it is required to deploy referenced assembles of these modules. Copy these assemblies from output folders of referenced module projects (i.e. MySolution\MySolution.Module.Web\Bin\Release and MySolution\MySolution.Module\Bin\Release). Assembly files from these output folders should be copied to the Bin subfolder of the application folder (e.g. C:\Sites\MySolution\Bin). You can skip overwriting files that are copied already.
Note
If you are deploying an application to remote web hosting, you do not need to create a folder via the IIS Manager. Create the mysolution subfolder in the web root folder (typically, it is named wwwroot). Upload the MySolution\MySolution.Web folder contents from the Developer Workstation to the created folder (for instance via FTP). Contact hosting support if you experience problems accessing the web root folder.
If the application is localized, and pre-built satellite assemblies are used in it, do the following.
- Create a subfolder in the bin folder. The subfolder name should be the culture code (for instance, “de” for the German language).
- Copy the required satellite assemblies to the subfolder.
Check to make sure that the target language is added to the application configuration file (Web.config).
<appSettings>
    <!-- ... -->
    <;add key="Languages" value="en;de" />
    <!-- ... -->
</appSettings>
The supported languages are specified via the Languages key. This key value consists of supported language codes, separated by semicolons.
If there are several localization languages, repeat these steps for each language.
Open a web browser, either locally at a Web Server or at any remote workstation that has access to a Web Server. If you launched a Web Server local browser, type “http://localhost/mysolution/“ in the browser address bar. If you launched the browser on a remote workstation, type “http://localhost/mysolution/“ or “http://<your_server_name>/mysolution” instead. Press ENTER. If the Web Server displays an error message stating that an assembly is missing, then the reported assembly not being copied to the MySolution.Web\Bin folder from the Developer Workstation Global Assembly Cache (GAC) when building the application.
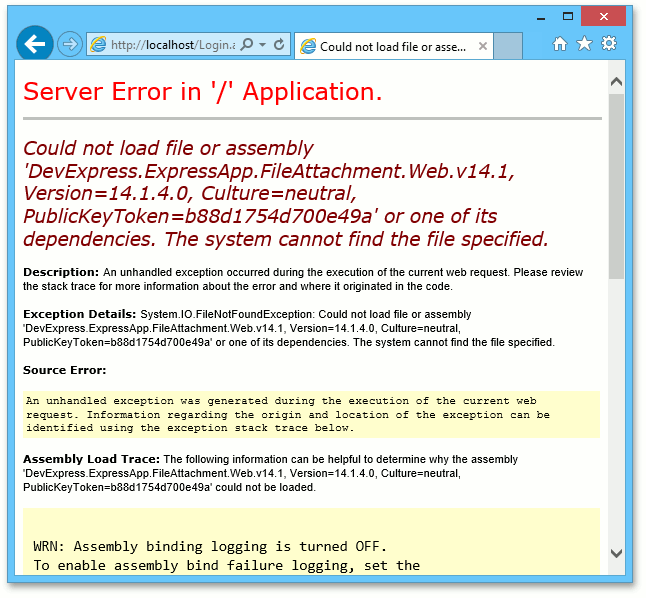
To resolve this error, copy the required assembly to the Bin folder on the Web Server. There are two locations on the Developer Workstation where you can get the required assembly.
- %PROGRAMFILES(x86)%\DevExpress 20.2\Components\%PROGRAMFILES(x86)%\DevExpress 20.2\.NET Core Desktop Libraries\Bin\Framework
- %PROGRAMFILES(x86)%\DevExpress 20.2\Components\%PROGRAMFILES(x86)%\DevExpress 20.2\.NET Core Desktop Libraries\Bin
Note
You can register the required assembly in the Global Assembly Cache, instead of copying it to the application folder.
Refresh the web page, and see if there is another missing assembly. Copy it from the Developer Workstation. Repeat the process until there are no errors reported on missing assemblies.
Note that if you are browsing your application from a remote workstation using the “http://<your_server_name>/mysolution” URL, the following brief error page that does not contain a missing assembly name may be displayed.
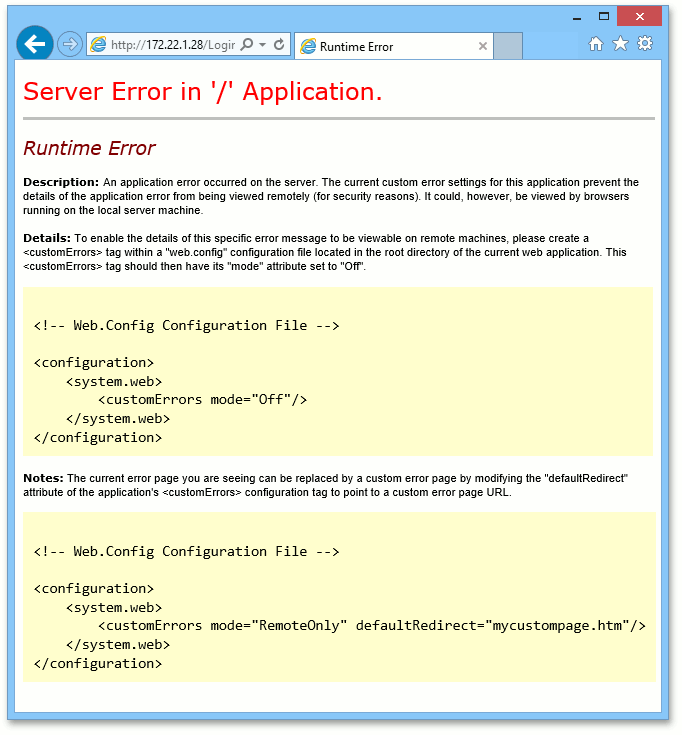
Web server error messages may contain information meant only for developers, and not public access. That is why the display of unhandled error information is disabled in ISS by default. Launch a browser and open the application at the Web Server locally, if possible. If you have no such access, modify the application Web.config file as shown below.
<system.web>
    <!-- ... -->
    <customErrors mode="Off">
</system.web>
This will give you the ability to obtain detailed error descriptions at a remote browser (usually it will be a message about a missing assembly). For security reasons, we recommend that you undo these changes in the Web.config file after successful deployment.
Note
Only run-time assemblies from the Developer Workstation are required. Ensure that you do not accidentally copy design-time assemblies or XML files that are named after the run-time assemblies.
Finally, the application will display the following message.
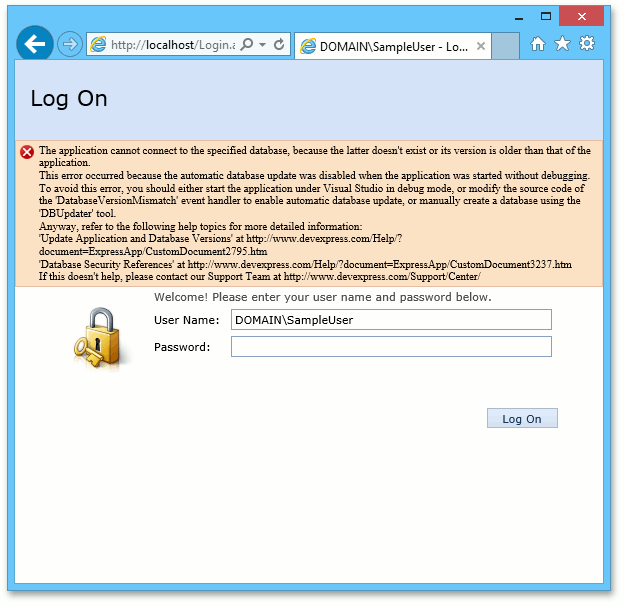
It means that all assembly requirements are satisfied and the application now requires a proper connection string in its configuration file, as well as access to its database. The Set Up the Database Connection lesson describes how to resolve this issue.
Note
If you experience any problems performing the steps in this lesson, refer to the Deployment Troubleshooting Guidelesson.
Now your application needs a connection to a database to run properly. Proceed to the Set Up the Database Connection lesson to learn how to do it. To familiarize yourself with alternative deployment methods, take one of the following lessons.