Set Up the Database Connection
- 5 minutes to read
In this lesson, you will learn how to connect your application to a Database Server. You will become acquainted with the DBUpdater tool supplied with XAF. This tool helps to initially create a database, and resolves database and application version mismatches.
- Run the application (either Windows Forms or ASP.NET) at the target workstation or server. Ensure that there are no missing assemblies or other non database-specific errors. The application should display the following message: “The application cannot connect to the specified database, because the latter does not exist, or its version is older than that of the application.” If you see another message, review the lesson you followed to deploy the application.
- Ensure that your Database Server is up and running. If required, the Database Server must also accept remote connections.
Open the application configuration file. It is an XML file located in the application folder. The Windows Forms application configuration file is MySolution.Win.exe.config. The ASP.NET application configuration file is Web.config. Find the following line in this file.
<add name="ConnectionString" connectionString="Integrated Security=SSPI;
    Pooling=false;Data Source=.\SQLEXPRESS;Initial Catalog=MySolution" />
If your Database Server authentication mode is Windows Authentication, modify this line as shown below.
<add name="ConnectionString" connectionString="Integrated Security=SSPI;
    Pooling=false;Data Source=DBSERVER;Initial Catalog=MySolution" />
Substitute “DBSERVER” with the Database Server name or its IP address. Use “localhost“ or “(local)“ if you use a local Database Server.
Note
An account used to run the application must have appropriate permissions at the Database Server. You can use an administrative account for training purposes and set up a limited account later (see Database Security References lesson).
If your Database Server authentication mode is SQL Server Authentication, then modify this line as shown below.
<add name="ConnectionString" connectionString="Integrated Security=False;
    Pooling=false;Data Source=DBSERVER;Initial Catalog=MySolution;User ID=USER;Password=PWD;" />
Substitute “DBSERVER” with the Database Server name or its IP address. Use “localhost“ or “(local)“ if you use a local Database Server. Substitute “USER” and “PWD” with valid credentials.
Note
An account used in a connection string must have appropriate permissions at the Database Server. Initially, you can use an administrative account for training purposes and set up a limited account later (see Database Security References lesson).
To proceed with this lesson, the DBUpdater tool must be installed at the target workstation or server. Create a DBUpdater folder for this tool. For instance, it can be C:\Program Files\DBUpdater. Copy the following files from the Developer Workstation to the newly created folder.
- %PROGRAMFILES(x86)%\DevExpress 18.2\Components\Tools\eXpressAppFramework\DBUpdater\DBUpdater.v18.2.exe
- %PROGRAMFILES(x86)%\DevExpress 18.2\Components\Tools\eXpressAppFramework\DBUpdater\DBUpdater.v18.2.config
- %PROGRAMFILES(x86)%\DevExpress 18.2\Components\Bin\Framework\DevExpress.ExpressApp.v18.2.dll
- %PROGRAMFILES(x86)%\DevExpress 18.2\Components\Bin\Framework\DevExpress.Data.v18.2.dll
Note
If you are deploying an ASP.NET application to remote hosting, you cannot run the DBUpdater tool at the Web Server. In this instance, you should perform the remaining steps described in this lesson with local copies of the DBUpdater tool and the ASP.NET application to be deployed.
If the host’s Database Server does not allow remote connections, you should also use a local Database Server. In this instance, after completing this lesson, restore a backup of the application database to a host’s Database Server.
The DBUpdater is a command line tool. It should be launched with the application configuration file name as a parameter. Launch the Command Prompt. It is usually located in All Programs | Accessories. Type “cd C:\Program Files\DBUpdater“ in the command prompt and press ENTER. Type “DBUpdater.v18.2.exe ..\MySolution\MySolution.Win.exe.config“ for a WinForms Application or ‘’DBUpdater.v18.2.exe C:\Sites\MySolution\Web.config“ for an ASP.NET application and press ENTER. The DBUpdater will connect to the database server, determine that the application database does not yet exist and create it.
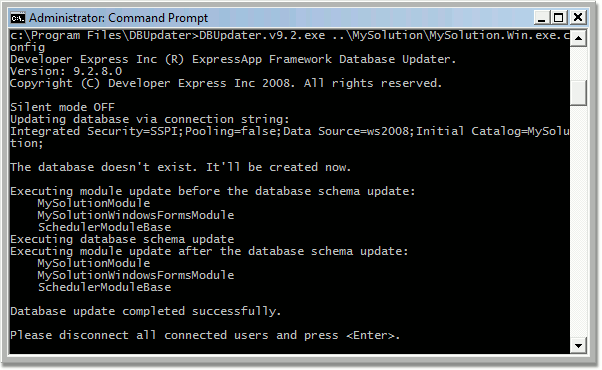
Note
When using the DBUpdater tool, ensure that you use correct paths.
If an empty database was already created for you by the database administrator, the DBUpdater output will differ.
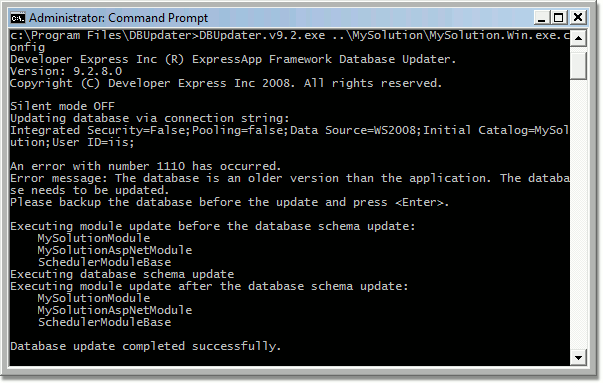
In this instance, the DBUptater will populate the empty database with initial data.
You can use Microsoft SQL Server Management Studio to ensure that the MySolution database was created.
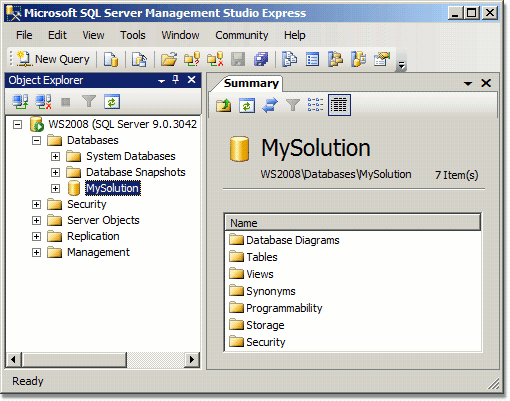
Note
If you use another DBMS supported by XAF, use the appropriate tools. For instance, use the phpMyAdmin for a MySQL database server.
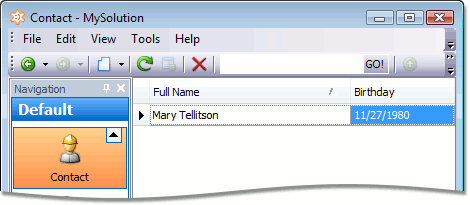
Run the application. You will see that the database already contains objects created in the Supply Initial Data (XPO) lesson.
Your local database located at the Developer Workstation may contain objects created while developing and debugging an application. If you want this data to be accessible to end-users, create a backup of the database at the Developer Workstation and restore it to the Database Server. For this purpose, use the Microsoft SQL Server Management Studio. Connect to a local database server at the Developer Workstation. Right-click your database name in Object Explorer and choose Tasks | Back Up… | Database…. Select a backup destination in the invoked dialog and click OK. Connect to the Database Server. Right-click your database name in Object Explorer and choose Tasks | Restore… | Database…. Select the backup file in the invoked dialog and click OK. Run the application. You will see objects created when developing and debugging the application.
Note
If you made changes to the application solution after deployment, you will get an error, stating a database and application version mismatch: “An error with number 1111 has occurred. Error message: The database version is greater than the application version. The application needs to be updated. Please contact your system administrator or download a new version.”. In this instance, update the application as described in the Application Update lesson.
Follow the Database Security References lesson recommendations to make your database more secure.
Important
The DBUpdater tool does not support a scenario when multiple Object Space Providers are used (see How to: Use Both Entity Framework and XPO in a Single Application). Refer to the Updating the database when multiple persistent Object Space Providers are used ticket for possible workarounds.