Setup Project Deployment of a Windows Forms Application
- 4 minutes to read
In this lesson, you will learn how to deploy a Windows Forms XAF application using the Setup Project method. You will create a simple installer for the application.
Note
The Setup Project template is no longer included by default with the latest Visual Studio versions. You can download this template from Visual Studio Gallery: Microsoft Visual Studio 2015 Installer Projects.
Perform the following steps at the Developer Workstation.
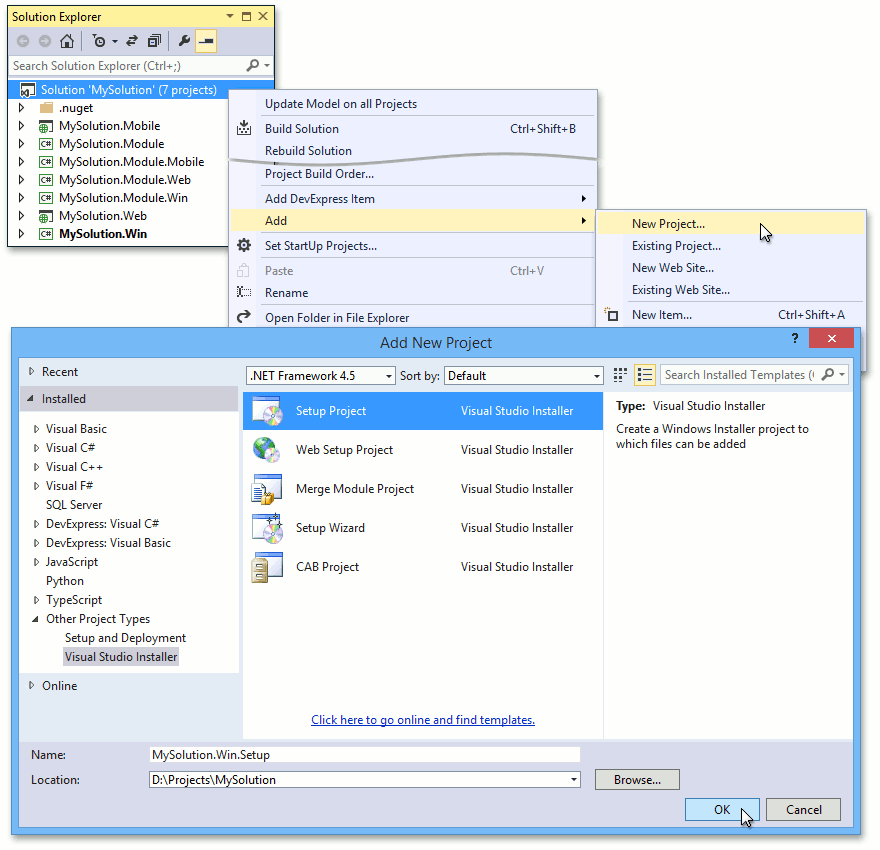
Right-click the Solution item in the Solution Explorer. Choose Add | New Project… in the context menu. In the invoked Add New Project dialog window, locate the Other Project Types | Setup and Deployment node in the Project types section. Choose Setup Project in the Templates section. Enter the required Setup project name. For instance, call it MySolution.Win.Setup. Click OK.
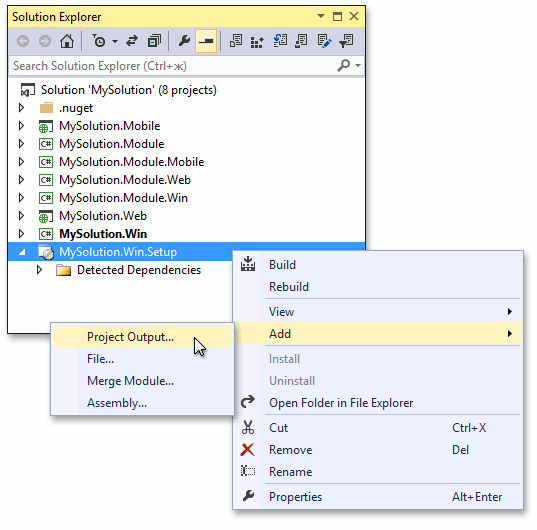
Right-click the newly created MySolution.Win.Setup project in the Solution Explorer. In the invoked context menu, choose Add | Project Output….
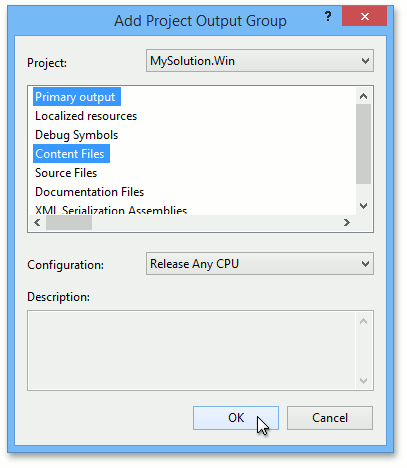
The Add Project Output Group dialog will be invoked. In the Project dropdown list, select the Windows Forms application project (e.g. MySolution.Win). In the output type list, choose “Primary output” and “Content Files” simultaneously. In the Configuration drop-down list, select the Release configuration. Click OK. All the dependent assemblies will be added to the Setup project.
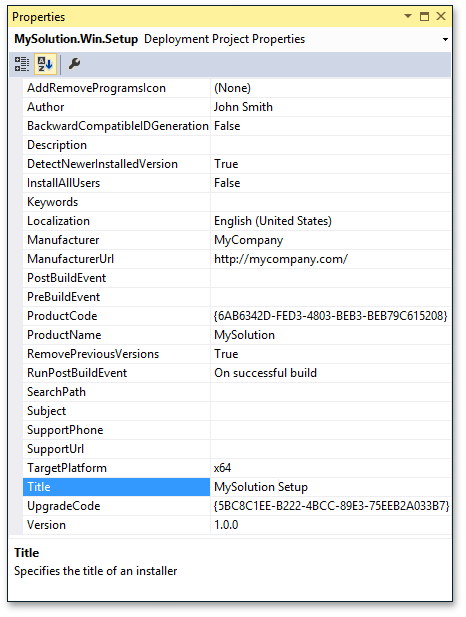
Specify the Setup project properties via the Properties window. Set the Author property to your name. Set the Manufacturer to your company name. Set the ProductName to MySolution. Set the RemovePreviousVersions to True. Set the Title to MySolution Setup.
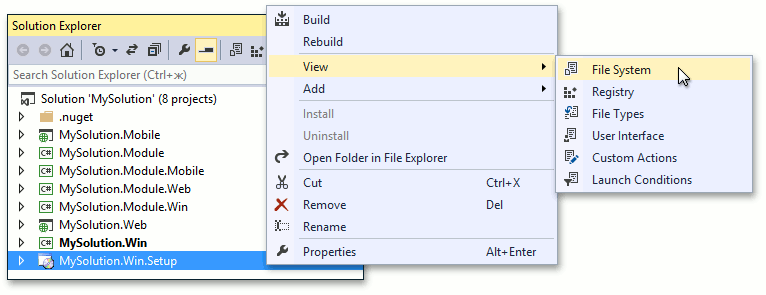
Right-click the MySolution.Win.Setup project in the Solution Explorer. In the invoked context menu, choose View | File System.
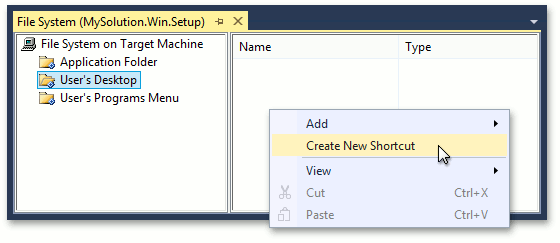
Select the User’s Desktop item. Right-click the blank space to the right. In the invoked context menu, choose Create New Shortcut.
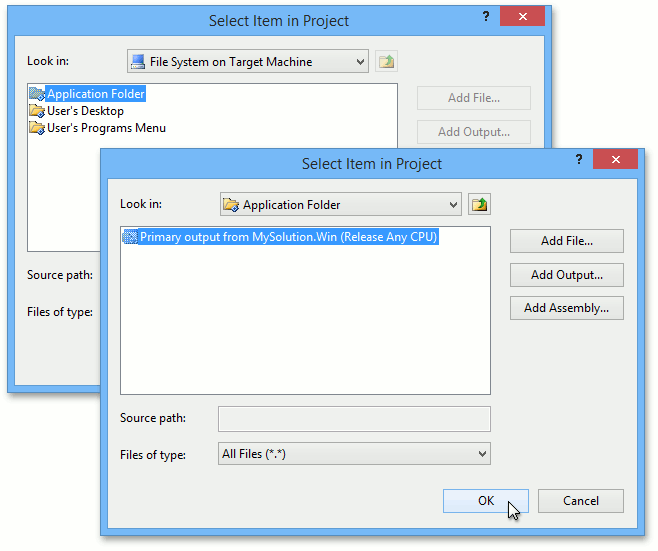
In the invoked Select Item in Project dialog, double-click the Application Folder to expand its content. Double-click the Primary output from MySolution.Win (Active) item to set it as the shortcut target.
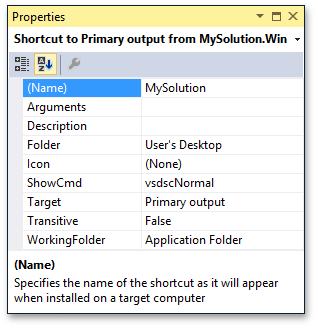
In the shortcut Properties window, set the Name to MySolution.
If your application is localized and uses the pre-built satellite assemblies, the satellite assemblies should be deployed with the application. So right-click the Application Folder item in the File System pane and choose Add | Folder. Set the name of the new folder to the language culture code (for instance, “de” for the German language). Add the required satellite assemblies to this folder (right-click the folder and choose Add | File…).
Additionally, the satellite assemblies with your custom localizations made within modules, should be added. Right-click the Application Folder item in the File System pane and choose Add | Project Output…. The Add Project Output Group dialog will be invoked. In the Project dropdown list, select the module project (e.g. MySolution.Module). In the output type list, choose “Localized resources”. In the Configuration drop-down list, select the Release configuration. Click OK. All the dependent assemblies will be added to the Setup project. Analogously, add the required localized resources from the platform-specific module.
Build the MySolution.Win.Setup project.
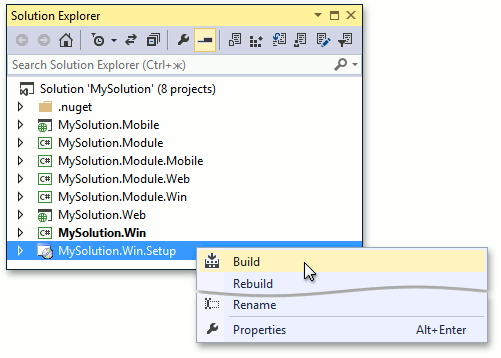
- After the successful build, check that the setup.exe and MySolution.Win.Setup.msi files exist in the MySolution\MySolution.Win.Setup\Release folder. Copy these files to a location accessible by end-users (e.g. a shared network folder or removable media).
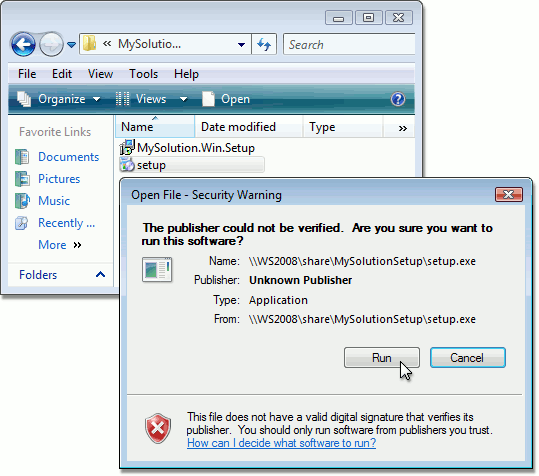
Perform the following steps at each End-User Workstation or at the Terminal Server.
- Ensure that an appropriate version of the Microsoft .NET Framework is installed.
Launch the setup.exe file as a user with administrative privileges. In the invoked Open File - Security Warning dialog, click Run.
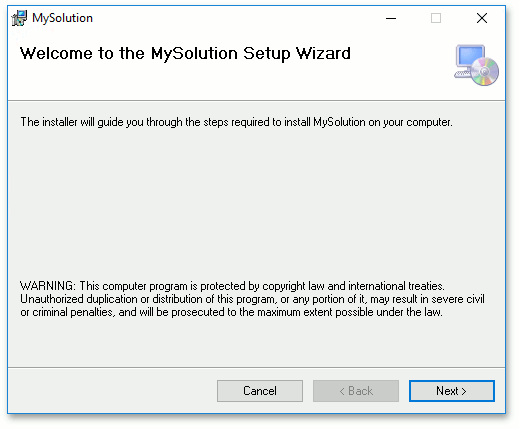
In the invoked MySolution Setup Wizard click Next .
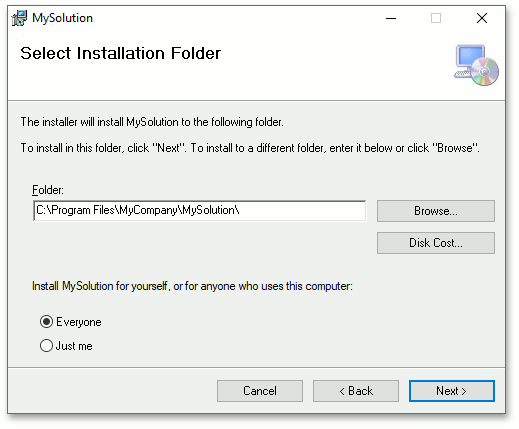
Select the installation folder, e.g. C:\Program Files\MySolution. To install the application for all local users, click Everyone. Click Next.
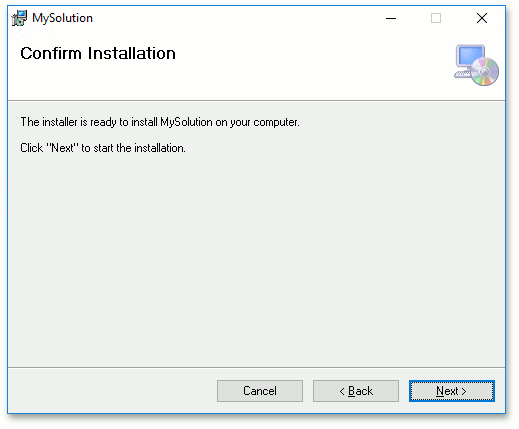
In the invoked confirmation dialog, click Next.
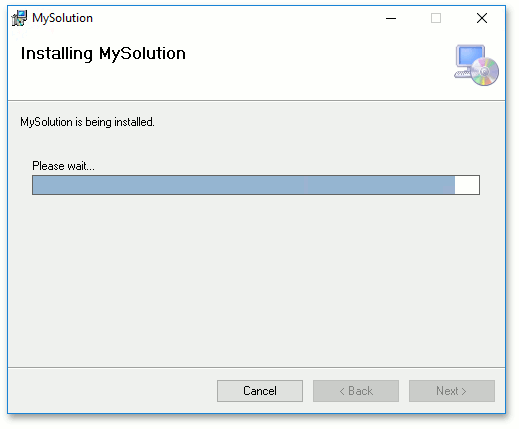
Wait until the installation process finishes.
- Check that the C:\Program Files\MySolution folder contains the application files, and there is a MySolution shortcut located on the Desktop.
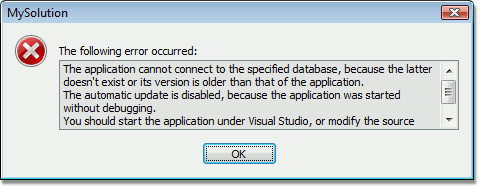
Run the application. If the application displays the following message, it requires a proper connection string in the configuration file, and database accessibility. The Set Up the Database Connection lesson describes this issue.
Note
You can uninstall the Windows Forms application via the Programs and Features (Add or Remove Programs in Windows XP) Control Panel applet.
If you are deploying your Windows Forms application to the Terminal Server, follow the steps from Connect Clients to the Terminal Server lesson, to learn how to provide end-users with access to the application.
Now your application needs a connection to database to run properly. Proceed to the Set Up the Database Connection lesson, to learn how to do it. To familiarize yourself with alternative deployment methods, take one of the following lessons.
- Xcopy Deployment of a Windows Forms Application
- Publish Wizard Deployment of a Windows Forms Application