Publish Wizard Deployment of a Windows Forms Application
- 3 minutes to read
In this lesson, you will learn how to deploy a Windows Forms XAF application via the Publish Wizard method. This method is most appropriate when the Developer Workstation and End-User Workstations can connect to a production Database Server. Otherwise, it is recommended that you deploy the application via Xcopy or Setup Project.
Before performing the following steps, ensure that the application connection string points to the production Database Server. To learn how to do this, refer to the Connect an XAF Application to a Database Provider topic.
The Publish Wizard method is also known as ClickOnce Deployment. ClickOnce enables the user to install and run a Windows Forms application by clicking a link in a browser. This method does not require administrative privileges. You can make an application installable from a web page, a shared network folder or removable media. For this purpose, Visual Studio supplies the Publish Wizard. The following steps describe how to publish an application to a shared network folder via the Publish Wizard.
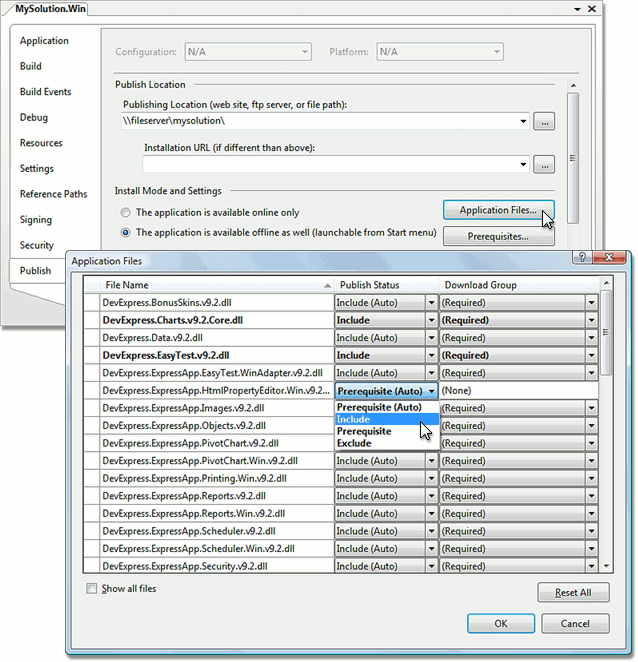
Right-click the MySolution.Win project in Solution Explorer. In the invoked context menu, click Properties. Navigate to the Publish tab and click the Application Files… button. This will invoke the Application Files dialog. Locate all the assemblies which have the Prerequisite Publish Status. Set their Publish Status to Include. Click OK.
Note
If your application is localized and uses the pre-built satellite assemblies, the satellite assemblies should be deployed with the application. So, create a folder in the MySolution.Win project. The name of this folder should be the language culture code (for instance, “de” for the German language). Add the required satellite assemblies to this folder (right-click the folder and choose Add | Existing Item…). Set the satellite assemblies’ Copy to Output Directory property to Copy if newer. You can refer to the Localizing ClickOnce Applications MSDN topic for additional information.
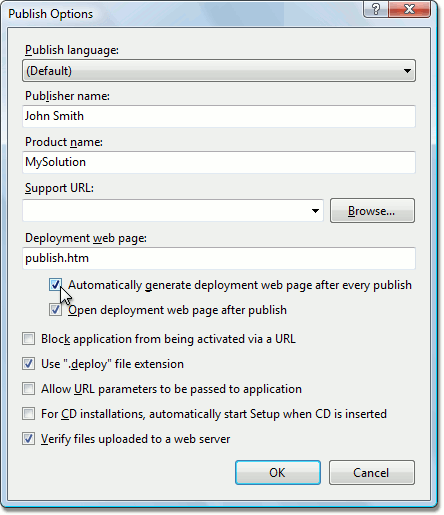
Click the Options button located in the Publish tab. In the invoked Publish Options dialog, fill in the Publisher name and Product name fields. Check the “Automatically generate deployment web page after every publish” option. Click OK.
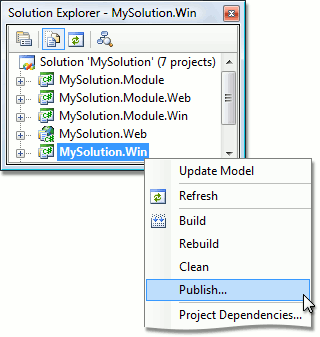
Right-click the MySolution.Win project in Solution Explorer. Choose Publish….
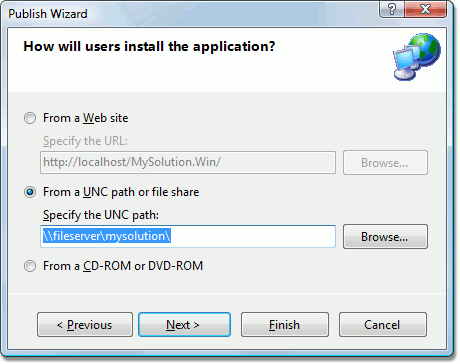
In the invoked Publish Wizard, specify the shared folder as the publishing location and click Next.
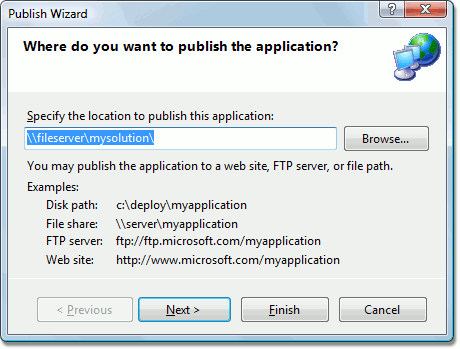
Set the same shared folder as an installation source and click Next.
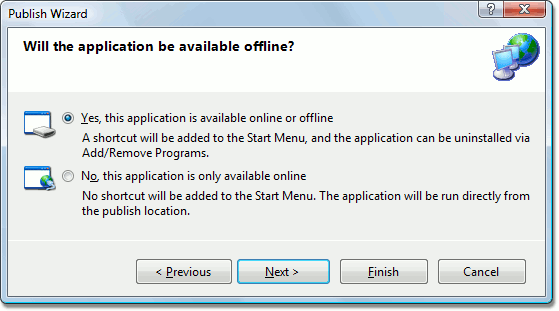
Choose “Yes, this application is available online or offline“ and click Next.
- Click Finish. The application will be published to the specified location and the publish.htm web page will be generated.
Note
To learn more about ClickOnce deployment, refer to the Introducing Client Application Deployment with “ClickOnce” MSDN topic.
Now, end-users are able to set up and run your application. They have to open the \fileserver\mysolution\publish.htm web page in Internet Explorer and click Install. The application can be uninstalled via Programs and Features (Add or Remove Programs in Windows XP) control panel applet.
To familiarize yourself with alternative deployment methods, take one of the following lessons.
- Xcopy Deployment of a Windows Forms Application
- Setup Project Deployment of a Windows Forms Application