Test an Action
- 4 minutes to read
This topic provides step-by step instructions on how to test an XAF application. A custom Controller that provides the Postpone Action is implemented in this example. Then, this Action’s functionality will be tested via the EasyTest functional testing.
Implement a Custom Action
Create a new XAF application solution named PostponeControllerTest. The custom Controller will perform an Action over Task business objects. The sample Task business class exposes two properties - Description and DueDate.
[DefaultClassOptions]
public class Task : BaseObject {
    public Task(Session session) : base(session) { }
    public string Description {
        get { return GetPropertyValue<string>(nameof(Description)); }
        set { SetPropertyValue<string>(nameof(Description), value); }
    }
    public DateTime DueDate {
        get { return GetPropertyValue<DateTime>(nameof(DueDate)); }
        set { SetPropertyValue<DateTime>(nameof(DueDate), value); }
    }
}
The custom Controller is targeted for List Views and contains the Postpone Action. This Action processes the selected objects in a Task List View. The Action adds one day to the objects’ DueDate property values.
public class PostponeController : ViewController {
    private SimpleAction postpone;
    public PostponeController() {
        TargetObjectType = typeof(Task);
        postpone = new SimpleAction(this, "Postpone", "Edit");
        postpone.Execute += Postpone_Execute;
    }
    void Postpone_Execute(object sender, SimpleActionExecuteEventArgs e) {
        foreach (object selectedObject in View.SelectedObjects) {
            Task selectedTask = (Task)selectedObject;
            if (selectedTask.DueDate == DateTime.MinValue) {
                selectedTask.DueDate = DateTime.Today;
            }
            selectedTask.DueDate = selectedTask.DueDate.AddDays(1);
        }
    }
    public SimpleAction Postpone {
        get { return postpone; }
    }
}
Functional Tests
This section describes a way of creating an EasyTest script that ensures that the implemented Postpone Action works as expected. The test will work for both Windows Forms and ASP.NET Web applications.
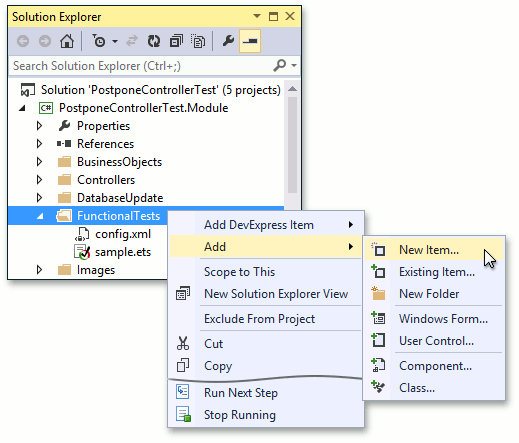
In Solution Explorer, navigate to the module project. Right-click the FunctionalTests folder and select Add | New Item.
In the Add New Item dialog, select Text File and enter “PostponeControllerTest.ets” as the new file’s name. When the Visual Studio text editor is invoked, enter the following code.
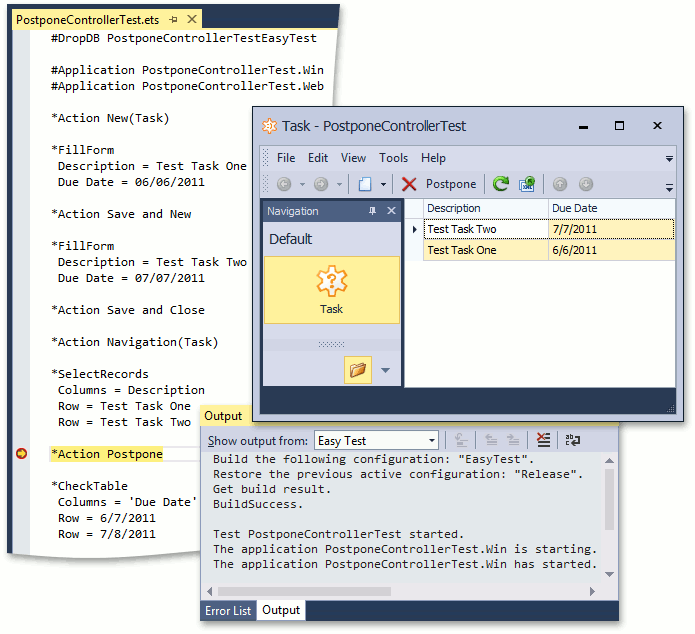
#DropDB PostponeControllerTestEasyTest

#Application PostponeControllerTest.Win
#Application PostponeControllerTest.Web

*Action New(Task)

*FillForm
 Description = Test Task One
 Due Date = 06/06/2011

*Action Save and New

*FillForm
 Description = Test Task Two
 Due Date = 07/07/2011

*Action Save and Close

*Action Navigation(Task)

*SelectRecords
 Columns = Description
 Row = Test Task One
 Row = Test Task Two

*Action Postpone

*CheckTable
 Columns = 'Due Date'
 Row = 6/7/2011
 Row = 7/8/2011
This script creates two Task objects, selects them in the List View and executes the Postpone Action. After that, the script ensures that the test objects’ DueDate property values change as expected. For detailed information on the EasyTest command syntax, refer to the EasyTest Script Reference topic.
Note
By default, the FunctionalTests folder contains the Sample.ets script. You can use it as a starting point when creating tests. If you do not need this file, you can delete it. Another file, initially located in the FunctionalTests folder, is Config.xml. This file specifies the EasyTest configuration settings and should not be deleted.
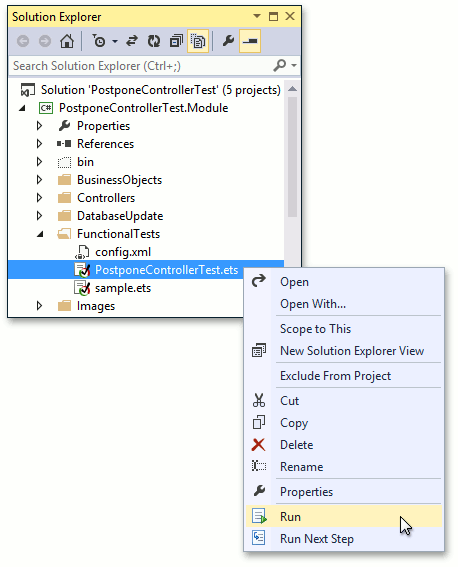
Save the test script. Right-click this file in Solution Explorer and select Run:
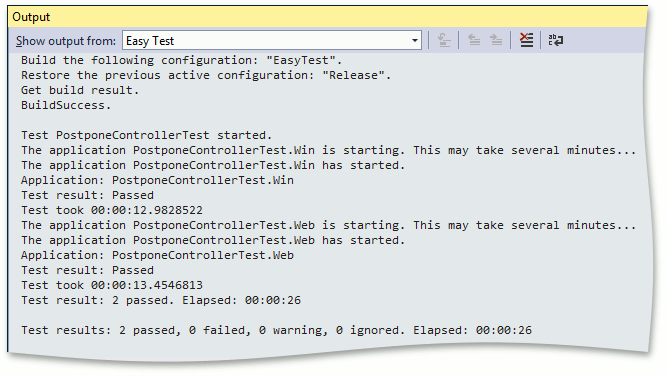
The test will first be executed in Windows Forms, and then in the ASP.NET application (this is specified by the second and third commands of the test script). You will then see the following output, indicating that all tests passed successfully.