EasyTest Basics
- 8 minutes to read
The eXpressApp Framework includes its own functional testing engine - EasyTest. All you need to know to use it is a set of commands allowed by test scripts. Using a custom script language has strong advantages - you write tests in XAF terms. As a result, your tests will work for WinForms and ASP.NET Web applications. This topic describes the basics of using EasyTest, and the components it comprises. For step-by-step instructions on how to test your XAF applications, refer to the How to: Test an Action topic.
EasyTest Components
When you create a new XAF solution, the FunctionalTests folder is added to the module project.
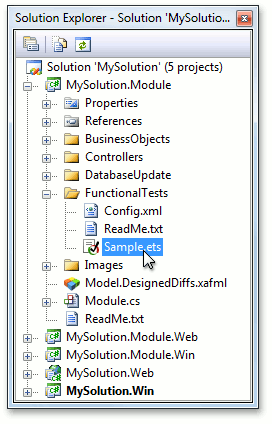
By default, this folder contains the EasyTest configuration file and the Sample.ets sample test script file. You can use the sample test script to quickly get a general idea of the script syntax. EasyTest requires that the Config.xml configuration file is present in the folder containing a test script to be able to perform the test script. This file serves as a central storage for the configuration information required by test scripts. The configuration file created by default contains application definitions for the solution’s application project. You can create test scripts in any folder. However, since the FunctionalTests folder contains the automatically generated configuration file, it is recommended that you store test scripts here. To learn more about the configuration file, refer to the EasyTest Configuration topic.
New solutions are created with a separate EasyTest connection string defined in application projects’ configuration files. This connection string is named EasyTestConnectionString. Thus, while testing, the applications will use the database specified by this connection string.
Create Test Scripts
Test scripts can be created in two ways.
Manually
Right-click the FunctionalTests folder and select Add New Item. In the Add New Item dialog, select Text File, enter a name and change the file extension to ETS. After that, you can enter the required script via the Visual Studio text editor. Refer to the EasyTest Script Reference topic for a list of available script commands.
Use the EasyTest script recorder
EasyTest is shipped with a script recorder that can record the actions you perform on a UI and save them to an EasyTest script file. To learn how to use the script recorder, refer to the Script Recorder Module topic. Please note that the script recorder has certain limitations that are also listed in that topic.
To see test script examples, refer to the XCRM demo installed with XAF. This demo application contains about two dozen sample test scripts you can use to learn EasyTest. The XCRM demo is located in the %PUBLIC%\Documents\DevExpress Demos 18.2\Components\eXpressApp Framework\XCRM folder by default.
Run Tests
EasyTest has its testing functionality integrated into Visual Studio. So you can test your applications from Visual Studio while developing them. EasyTest supplies a set of actions for a context menu available when you are editing ETS script files in the Visual Studio text editor, and in the Solution Explorer when you click over an ETS file.
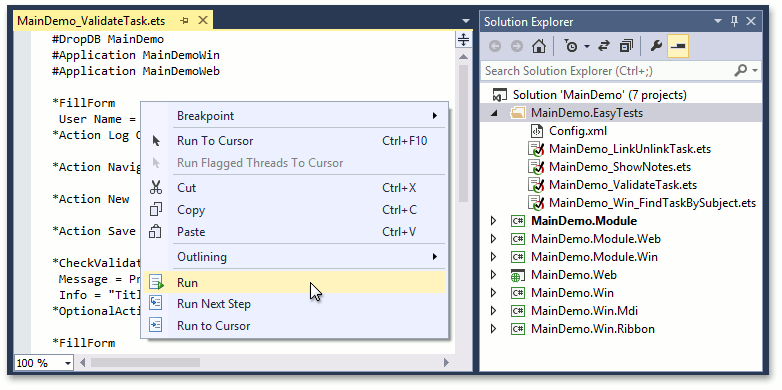
The context menu contains the following actions.
| Action | Description |
|---|---|
| Run | Performs a whole test. |
| Run Next Stop | Performs a test script on a by-command basis. To perform the whole test, this action must be performed as many times as there are test commands in the test file. |
| Run to Cursor | Active only in the Visual Studio text editor when editing an ETS file. Performs the test up to the cursor’s position, after which test execution is paused. |
| Stop Running | Stops a running test. |
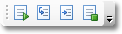
All these commands are also available on the EasyTest toolbar, which is disabled by default.
You can run multiple tests in a batch. To do this, select the required test script files in the Solution Explorer before using the context menu’s Run command. You can also invoke the context menu for the module project or the FunctionalTests folder. In this instance, if you use the Run command, all existing scripts will be executed. When using the Run Next Step action to perform several tests, the selected tests are put into a queue, and performed as if they were represented in a single test. So, if you have reached the last command in test one and used the Run Next Step command, the first command from test two will be executed.
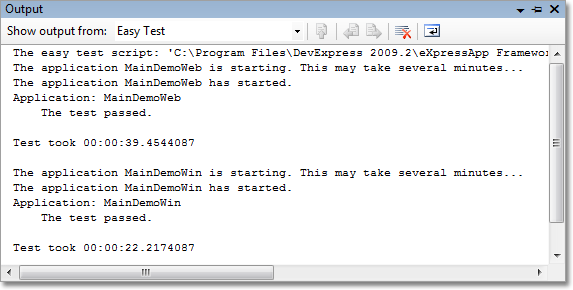
When performing multiple tests, if a certain test command cannot be executed, the current script file execution is interrupted. The error and the corresponding script row number are written to the Output Window. Then, the next script file is executed. The Output Window contains a simple log describing the process and the result of the test.
When a test fails, in addition to the error message, a screenshot is taken capturing the state of the application’s UI at the time of failure. Currently, the screenshot is represented by a JPEG file for Windows Forms applications and an HTML page for ASP.NET Web applications. You can open the screenshot by double clicking its name in the Visual Studio Output window, if an association exists between the screenshot file’s extension (JPEG or HTML) and a corresponding editor. To learn how to set up associations, refer to the How to: Change or Add a Default Editor MSDN article.
You can also set up a breakpoint, as in a regular Visual Studio solution.
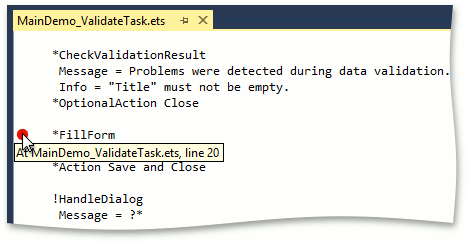
When a test execution is paused at a breakpoint, you can resume execution of the test up to the last command or step-by-step, using appropriate context menu actions.
EasyTest script files can also be performed by a stand-alone test executor tool. To learn more about it, refer to the TestExecutor Utility topic.
Remove EasyTest Components from an XAF Application
You can remove all EasyTest components from your application if necessary. In this case, delete the following:
- The FunctionalTests folder;
- The DevExpress.ExpressApp.EasyTest.WinAdapter assembly reference from the Windows Forms application project;
- The EASYTEST conditions from the Windows Forms application project’s Program.cs (Program.vb) and WinApplication.cs (WinApplication.vb) files;
- The EASYTEST conditions from the ASP.NET Web application project’s Global.asax.cs (Global.asax.vb) and WebApplication.cs (WebApplication.vb) files;
Add EasyTest Components to an Existing XAF Application
To be able to test an existing application created with DXperience versions prior to v2009 vol2, you will need to update its solution first. The following steps describe the modifications required to support EasyTest in the Debug solution configuration.
In a Windows Forms application project, the following methods must be updated.
The DatabaseVersionMismatch method in the WinApplication.cs (WinApplication.vb) file.
The Mainmethod in the Program.cs (Program.vb) file.
static void Main() { #if DEBUG DevExpress.ExpressApp.Win.EasyTest.EasyTestRemotingRegistration.Register(); #endif //.... }EasyTest listens the 4100 port by default. To use another port, specify the EasyTestCommunicationPort key value in the application configuration file (App.config). The custom port must match the port specified in the EasyTest Config.xml configuration file.
<appSettings>
    <!-- ... -->
    <add key="EasyTestCommunicationPort" value="44100"/>
    <!-- ... -->
</appSettings>
In an ASP.NET Web application project, the following methods must be updated.
The DatabaseVersionMismatch method in the WebApplication.cs (WebApplication.vb) file.
The Application_Start method in the Global.asax.cs (Global.asax.vb) file.
Note that after updating the solution in this way, EasyTest will use database connection strings specified in the application projects’ configuration files. So you may want to backup the databases used by the applications before running any actual tests.
EasyTest Limitations
- Administrative privileges may be required to run EasyTest scripts. So, if a script fails to run, try to start Visual Studio as an administrator.
- To run EasyTest for an ASP.NET application from Visual Studio 2013, disable the Browser Link feature. Otherwise, your tests may fail to execute whith the “WaitCallback - operation is not finished, pending ‘setTimeout’ handlers“ exception.
- ASP.NET applications can be tested in Microsoft Internet Explorer only. Testing with other browsers is not supported.